Welcome back to Quilts by Jen.
Today’s post is all about odd angles.
Odd angle flying geese are a bit tricky to figure out but by the time you read and follow the steps below you will be a pro. So let’s get started.
This is a how to tutorial – it will not have measurements for the pieces but the tutorial applies to any size of odd angle flying geese block.
First of all the wing part of the goose is a rectangle cut into 2 triangles – a left and right triangle are needed in order to create the block. The left triangle is piece BL and the right is piece BR. To learn how to cut half square rectangles check out my blog post: How to Cut Half Square Rectangles.
Making the Flying Geese Block
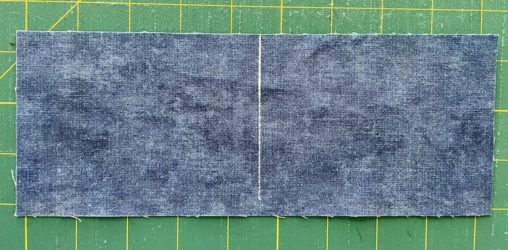
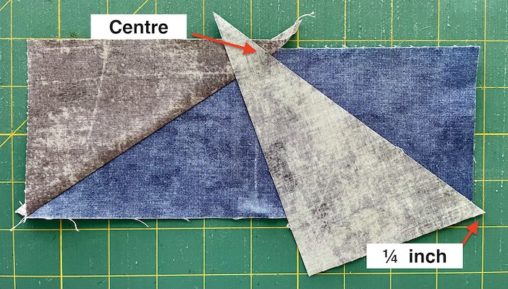
Step 1: Mark the centre of piece A with a chalk line and draw it down the centre of the rectangle. My favourite chalk marker is the Chaco Liner from Clover but any marking tool will work that disappears or can be wiped away.
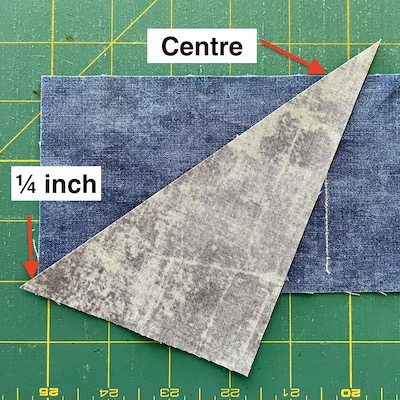
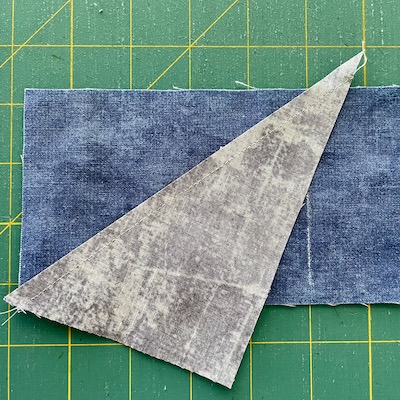
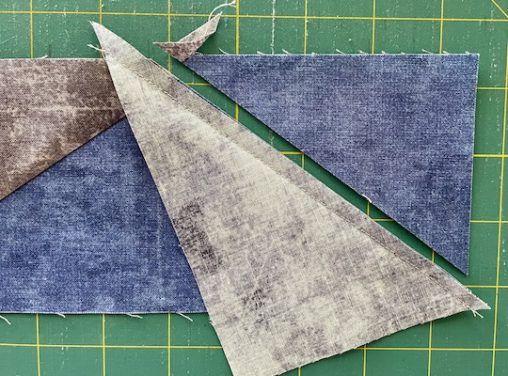
Step 2: Line up the bottom corner of piece BL triangle with the bottom left corner of piece A – the corner of the triangle needs to overhang the edge of piece A by a 1⁄4″. The long side of the triangle lines up with the centre mark made in step 1. It will sit on piece A at an odd angle and hang off the bottom.
Step 3: Sew along the long edge of the triangle with a ¼” seam.
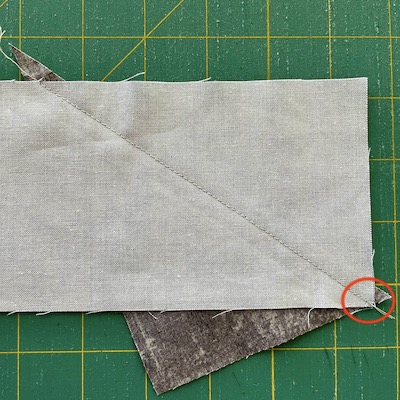
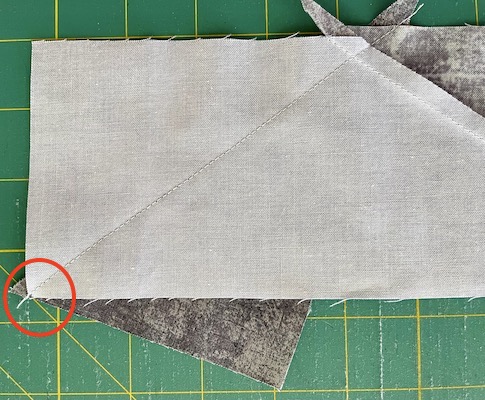
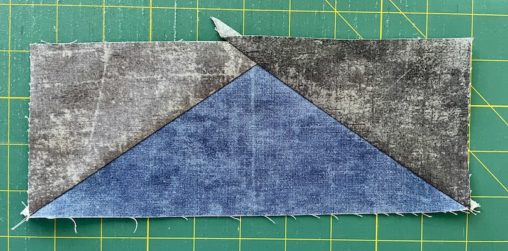
Step 4: Press the triangle over to make sure that it covers the rectangle underneath it and that the corner of piece BL and piece A are aligned – there will be a small dog ear from the seam allowance.
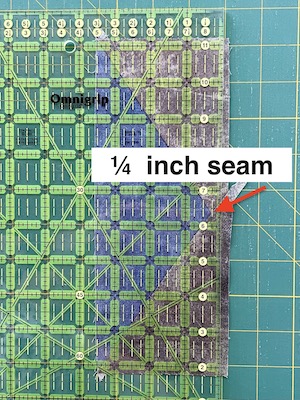
Step 5: Trim away excess fabric of piece A under piece BL leaving a ¼” seam allowance.
Step 6: Line up the bottom corner of piece BR triangle with the bottom right corner of piece A – the corner of the triangle needs to overhang the edge of piece A a ¼”. The long side of the triangle lines up with the centre mark made in step 1. Once again it will sit on piece A at an odd angle and hang off the bottom.
Step 7: Sew along the long side of triangle with a ¼” seam.
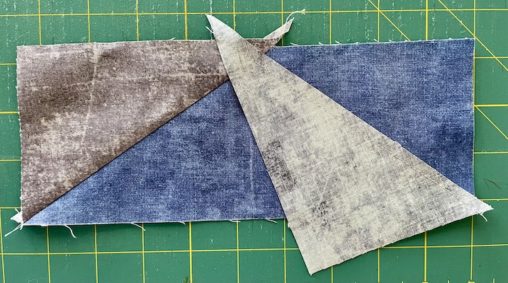
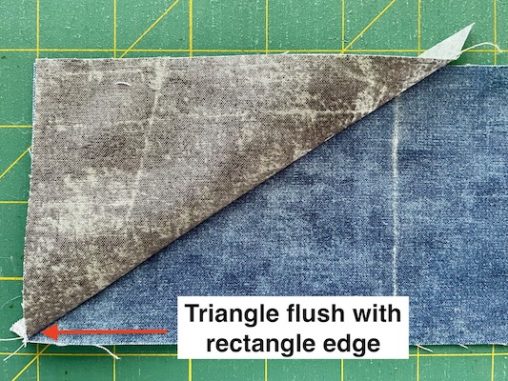
Step 8: Press the triangle over to make sure that it covers the rectangle underneath it and that the corner of piece BR and piece A are aligned – there will be a small dog ear from the seam allowance.
Step 9: Trim away excess fabric of piece A under piece BR leaving a ¼” seam allowance.
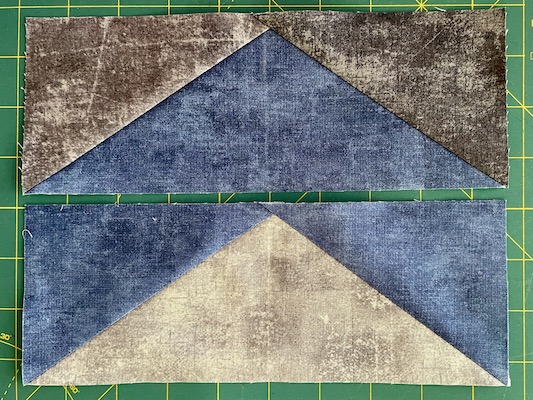
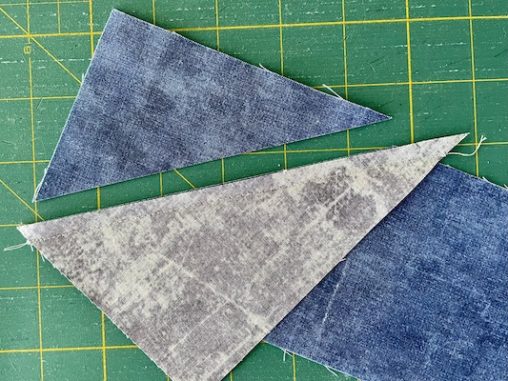
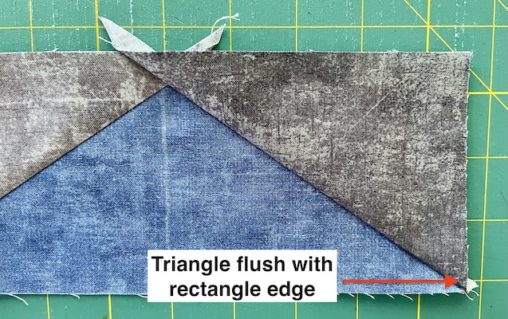
Step 10: Square up block to size needed. This one is 3 ½” x 9 ½”. Regardless of size make sure to have a ¼” at the top where the point is so that it doesn’t get cut off when sewing blocks together. See photo below.
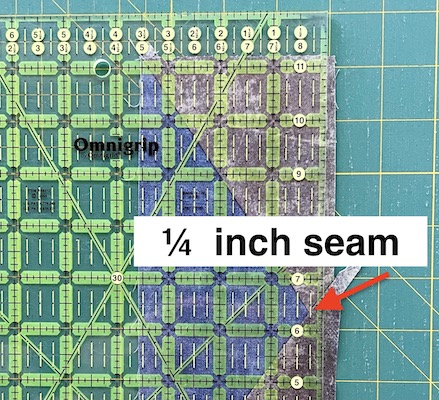
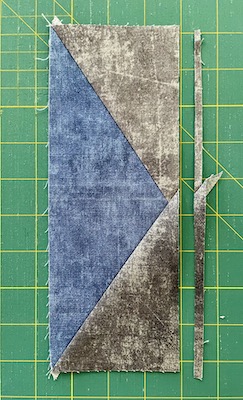
Step 11: Continue to square up as needed. Only a slight bit is cut off on the bottom of the geese and the dog ears on the two sides.

Not so difficult. Just remember that the triangles are cut on the bias and can stretch out of shape so be careful when sewing and use a dry iron when pressing. Pin pieces as needed.
Some quilter’s prefer to paper piece these kinds of blocks. Check out my post on paper piecing: How to Paper Piece: Step by Step.
Until next time…
Happy Quilting