


Hey Everyone, welcome back to Mug Rug Monday.
Yesterday I was trying to figure out what to create for my mug rug this week. I wanted to do something fairly simple as I in the middle of getting my presentations tweaked and ready for CreativFestival at the end of the week.
One of my presentations is all about pre-cuts and scraps. As I was working on sewing up more of the curved pre-cuts I bought in a kit years ago I thought this would work as a mug rug.
Before reading any further check out my previous post on sewing the curved pre-cut pieces together. It does help to know how those pieces fit together.
Last week I made a square mug rug using my popular pattern Rectangles & Squares mug rug. This week I am making a rectangular mug rug or at least that is my plan but then plans can change.
A while back I did a post on adding sashing to these blocks/pieces. I did a lot of auditioning of fabrics but I never did go any further with adding the sashing. Today I figure I am heading in the right direction by at least doing a mug rug with the sashing.
Plus I’ve also sewn a few more block pieces together. Woohoo!
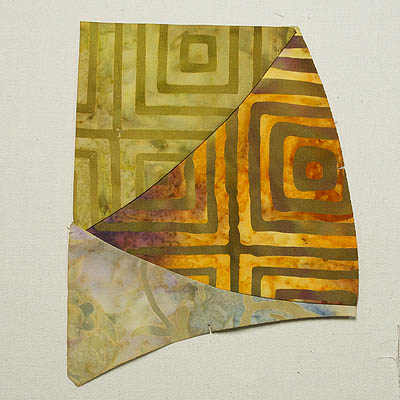
One section of the block
The hardest part of the sashing is actually picking the fabric and colour. Since this is a on of piece I am going to go with the dark blue and see how it looks.
Cutting and Sewing the Sashing Pieces
I set about adding the sashing and after sewing the pieces together I ended up sewing the same curve to the same curve. To sew a piece of sashing in place I realised that I had to sew a concave curve to a convex curve -an inny to an outy in other words – in order to get the pieces to sit flat. Makes total sense to me now.
It is a bit like thinking backwards and the pieces have to be cut opposite to what you think they should be. Just a bit confusing but I did finally get it sorted and my head wrapped around the technique.
Concave curve cut.

Concave curve
Sashing sewn to concave curve.
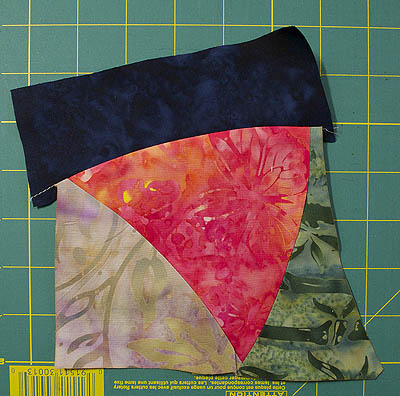
Sashing sewn to block section
Convex curve cut.
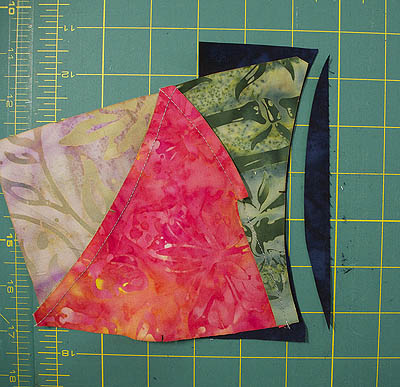
Convex curve
Same thing for the horizontal sashing but at least with this one the two different curves are pieced together and I just had to cut along the edge of the piece.
Concave & convex being cut at the same time.
Both curves cut at once
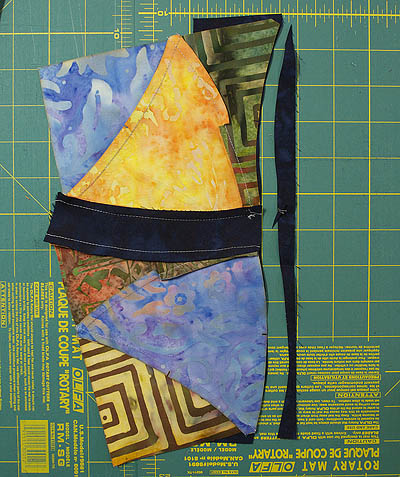
Here’s the sashing in place and wow this is a big block.
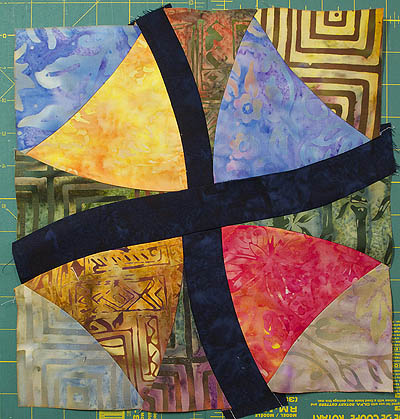
The block together
I think I will be trimming it down to make a smaller mug rug as this is almost placemat size. The next one I make I will also make the horizontal sashing a bit narrower. I’m not so sure I like the wide band of blue in the middle.
Quilt and Bind
Some free motion echo quilting to mimic the curves in the pieces is a perfect way to quilt this little piece.
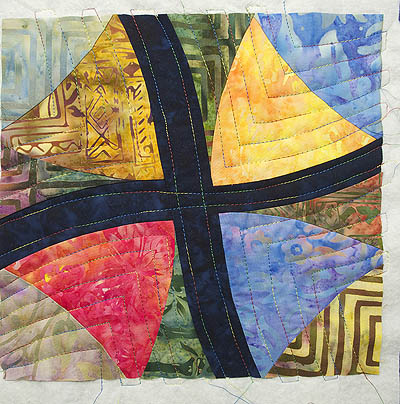
Quilting done
Trimming the piece to a rectangle which measures 8 ½″ x 11″. Looks good!
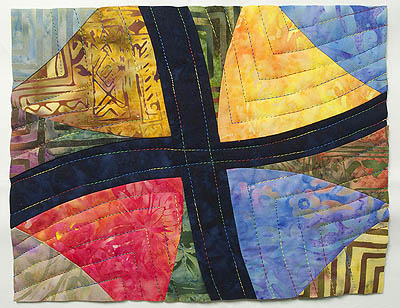
Trimmed to a rectangle shape
After squaring the piece off I bound it with the same fabric as the sashing.
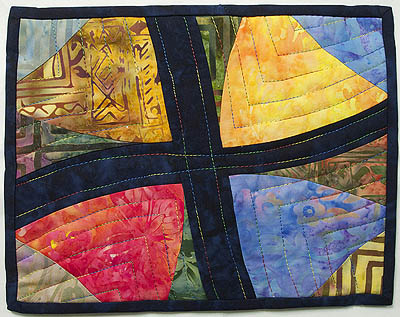
Mug Rug Complete
Near the middle of the page I said that the hardest part about the sashing was picking the colour – I was wrong – it was actually cutting the pieces and getting the right curves lined up together to create a flat block.
Happy Quilting!


