

Hey Everyone, welcome back to Stitch Along Sunday.
A new stitch along challenge to start the year off. I had a great time last year with the stitch along challenges and I am sure that this year will be no exception. I am not sure how Ruth keeps coming up with ideas but she does. Ruth is Ruth Blanchet of Arbee Designs and the Academy of Quilting.
The rules for this first week of January can be found on Ruth’s blog at January Rules Week 1.
This month we are doing A, B, C, D of quilting.
A = applique
B = broderie perse which I have never done before so I will be learning a new technique – goal met for this month
C = colour
D = dark
I gathered together all of my bits of fabric. I do want to use some embellishments as well but didn’t know what so will wait and find some when the piece is coming together a little bit more.

All the fabrics being used
A & B
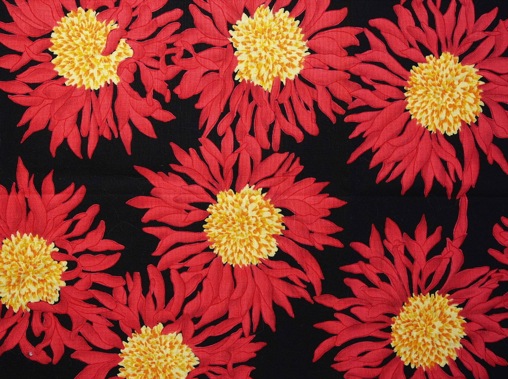
I have chosen to use a wispy red flower with a yellow centre for the appliqué and broderie perse.

flower for broderie purse
Colour
I added in a piece of green to complement the red as they are complementary colours. Maybe as the piece goes on I will add some more colours.

green fabric for colour
Dark
I chose two fabrics for the background – both black but one a fair bit lighter than the other. This will create contrast within the background using different values of the dark fabrics.

dark fabrics
Making the Background
For the background I decided that I wanted it to be a checkerboard. There were several different methods that I could use to create the checkerboard. The methods I had to choose from were sewing all the 2 inch squares together individually, using strip sets or using the quilt fuse grid.
I went with the latter option the quilt fuse grid. To see how to use the quilt fuse grid check out my blog post.
I cut the two fabrics into 2 inch squares and laid them out on the grid making sure they were on the side with the glue and lined up with the grid lines.

building the checkerboard background
Once place I fused them to the grid.

Squares fused in place
Sewing the seams didn’t take long and here is my finished background all ready to go for next week. It is 12 x 9 inches which is approximately the size of a piece of A4 paper.

Squares all sewn together
Flower
It was a bit difficult to decide which flower I wanted but in the end went with one at the edge of the fabric so as not waste the rest of the fabric. I fused a piece of fusible to the back of it and it is all ready to be cut when told to do so. It is the one pictured above under A & B.
I hope that you will join Ruth and I in the challenge this year. Each month will be a different piece all measuring the same. All of the pieces will be put together as a collection at the end of the year.
Happy Quilting!


This looks like too much fun! I better go dig in my stash for something with flowers
Yes, it is lots of fun.