

Hey Everyone, welcome back to Mug Rug Monday.
Last fall I made a mug rug for one of my posts at QUILTsocial and loved how it was so fast and easy to complete in just one sitting. This is perfect for me because with all the UFO’s that I have it gives me a sense of accomplishment in completing something in the same day and not having it hang over my head to get it done. The design was a maple leaf in autumn colours.
What is a mug rug?
A mug rug is larger than a coaster and smaller than a placemat. The smaller ones are perfect for your hot mug of tea or coffee by your computer or sewing machine and the larger ones you can add a plate of treats with your beverage. I have been making them approximately 8 x 12 inches just so I have room to create a design on them.
Mug rug designs
Oh the sky is the limit for mug rug designs from traditional blocks, appliqué, a mix of both, modern, abstract or even a small art quilt. This little piece is a great way to try out a new technique, ruler or design. As well they are a great way to use up scraps as not much fabric is needed for these fun little pieces.
They also make perfect gifts for teachers, friends or for the hostess of the party.
I made a second mug rug for QUILTsocial in December which was a snowflake in winter colours.
My challenge
I decided to give myself a challenge to create a mug rug a week for 52 weeks. Each and everyone of them will be different. Some months may have a theme like February – hearts, October – autumn colours and December – Christmas just to mention a few ideas. Pretty easy to give each month a theme so maybe I will do that for all months and it will make my creating a bit easier with a theme to work from.
The first one
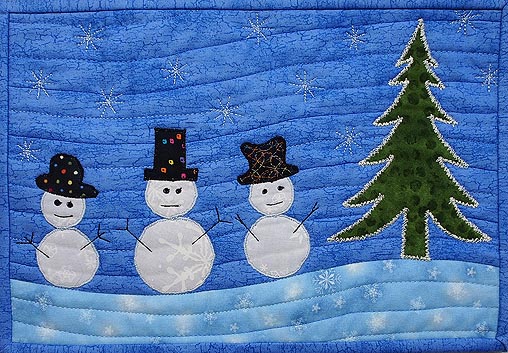
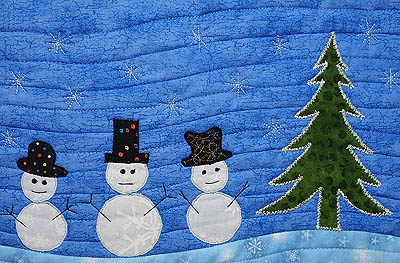
On Saturday as I sat in my studio and watched the snow fall to the ground I decided that I would do a winter scene – more of a whimsical one than an actual one as there are no snowmen lined up in my yard by the pine tree wearing hats – with imagination and creativity we can make whatever we like.
Background & Quilting
The pieces were cut with a curve and sewn together with a curved piecing technique I outlined in a blog post last summer.
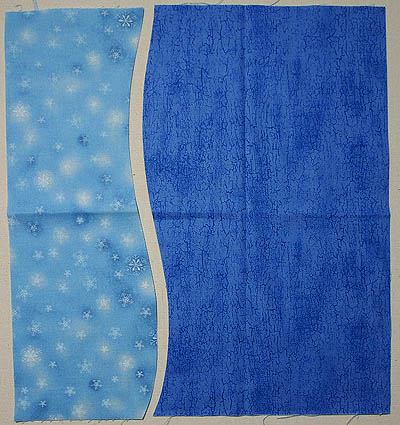
Pieces cut in a curve
Once the background was made I layered the top, batting and backing and did echo quilting to mimic the curve with a variegated rayon thread from Sulky. I did the stitching free motion but it could also be done with a walking foot. I chose to quilt the piece before adding the appliqué so I wouldn’t have to do a lot of stopping and starting and then tie off and bury threads afterwards.

Echo quilting
Appliqué
Adding the snowmen and tree was fun, fast & easy with Lite Steam-A-Seam 2 fusible web. Here’s a tutorial I did on how to use fusible web for machine appliqué in case you are not familiar with it. I could have done needle turn appliqué but then I would still be working on the piece and my goal is to complete these little mug rugs in one sitting.
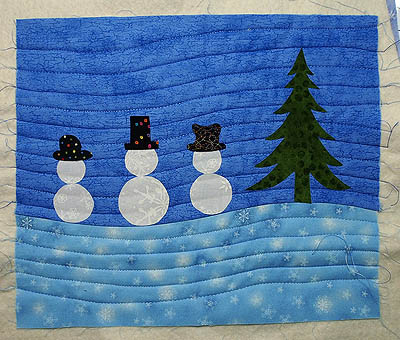
Applique in place
Stitching
There are many different stitches than can be used to finish the edge of the appliqué and for the snowmen I chose a satin stitch with a stitch width of 2.0 and a stitch length of .4 as I wanted it fairly close together.
The tree I chose to do a free motion zigzag stitch so that it had a jagged look of a tree with snow on the edge of the branches. The stitching really seems to glow on the tree.
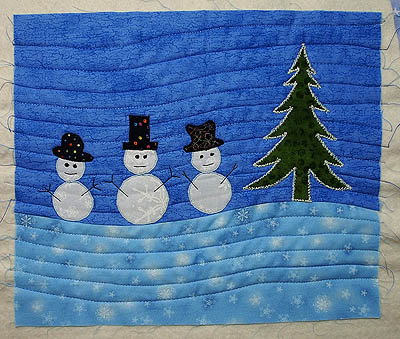
Stitching done
Finishing
I didn’t like how messy the back looked once I finished with the appliqué stitching and so I put a false back on the piece. Since it was snowing I added in a few stitched snowflakes with a rayon thread to keep this false back in place as well as a stitch in the ditch line along the curved piecing.
Close up of stitching & snowflakes
Before binding I squared up the piece and cut off some of the bottom as the mug rug was too big and the bottom was not proportionate to the top part. I think it looks much better now – definitely better proportioned. The final size of the finished piece is 8 ½″ x 12”.
A traditional binding added and it is ready for use. The snowman in the middle reminds me of the older brother who has to look after the little kids with his stern facial features.

Binding sewed to front
So 1 mug rug completed only 51 to go.
Happy Quilting!


Trackbacks/Pingbacks