

Hey Everyone, welcome back to Technique Tuesday.
Back in August I featured my little table topper quilt made with the spider web kaleidoscope block which I have decided to name Candy Corn. I am also teaching this little quilt at Creativfestival this fall in Toronto. The class is from 5-8pm on Thursday October 24, 2013.
Last Tuesday on Technique Tuesday I went through how to cut the pieces for a kaleidoscope block step by step with the Marti Michell Kaleido ruler.
Today I am going to do a quick overview of how to put these pieces together to create the kaleidoscope blocks using the half triangles and the spider web design.
Spider Web Block
1. The main triangle pieces are cut from a strip set of gradated fabrics – the number of fabrics and width of strips will depend on the size of block being made. This will be a 10 inch block and 5 fabrics have been used. Each block uses 8 main triangles and 4 corner triangles.

Pieces laid out in position
2. Sew a corner triangle to 4 of the main triangle making sure to match up the light corner triangle with the dark strip of the main triangle. The corner triangles are always sewn on first when using this ruler.

Sew corner triangles to main triangles
3. Sew a triangle to the unit made in step 2 to make 4 pairs.

Sew triangles into pairs
4. Sew 2 pairs together to create 2 halves. When sewing the pairs together stop a ¼″ from the centre as this will help create less bulk at the centre seam.

Pairs sewn together to create halves
5. Sew the halves together to create a kaleidoscope block. The middle will be bulky – I have not found that pressing the seams flat helped with this.

Completed block
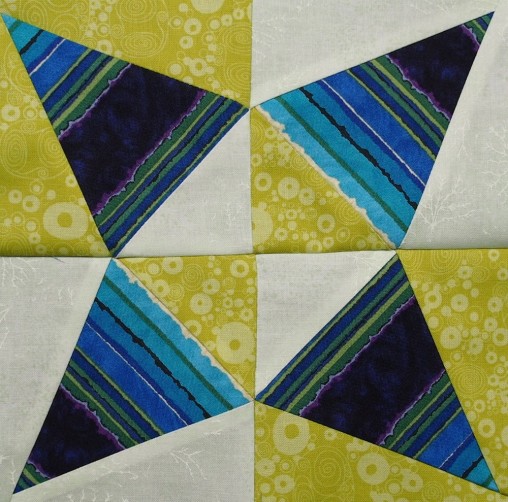
Half Triangle Kaleidoscope Block
1. This block uses 3 fabrics – two for the half triangles and corner triangles and then a feature fabric for the main triangle. This will be an 8 inch block.

Three fabrics make up this block
2. Sew a corner triangle to a main triangle. For the other block the corner triangles were at the outside edge of the block and with this one they will be in the centre of the block.

Sew the corner triangles to the main triangles
3. Sew the half triangles to one side of the unit made in step 2.

A half triangle sewn to one side of each main triangle
4. Sew the remaining half triangles to the other side of the unit from step 3. The units will now be in the shape of a square.

Remaining half triangles sewn to units to create squares
5. Sew the squares together into pairs. Make sure to get the placement of squares correct.

Squares sewn together in pairs
6. Sew the two halves together to create the kaleidoscope block.
Block completed
Two kaleidoscope blocks each with a very different look and a very different method of construction. One sewing the pie shaped sections together with many seams matching in the centre. The other one creating squares with the pieces and having few seams meet in the centre.
Both blocks create secondary designs when they are sewn together – this is one of the things I love about kaleidoscope blocks.
Happy Quilting!


