
Hey Everyone, welcome back to Technique Tuesday.
Small projects lend themselves very well to this technique of no binding flip and quilt finishing. What exactly does this mean?
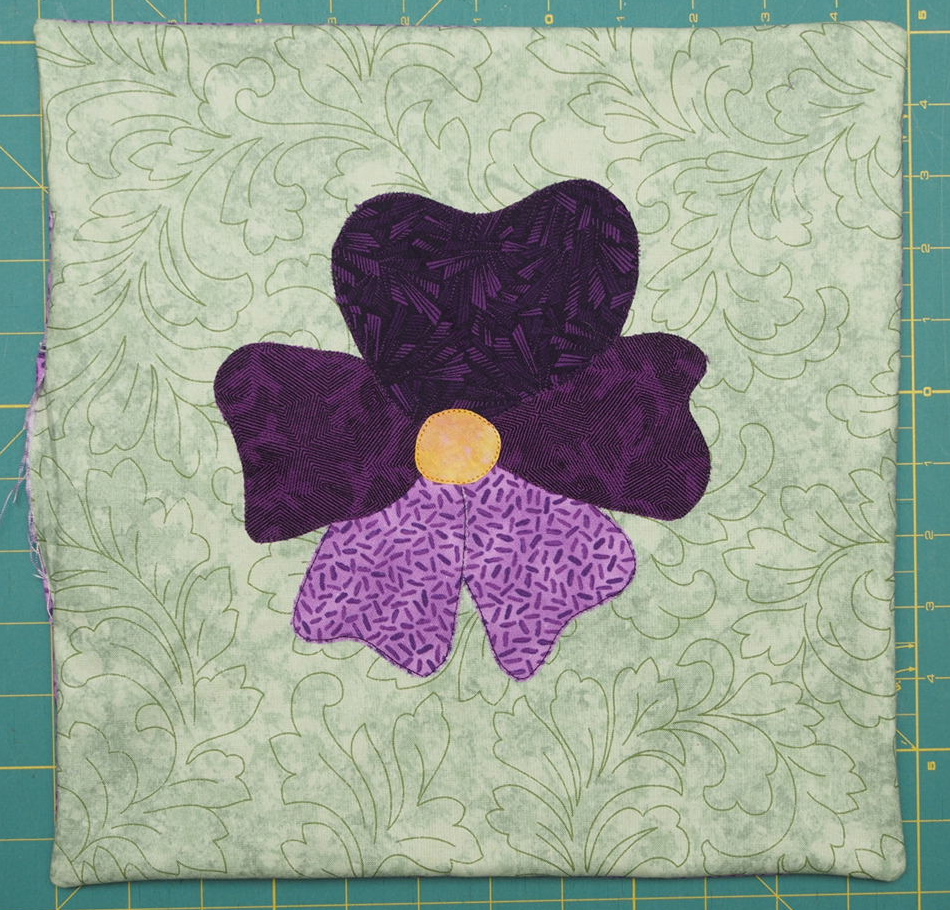
To start there is no binding on the finished piece. Instead the piece has been sewn together, all three layers then flipped so that everything is right side out and the opening that was left is sewn together by hand. Then the quilting is done.
Follow these simple steps for this no binding flip and quilt technique.
Download these instructions as a PDF so you can print them out.
First, cut all three layers – backing, batting and top – the same dimension. My pieces are 12 ½″ inches each.
Top

Batting

Backing

Lay the top on the batting so all edges match evenly.

Place quilt top on piece of batting
Lay the backing on the top of the quilt top right sides together.

Place backing on top of quilt top right sides together
Pin the layers together leaving the outside edges free.

Pin layers together so they do not shift when sewing edges
Sew around the outside edges leaving an opening large enough to pull all three layers through. When sewing stop a ¼″ from the corner leaving the needle in the down position, pivot and sew down the other side.

Piece sewn around all edges

Leave opening to pull layers through
Clip the corners with small cuts so that they will lie flat when turned.

Clip corners to minimise bulk

Make 3 small clips in each corner
Pull quilt through the opening so that everything is right side out.

Opening left on one side of quilt

Pull quilt through opening
Make sure that each corner of the piece is flat and forms a perfect corner. See my Cool Tool Thursday post for a review of That Purple Thang that I used to help turn this piece right-side out.

Quilt pulled through with not so square corners

Corners pushed out, pointed and flat
Iron flat and pin together again before quilting and sewing up the opening.

Iron and pin again before quilting
Hand sew the opening closed. Make sure to tune into Free Motion Friday this week to see how I quilt this little piece.

Hand sew opening together
A quick method of finishing a quilt especially when the piece is really too small to warrant binding such as a pot holder or trivet. This method can be used on any size of quilt though with great success.
Happy Quilting!


followed the link from linkedin — nice tutorial! I find binding oppressive and am constantly looking for ways to avoid.
thanks.
Thanks Dee. I quite like binding but I know for some it is not their favourite part of the quilting process, glad to give you another option.
I love to sew on bindings; stitch on by machine the first go around and then do my hand stitching, which I love!
you saved me i cant get how to do binding! this will work great fof me thanks!!
Carmen You are most welcome. Glad I could help.
Thank you for sharing this. I feel I ruin my projects because I’m not good at binding. I’m fairly new to quilting and really enjoy it.?
Avril, binding takes practice and it will get better the more you do it. Happy Quilting Jen
Very helpful and easy.
Rosana, Glad this tutorial was helpful for you and yes it is so easy. Happy Quilting Jen
l love to hand sew so you have been a great help. Will the batting shift around during washing? Thank so much.
You will still have to do some quilting so that the batting doesn’t shift. Happy Quilting
Thank you for sharing this technique! I’m trying to quilt some banner for church and previous banners have this no binding technique. As I puzzled it through I through this seemed like the logical approach. I was so glad to find your quick tutorial to confirm I was on the right track! Blessings!
Enjoyed looking at this link from LinkedIn . One thing I learn from sewing clothing was to sew within on stitch of the corner. Turn 45 degrees and take one or two stitches until you reach the other side seam allowance. Turn and sew down the next side. This method gives a great square corner, but does require care when stitching.
Thanks Peggy for the tip on getting square corners. I will give it a try the next time I finish a quilt like this. Jen