

Hey Everyone, welcome back to Free Motion Friday.
I wanted to create a a continuous chain of rectangles today and had something completely different in mind than what I came up with. Funny how that happens.
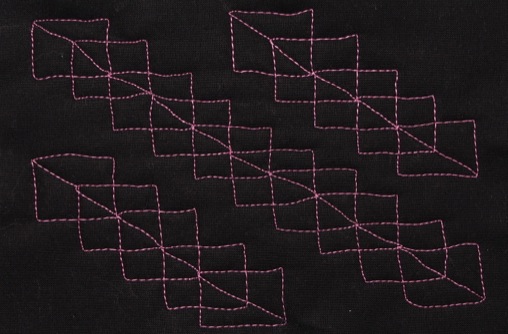
I managed to create this chain of rectangles without having to back track over any stitching.
Follow this sequence for a continuous line motif with no back tracking.
Step 1
Stitch a rectangle on the fabric.

Stitch a rectangle
Step 2
Stitch a line diagonally from the corner to the middle of the rectangle.

Stitch a line to the centre
Step 3
Stitch another square starting in the middle of the other rectangle where the diagonal line stopped.

Stitch another rectangle
Step 4
Stitch another diagonal line to the middle of the rectangle.

Continue the diagonal line to the corner
Step 5
Stitch another rectangle.

Create a third rectangle
Step 6
Stitch a diagonal line to the corner of the last rectangle to complete the chain.

Continue the diagonal line to the corner of the last rectangle
With the stitching being free motion and not quite straight there is a bit of a ripple to it – kind of neat effect. I also didn’t use my free motion gloves and it certainly makes a difference to my quality of stitching.
This motif could even be done with a walking foot which would be more precise and square. It can be easily marked with a chaco liner to follow the lines for even further precision.
I might try this motif in my next quilt. How about you?
Happy Quilting!


Love this . . . Going to try on a small table runner Monday. Would look great on a modern quilt to fill the negative space. Thanks for sharing you clever gal!