

Hey Everyone, welcome back to Free Motion Friday.
This week I took the tree cookie cutter I featured with the Tissue Paper Templates a few weeks ago and reduced it in size.
I wanted to create a line of trees connected together with a ribbon. First of all I traced 3 of the trees on paper and then joined them with two lines to look like ribbon.

Trees connected with lines
To create a template I glued the paper template to piece of box board with a glue stick. I put the glue all over the back of the paper as I didn’t want it to lift off. Once again I cut the ribbon of trees out of the box board.

Template glued to box board
The template was traced onto the fabric with my Sewline Fabric Pencil.

Template in position to be traced
I decided to have three rows of trees with the middle one staggered between the outer two.

Three rows of trees with the middle one staggered
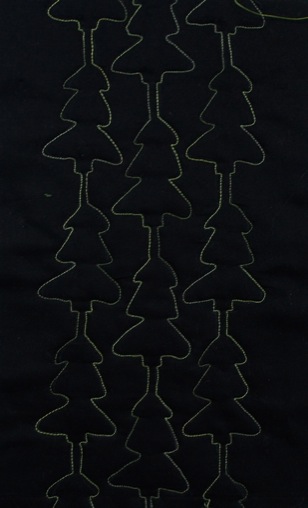
Stitching was done from the top down to the bottom and then back up to the top. Very simple to follow the lines. The trees are about 3 inches in height and 1 ½″ in width.
Trees stitched in green
If you are not comfortable with free motion this motif could easily be done with a walking foot. Just put pointed ends on the tree branches making it easier to pivot and turn with the walking foot.
This motif would be great for a border and could be repeated many times over. It would also look great in large open blocks as a great filler. Many options for these Christmas trees.
Happy Quilting!


