
Hey Everyone, welcome back to Technique Tuesday. Last week I talked about how to make half square triangles using the traditional method with 2 squares. This week I am going to make half square triangles with a grid method – this method works great if there are many half square triangles needed of the same two colours.
Getting Ready
Two nicely pressed fabrics are needed to make the half square triangles. I have chose to make mine out of a dark pink and a medium pink – these fabrics will have good contrast when put together.
How large are the half square triangles to be? For this example I have made them 3″ finished and 3½ unfinished. We will be working with the unfinished number to create the grid. Twelve half square triangles are needed which means we need to make a grid of 6 as each square in the grid will create two half square triangles. The grid will need to be 3 squares across and 2 up and down.
The grid.
Grids can be as small as 2 x 2 or as large as the piece of fabric you wish to work with.
How big does the fabric need to be cut for the grid?
I add an inch onto the unfinished size and then multiply by the number across and the number up and down to determine how big to cut the fabric. I use an inch instead of ¾″ only because it is much easier to do the math – there is a bit more fabric wastage but for easy math it is worth it.
For example: The HSTs are 3½″ unfinished – add an extra inch to the unfinished size to make 4½″. There are 3 across in the grid – 3 x 4½ = 13½. The width of squares is 2 – 4½ x 2 = 9. The pieces of fabric to make the grid needs to be cut 9″ x 13½″.
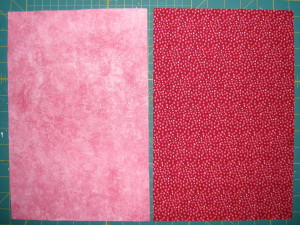
2 pieces of fabric needed.
Preparing the Grid
1. Lay out the two fabric pieces right sides together matching up the edges evenly.
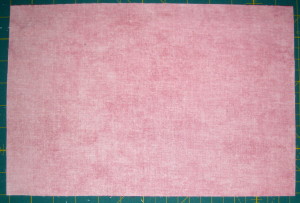
Place light coloured fabric on top of dark with RS together.
2. With a pencil or fabric marking pen and ruler draw a line down the centre of the fabric lengthwise at the 4½″ mark.
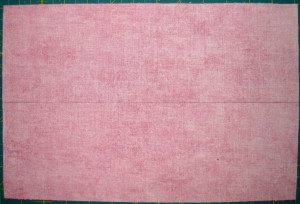
Draw pencil line down centre horizontally.
3. Mark off intervals lengthwise of 4½″. Draw lines vertically on the fabric at the 4½″ mark and 9″ mark.
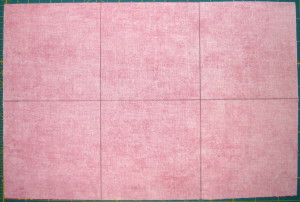
Draw pencils lines 4½″ apart vertically.
4. Draw a diagonal line from the top left corner to the bottom of the second vertical line continuing the line up to the corner of the centre line.
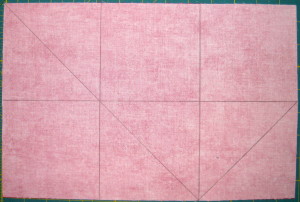
First set of diagonal lines.
5. Draw a diagonal line from the bottom left corner to the top of the second vertical line continuing the line down to the corner of the centre line.
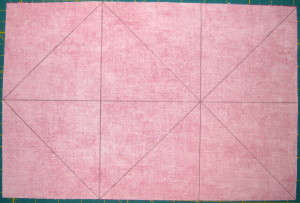
Second set of diagonal lines drawn.
6. Pin the grid together – this will prevent any movement when sewing.

Pin pieces together.
Sewing the Grid
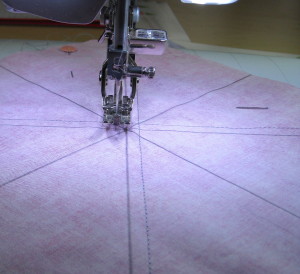
1. Start sewing at one of the corners on one side of the diagonal pencil line and follow along in a continuous line. This will be a ¼″ seam – line up the edge of the quarter inch foot on the line to ensure a ¼″ seam.
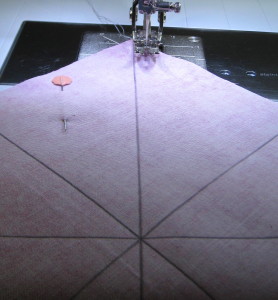
Sew a ¼″ on one side of diagonal pencil line.
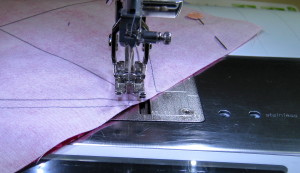
2. At the edge lift the foot and pivot around to start back down along the pencil line. If you wish to stop and cut threads that is fine but really no need.
No need to cut threads at the edge.
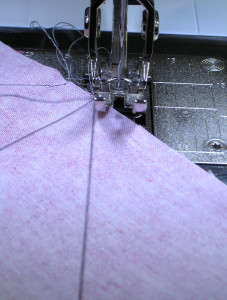
3. Completed sewing line is a ¼″ from the pencil line all the way around..
Sewing line complete on one side of pencil line.
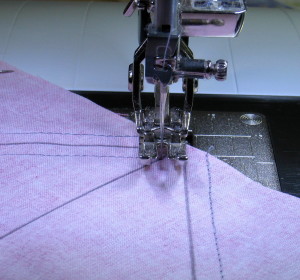
4. Sew another ¼″ seam on the other side of the line – lining up the edge of the quarter inch foot with the pencil line will make it easier.
Sew ¼″ seam on other side of diagonal pencil line.
5. At the corners, stop and leave the needle in the line, lift foot and pivot the fabric around lining up the edge of the foot with the line, continue sewing a ¼″ seam.
Stop with needle down on line.
Lift foot, pivot and continue sewing.
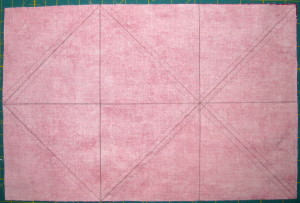
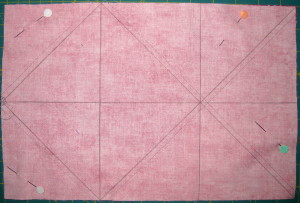
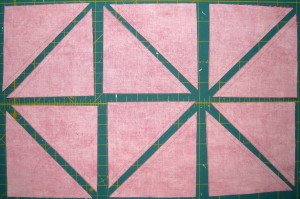
6. Sewing lines complete on either side of the diagonal pencil lines.
Complete sewing line on both sides of pencil line.
Cutting the Grid
1. Cut apart along the horizontal pencil line in the centre of the grid to make 2 long pieces.
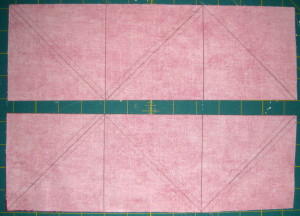
Cut apart along centre line.
2. Cut apart along the vertical pencil lines to make 6 squares.

Cut apart along vertical lines.
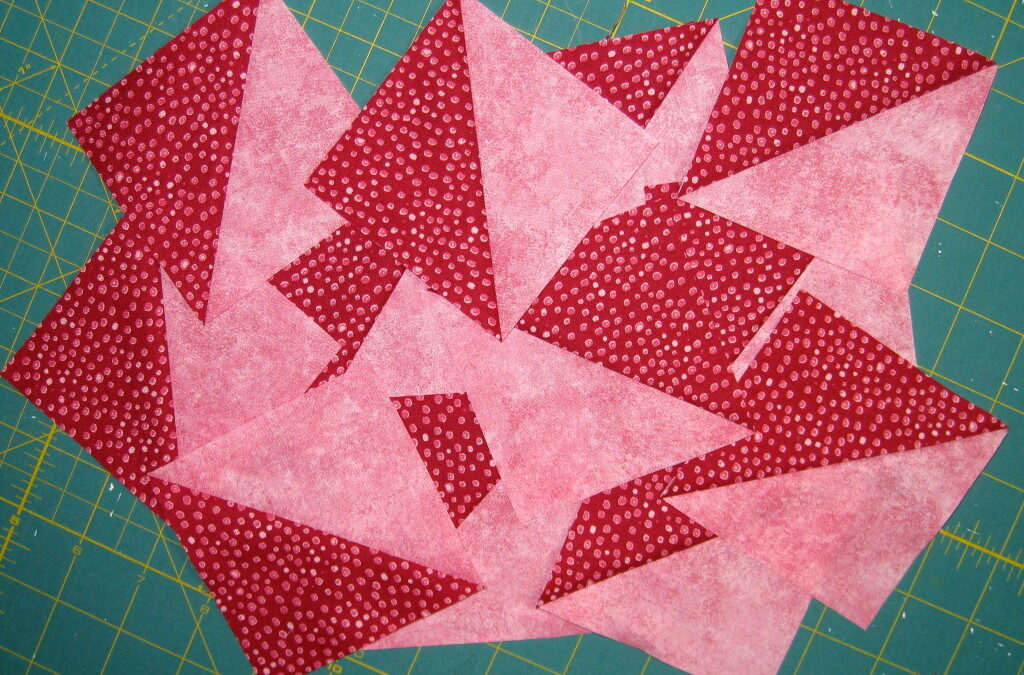
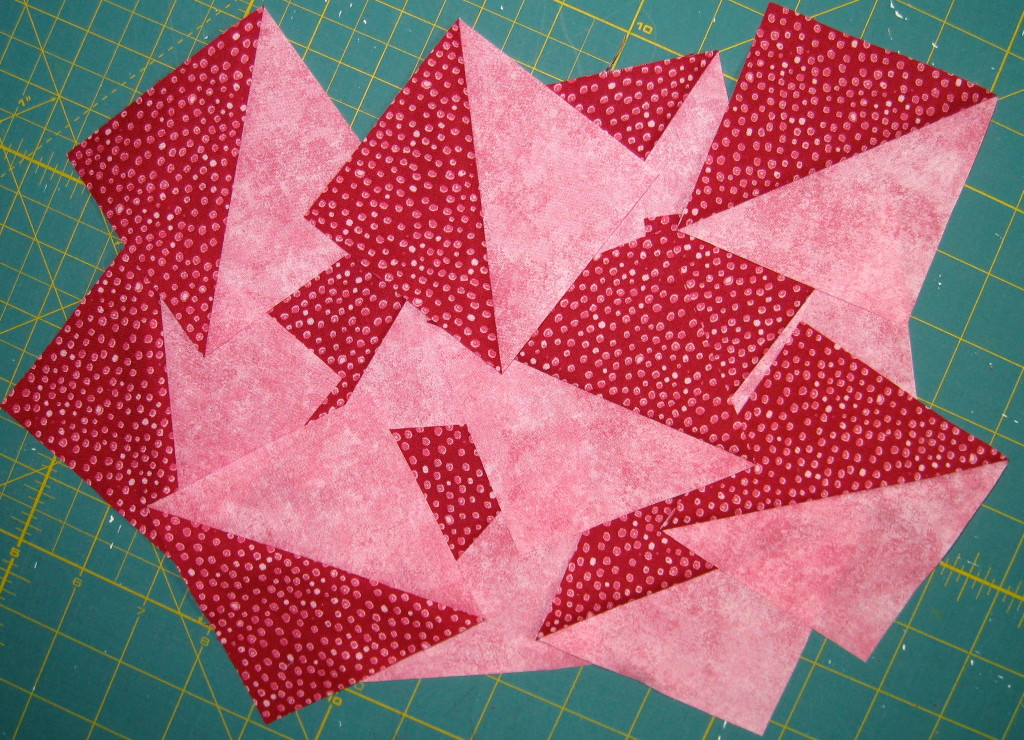
3. Cut along the pencil lines between the sewing lines to make 12 half square triangles.
Cut squares apart on diagonal lines.
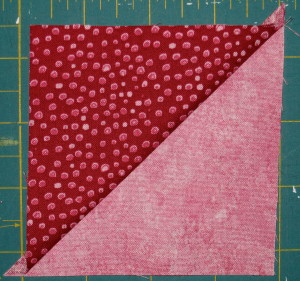
4. Press all the half square triangles open towards the dark fabric.

Press towards dark fabric.
Squaring Off the HST
Squaring off is when the HST is trimmed down to the size needed.
1. Place the HST right side facing up and the seam line going from bottom left corner to top right corner on the cutting mat.
Place HST on cutting mat.
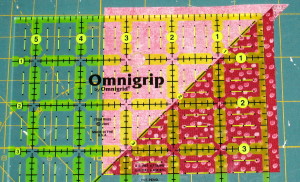
2. I use a small square ruler such as 4½″, 5½″ or 6½″ square for squaring off as these small square rulers are much easier to work with than the regular 6½″ x 24″ ruler for this job. The HST needs to be squared off to 3½″.
Line up the diagonal line of the ruler at the left hand bottom corner of the seam line with the 3¾″ vertical and horizontal lines matching the side and bottom edges of the HST as best you can. It is very important that the diagonal line on the ruler is square on with the diagonal sewing line of the HST. See photo below.
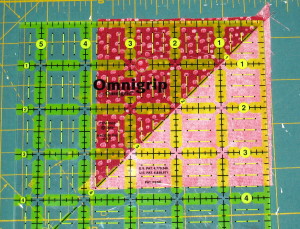
Line up ruler with edge of HST at 3¾″ line.
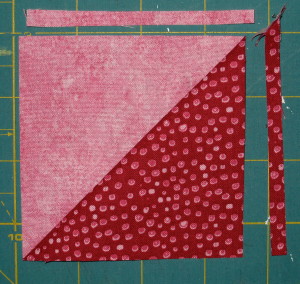
3. Trim off the excess fabric on the right hand side and top of the ruler.
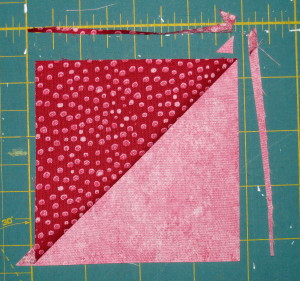
Excess fabric trimmed from right of ruler.
4. Spin the HST around so that the edge just cut is at bottom left hand corner.
5. Repeat step 2 only this time placing the 3½″ vertical and horizontal ruler lines on the side and bottom edge of the HST. Take care to make sure the diagonal like is once again lined up with the seam line.
Place ruler on edge of HST at 3½″ mark.
6. Trim off the excess fabric on the right hand side and top of the ruler.
Trimm off excess fabric.
7. The HST is squared to 3½″.
So there you have another method of how to make half square triangles. This one is certainly very handy if a lot of the same two colours are needed. There are also commercially stamped grids that can be bought to accomplish the same thing – I have never used them as I find drawing the lines on the fabric works just fine.
If you have any questions or are having difficulties please feel free to contact me, I am happy to help and only an e-mail away.
Happy Quilting!


Hey Jen,
Your explanation and pictures of the half-square triangle grid method are very good.
I am hoping you might be knowledgeable to further assist me. I have been looking for the historical origin of this method. Do you have any research available about the grid piecing method that you would be willing to share, or maybe direct me to a resource?
Thank you for sharing …. I really appreciate it.
Cheryl
.
Cheryl, unfortunately, I do not know the origin of this method of making half square triangles but it is very efficient when making many of them out of the same two fabrics.