


Hey Everyone, welcome back to Mug Rug Monday.
This week is a quick and easy mug rug using the stitch and flip method for construction. This means that when everything is sewn together the quilting is done as well – definitely fast.
First of all I am happy to say that all the fabric was in the scrap bin except for the binding – I had to cut a piece since the scraps were not wide enough. Woohoo! I used up some scraps – not that it is noticeable that they are gone but at least I know they are.
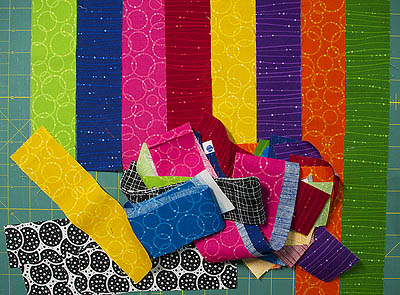
A bunch of scraps
This piece uses strips of rainbow colours with black and white ovals as the steps. The steps to where – well that is up to you.
I laid out the strips.

Strips in order
Then cut them up and added in the black and white squares.
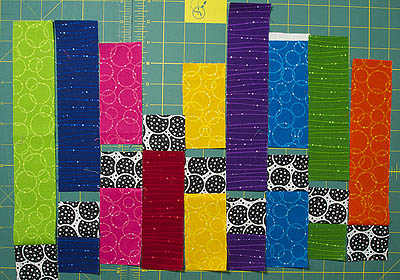
Strips with squares added
After laying the batting on top of the backing I made a line along the top and side as a guide to place the strips. I used my Trace’n Mark air erase marking pen and discovered with my first seam press that the line becomes much brighter when heat is applied. I didn’t know this – a very helpful tidbit of info for when the line fades.
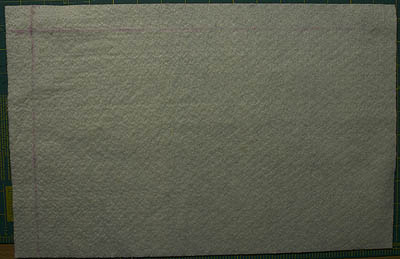
Faint pink line on top and side
Then I sewed the pieces together using the stitch and flip method of quilt as you go. So fast and easy especially when using the walking foot.
My pieces didn’t line up with the top line very well – no worries as I’ll be squaring it all up. Note how bright the pink line is now after having some heat applied.

Not quite straight
The piece squared up and ready for binding. It measures 8 ¼″ x 13 ¼″.
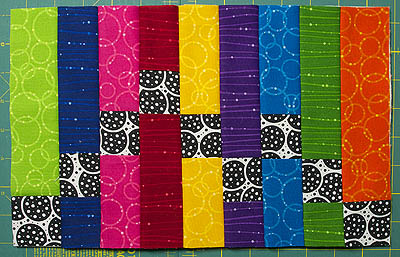
All squared up
This is a wonderfully bright mug rug to bring a bit of colour to our still mostly brown spring days. Although there are signs of green.
Mug rug complete
Happy Quilting!


