

Hey Everyone, welcome back to Technique Tuesday.
As you may recall from last week I wasn’t very happy with the blocks I had made using the scrap crazy templates. Yesterday I set to work experimenting with them by adding some contrast pieces.
Picking the Contrast Fabric
Initially I thought I would add three different colours of contrasting fabrics. But then I was having trouble deciding exactly what to add. Here is one option – a blue print, green and purple fabrics all on the dark blue background.
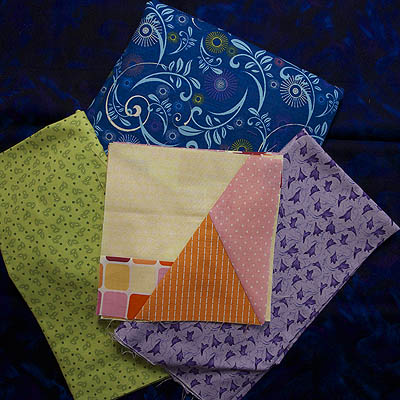
Multiple fabrics for contrast
As I stood there looking at the fabrics and pulling more out of the cupboards it dawned on me that one fabric would work and so I went with the darkest one. This is a Nancy Crow fabric that I have had in my stash for a very long time as it has to have just the right coordinating fabrics to go with it. It has pink in it and so these fabrics work well with it.

Dark blue as the contrast fabric
Adding the Contrast Strips
Since I have 32 of these 6 ½″ blocks I figured I could sacrifice 4 of them to the experimentation process.
I layered 4 blocks on top of each other – each laying in a different orientation so that the cut would be in a different spot on all four blocks. I cut an angled line through the blocks.
The first cut
I cut one inch strips from the contrast fabric to insert between the cut pieces. I started by sewing the three pieces together – not sure what I was thinking but this is not the correct way to add a contrast strip.

Oops!
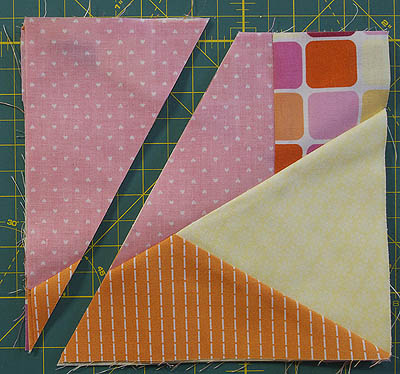
After ripping the 3 layers apart I sewed the contrast strip to one section of the block.

Contrast strip sewn to one section
After pressing I sewed on the remaining section of the block giving me blocks that look like this.

One contrast strip added
Once again I layered the 4 blocks and cut another angled line – this one through the contrasting strip as well.

Second cut
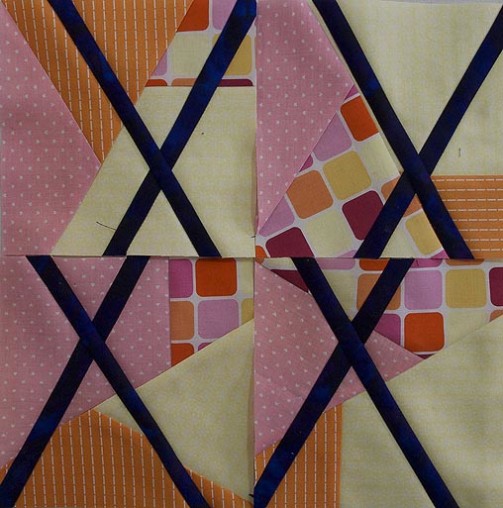
Remember this is all an experiment and I have no idea how it is going to turn out. After adding in the second contrasting strip I have ended up with 4 blocks that look like this.
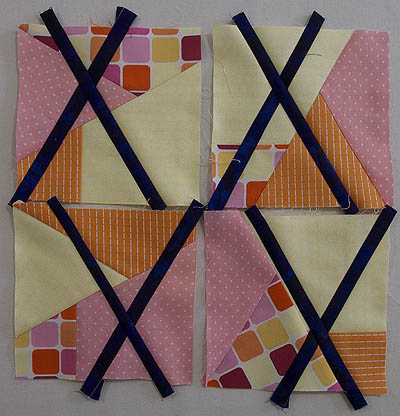
The second strip added
So far I am liking what I have but my next question is do I leave them like this or continue on with the experiment? After all I do have another 28 blocks to play with if the experiment ends up going pear shaped.
Happy Quilting!


