Hey Everyone, welcome back to Stash Blasting Wednesday.
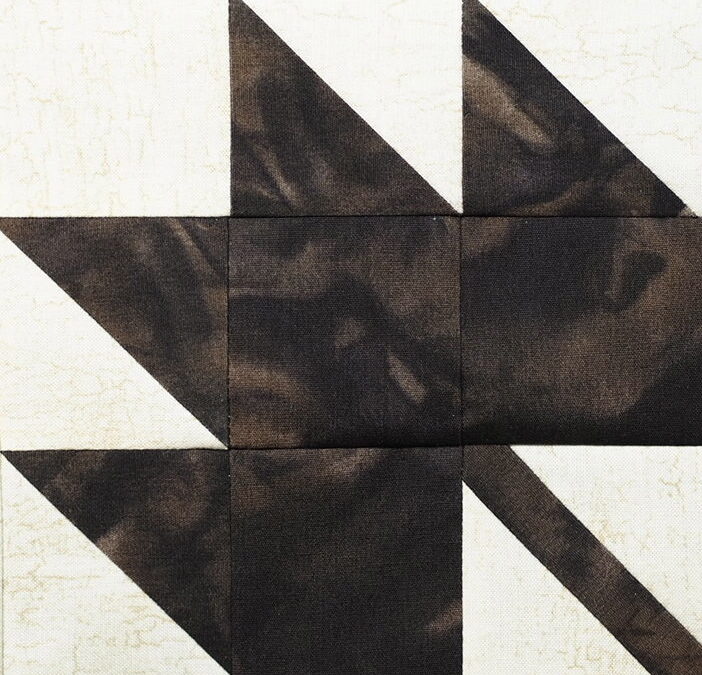
Seeing how Canada Day is just around the corner what better block to have today than our iconic maple leaf. There are many different versions of the maple leaf block and this is the one that I incorporated into the cornerstones of my Purely Canadian quilt. Another great quilt to display on Canada Day as it really is very Canadian.
This block can be made with any colour you like – it can be the actual colour of leaves whether green for summer or gold for autumn. It could even be made scrappy with all of the leaf pieces being a different colour – that would look very interesting and unique I do believe especially if there were many of them in the quilt. My block is with made with brown and cream. Or it could be done in true Canadian colours of red and white.
The block shown is a 6 inch block.
Cutting Instructions
Brown Fabric
- Cut TWO (2) 3 ¼″ squares
- Cut THREE (3) 2 ½″ squares
- Cut ONE (1) 1″ x 4″ rectangle
Cream Fabric
- Cut TWO (2) 3 ¼″ squares
- Cut THREE (3) 2 ½″ squares
- Cut ONE (1) 3 ½″ square cut on the diagonal once – not sure what this means check out my blog post on cutting on the diagonal
Building the Block
Making the Leaves
1. With the brown and cream 3 ¼″ squares make 4 half square triangles. Follow the directions here on how to make half square triangles. Press the seam towards the brown fabric. Which tool are you going to use for pressing – finger, hera marker or iron.
2.Square off the half square triangles to measure 2 ½″.
Making the Stem
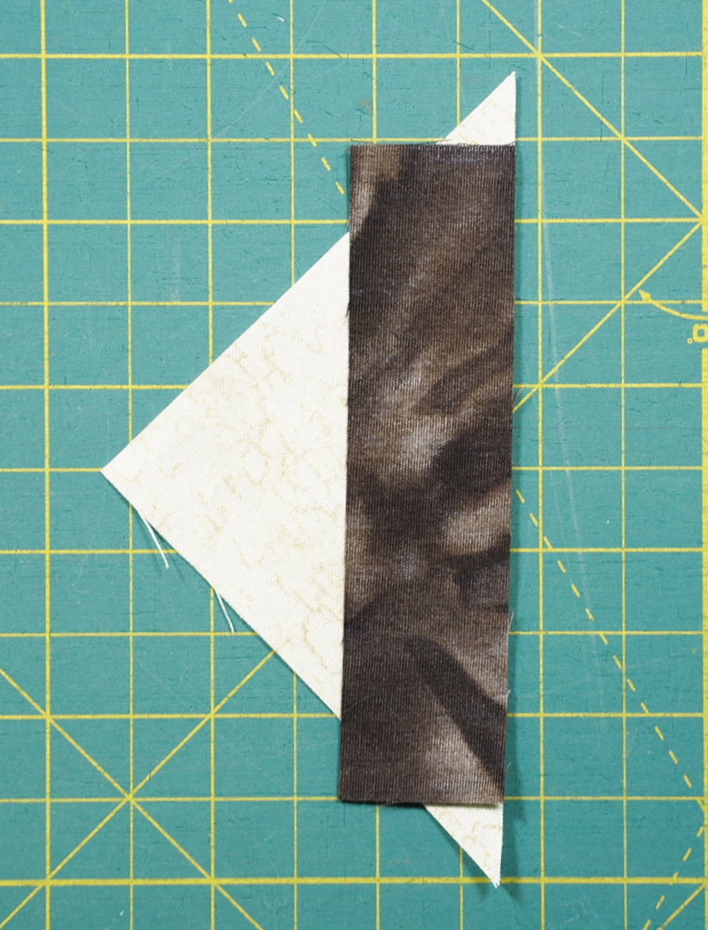
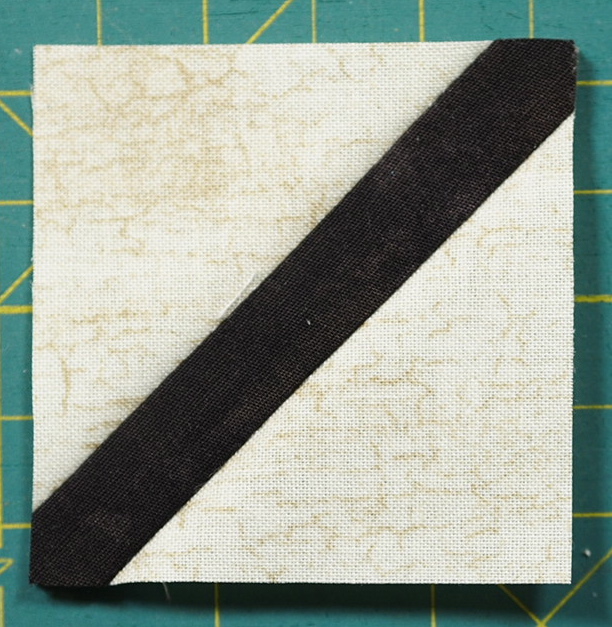
1. Make the stem by sewing the brown rectangle to one of the triangles. Place the rectangle along the long side of the triangle. Be careful not to manipulate the triangle too much as it is cut on the bias and can stretch. The triangle will be longer than the rectangle. Press the seam towards the rectangle.
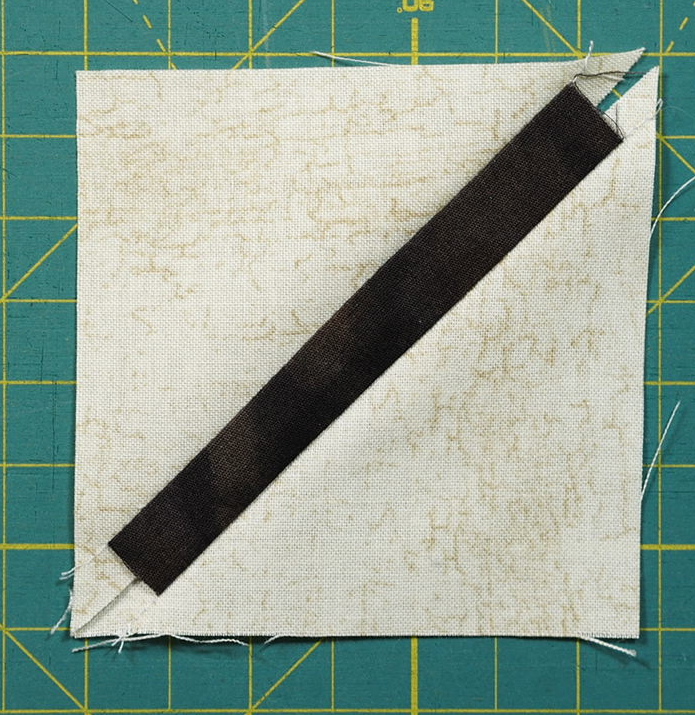
2. Sew the other triangle to the other side of the rectangle in the same manner. Press the seam towards the rectangle.
3. Square off the piece to 2 ½″. I have been generous with the amounts so there is a bit to cut off.
Putting the Pieces Together
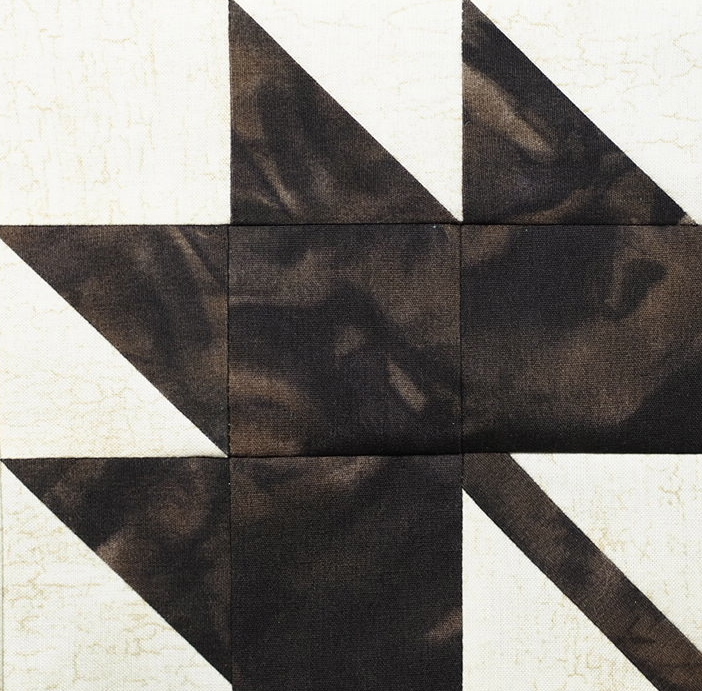
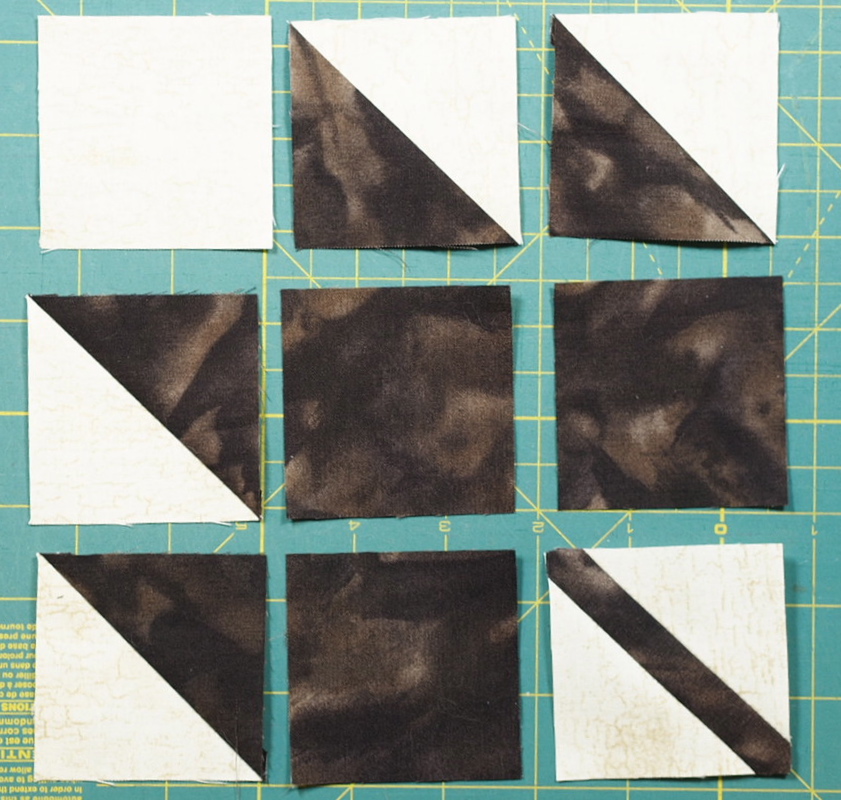
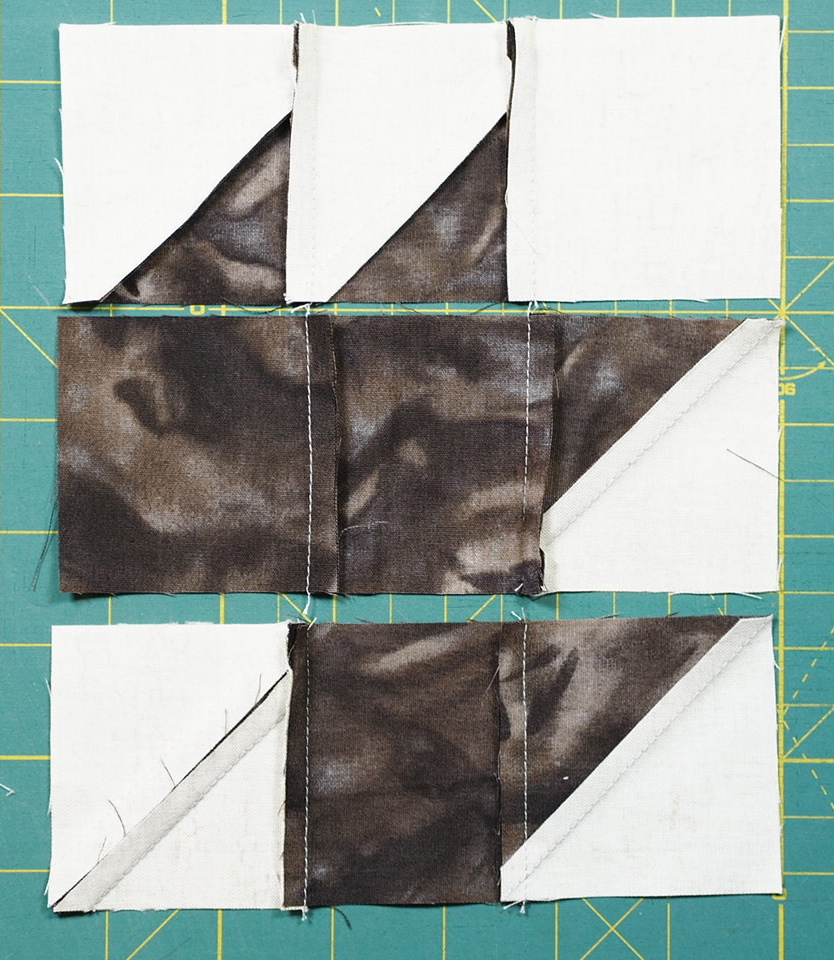
1. Lay out the pieces as in the photo below.
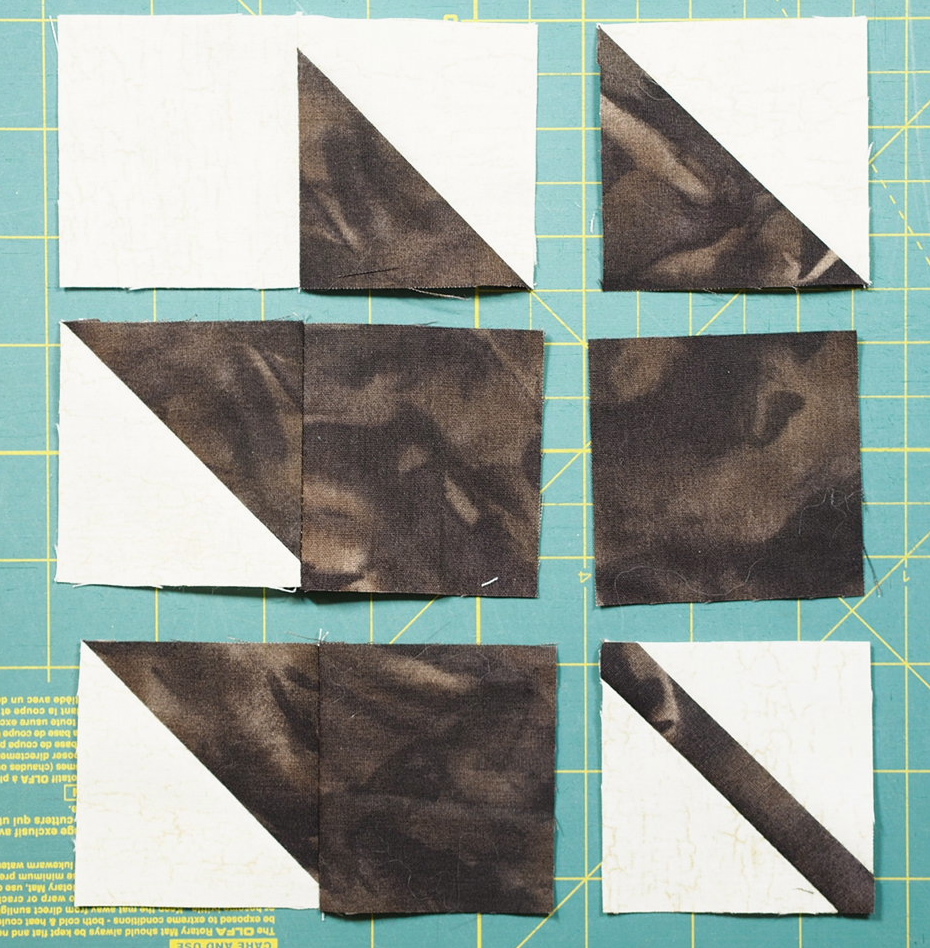
2. Sew the first two squares in each row together making sure to keep the half square triangle oriented the proper way. Press rows 1 & 3 towards the half square triangle and row 2 towards the brown square.
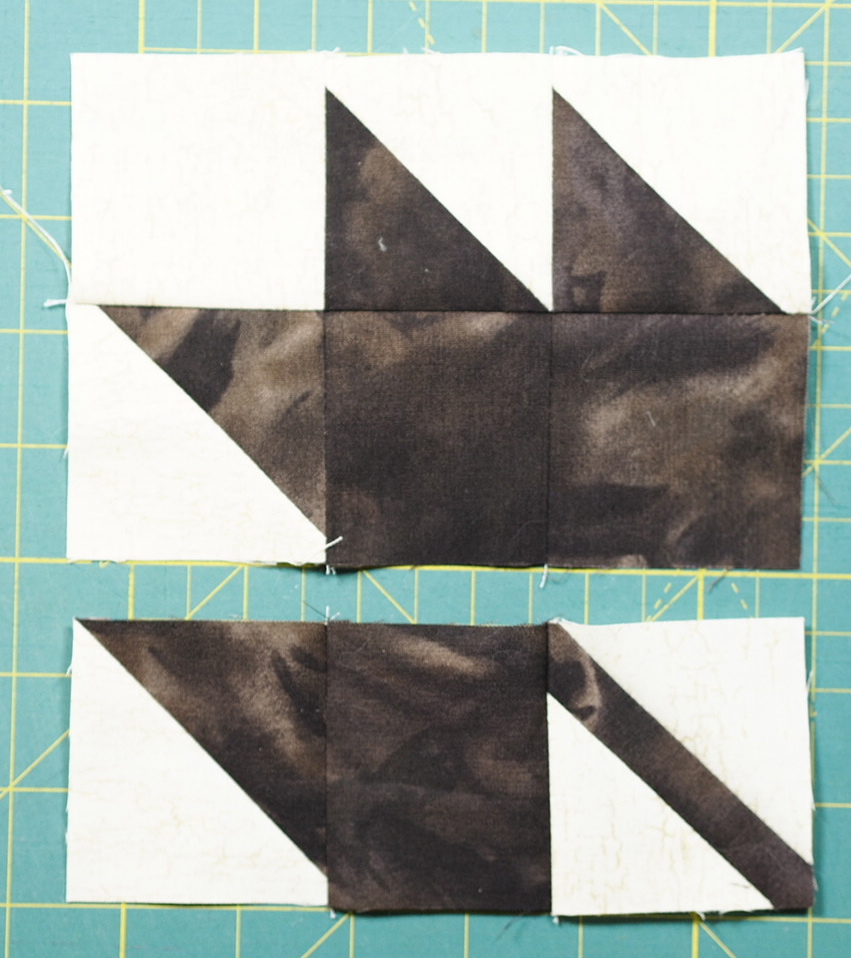
3. Sew the remaining square in each row to the unit made in step 2. Press the seam in the same direction as previously done.
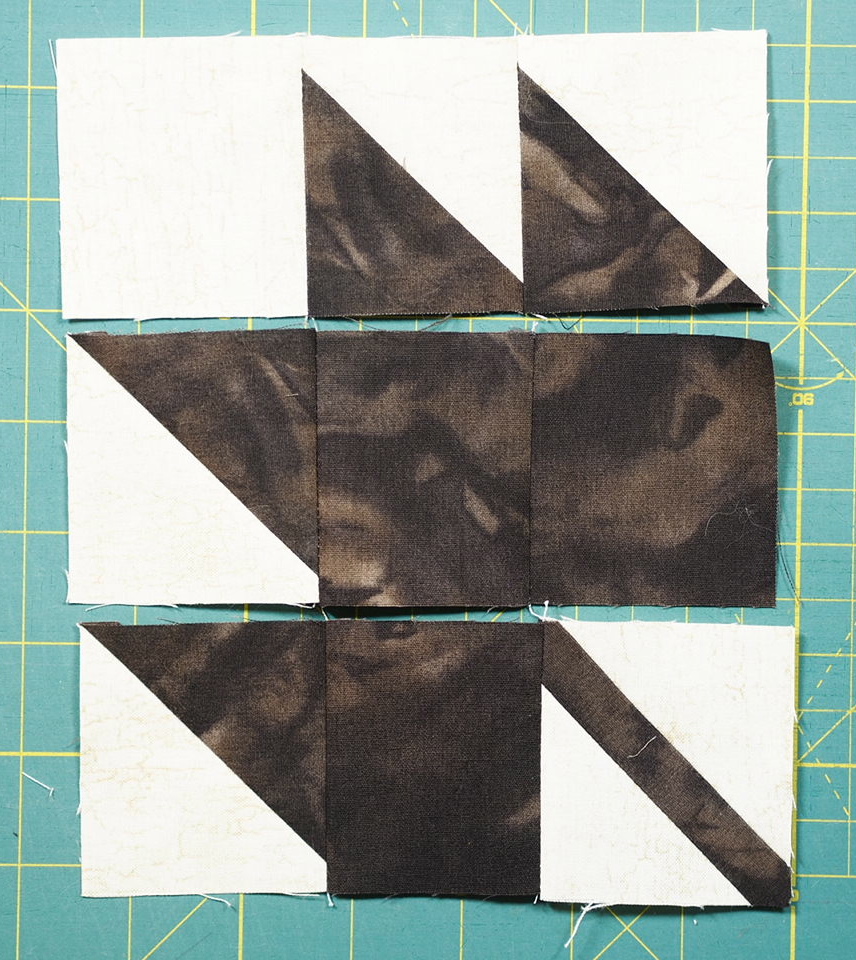
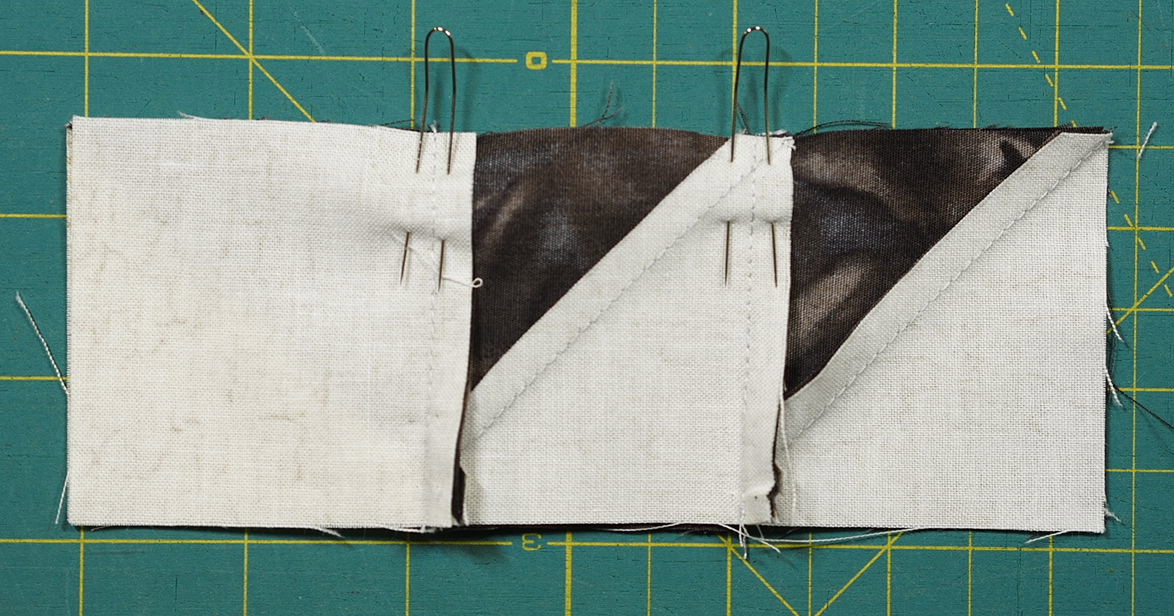
4. Sew row 1 & 2 together taking care to match the seams. Pin seams if necessary – the forked pins from Clover work great to hold the seams together and ensure perfectly matching seams. See them in action here at To Pin or Not to Pin. Press the seam in either direction.
5. Sew row 3 to the unit made in step 4. Press the seam in the same direction as step 4.
What colour are you going to make yours?
Happy Quilting!






Hi Jen: You have put a thought in my head. I have some fabric with hockey players
in red & black. I’m going to make a little quilt out of that fabric using the maple leaf pattern design. From the 2 square pieces I would make sure I placed a hockey player in those squares. Do you think it would look too busy?
Really enjoying your daily e-mails
Shirley
Hey Shirley. Thanks, so glad you’re enjoying my posts! I think this is wonderful idea and will look great. Please share the finished result and I’d love to feature it in a blog post. Jen
Hey Jen,
I was in Rocky Mountain Antique Mall in Edmonton today. And got some quilt block inspiration there. I”ve been thinking of doing a block in memory/honour of my brother and saw a book there on the Toronto Maple Leafs. Hmm, a blue maple leaf… He was a big Leafs fan.
I think & hope my Canadian “Secret Sister” will be pleased I found this pattern for her for when we reveal ourself at the Christmas party. I started giving quilts 2 years ago after a year of practice & learning this new hobby. Its fun to work on something they will know came from my heart & fingers! When we draw our new names, I feel good when they express how they hope I draw their names. Thank you for making this pattern available for us newbees learning the art of quilting. Happy Quilting from Florida, USA!
Ellen, that’s awesome that you found this block for your Secret Sister. Happy Quilting!
I’m missing something here – why do I need to cut THREE 2.5″ squares of cream? I see only ONE in use, in the photo the upper left corner. The HST are made using the two 3 1/4″ cream squares and the two 3 1/4″ brown squares and the stem is made using the 3.5″ cream square.
This has got to be a typo because I see no other use for the two additional 2.5″ cream squares.
You only need one – a typo.
I am making mine with the Canada fabric in red and off white for a lap quilt for a friend’s military son.
Bev, that will look stunning. Happy Quilting Jen
I’m about to go to Montreal for a few days and will go into Ontario, I hope, in a few months, driving west to east on Lake Erie and up to Toronto then back east to west on Lake Erie home (we live on its south shore in Ohio). I’m planning to use your block in reds and off whites for the Montreal quilt (called O! Canada!) and mixed Civil War prints on tan for the Toronto quilt (called Cabbagetown). Do those colors sound OK and fairly authentic, Jen? Thank you for your perfect block.