Hey Everyone, welcome back to Stash Blasting Wednesday.
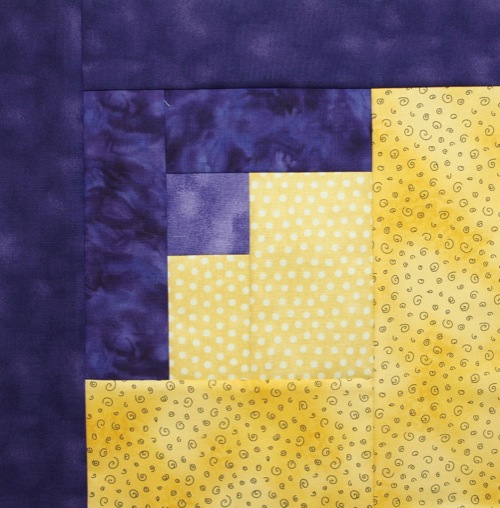
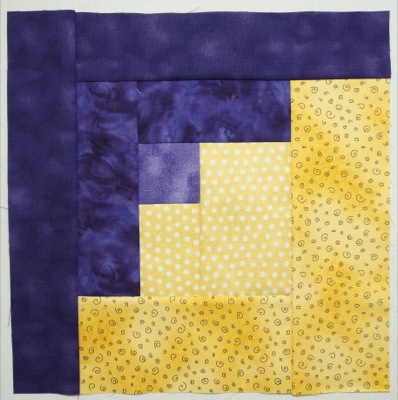
This week’s block which is the third block in my log cabin series is the off centre log cabin. The first block in the series was the basic log cabin block and the second was the courthouse steps block.
As I did with the first two blocks I have continued this block in a complementary colour scheme as well. This week is purple and yellow. I had a hard time finding enough large pieces of these colours in my scrap bin. In fact I cheated and had to use a piece from the fabric cupboard to get what I needed to make 4 blocks.
Once again the directions are for making a 12 inch finished block. The block uses 5 different fabrics – 3 purples and 2 yellows is what I chose to use.
Cutting Instructions
All measurements include the ¼″ seam allowance.
Piece A – cut 1 – 2 ½″ square from the light purple fabric
Piece B – cut 1 – 2 ½″ x 3 ½″ rectangle from the light yellow fabric
Piece C – cut 1 – 3 ½″ x 5 ½″ rectangle from the light yellow fabric
Piece D – cut 1 – 2 ½″ x 5 ½″ rectangle from the medium purple fabric
Piece E – cut 1 – 2 ½″ x 7 ½″ rectangle from the medium purple fabric
Piece F – cut 1 – 3 ½″ x 7 ½″ rectangle from the dark yellow fabric
Piece G – cut 1 – 3 ½″ x 10 ½″ rectangle from the dark yellow fabric
Piece H – cut 1 – 2 ½″ x 10 ½″ rectangle from the dark purple fabric
Piece I – cut 1 – 2 ½″ x 12 ½″ rectangle from the dark purple fabric
Block Layout
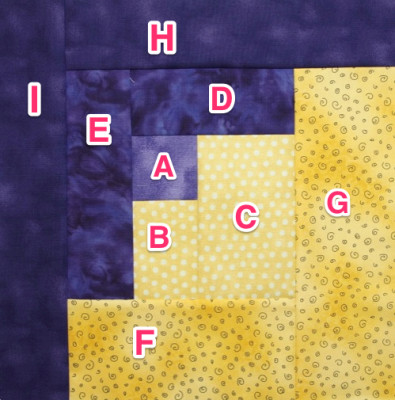
Here are the pieces shown with the corresponding letter. This time they start with A in the centre.
Making the Block
All seams are a ¼″ and all seams should be pressed towards the block just sewn on.
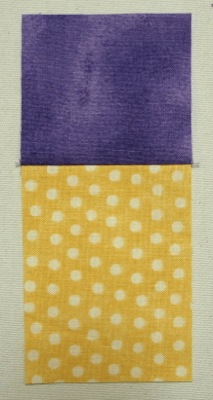
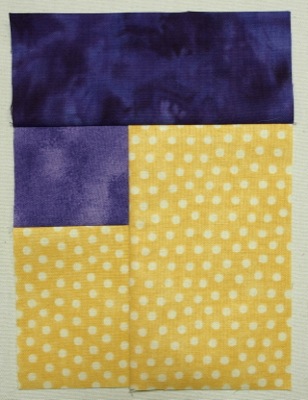
1. Sew piece A to the top of piece B.
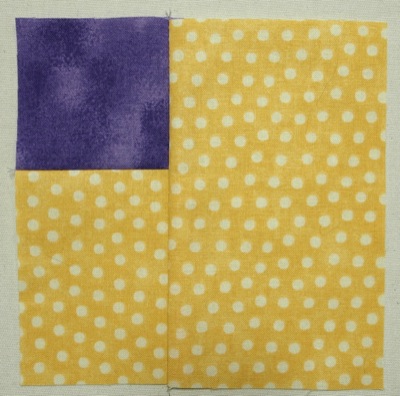
2. Sew piece C to the right side of the unit from step 1.
3. Sew piece D to the top of the unit from step 2.
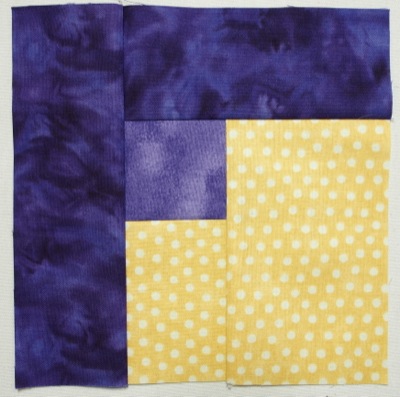
4. Sew piece E to the left hand side of the unit from step 3.
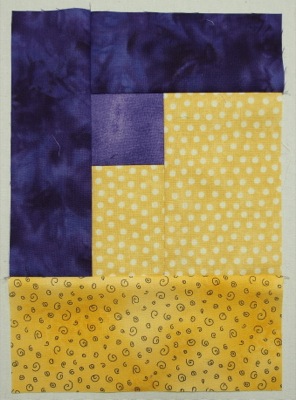
5. Sew piece F to the bottom of the unit from step 4.
6. Sew piece G to the right hand side of the unit from step 5.
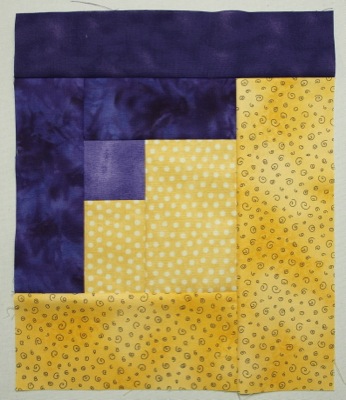
7. Sew piece H to the top of the unit from step 6.
8. Sew piece I to the left hand side of the unit from step 7 to complete the block. The block will measure 12 ½″ at this point.
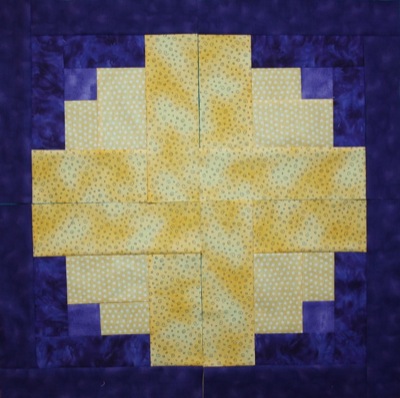
Once again I made 4 blocks and these were my favourite layouts with the 4 blocks.
Layout #1
Layout #2
Do you have a favourite block yet? Or colour combination?
See you next week for the fourth block of the series.
Happy Quilting!







I always find the log cabin block very hard to make so that it comes out the right size. A very experience quilter taught me to make the final strips 1/4 inch larger than what was called for and then it can be easily squared up. Love your block (and your blog) by the way.
Peggy, I often do that too and tell my students to do that as well. It works well to have the same size blocks.
Love the alphabet the right way around and Peggy’s tip, what a good idea.
This is a great block for a stash buster. I love the color combination of yellow/purple. I like that you repeated the same fabric within the block, instead of each strip of fabric being a different print.
Lisa, it sure is. I am hoping to get a few more made. A baby quilt would look great with this block.
Thanks Lisa. I like the repeated fabrics too as it does not look quite so scrappy this way even though I used scraps to make it.
Love your quilting ideas with wonderful, easy to follow directions.
Thanks June. The Log Cabin blocks are so versatile with so many options – lots of fun to experiment with.