

Hey Everyone, welcome back to Stash Blasting Wednesday.
Another week has come and gone and here we are at Stash Blasting Wednesday again. One more quick and easy block and then next week I will move onto something else. Once again I looked at EQ7 for a little inspiration and came up with this block called “O Chain”. I guess it is named this because if you put the blocks in a row each block has an ‘O’ shape in it and a piece connecting each ‘O’.
I rummaged through a drawer in the shelving unit that houses my stash and came out with a group of fabrics I bought in a kit ages ago at the Be Creative By the Sea Retreat which was held in Coffs Harbour, New South Wales, Australia. Unfortunately, I do not believe this retreat is being held any longer – it was definitely a good one.
The fabrics I came up with look like this – a bit of an Asian look to them. They are also a much coarser weave than our regular quilting cottons. They seem to sew together okay and press well, which is a good thing.

Fabrics for this block and quilt
The block is a 9 inch block.
Cutting Instructions
Cream Fabric
- Piece A: Cut TWO (2) 2″ x 9 ½″ rectangles
- Piece B: Cut THREE (3) 2″ x 3 ½″ rectangles
Blue Print Fabric
- Piece C: Cut TWO (2) 3 ½″ x 4 ¼″ rectangles
Plain Blue Fabric
- Piece D: Cut ONE (1) 3 ½″ x 6 ½″ rectangle

Pieces cut for one block
Putting the Block Together
Note: all seams are a ¼″
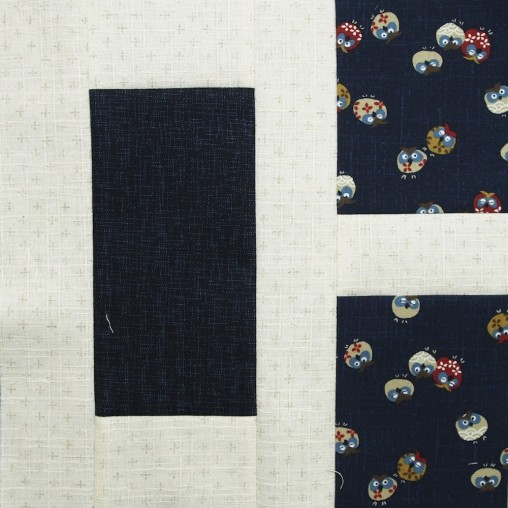
Block Layout

Placement of pieces in block
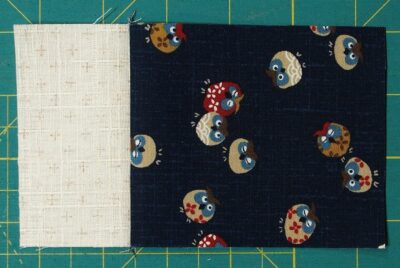
1. Sew a piece B to one end of piece D. Press the seam towards piece D.

Sew a small cream rectangle to the large blue rectangle
2. Sew another piece B to the other end of piece D in the unit made in step 1. Press the seam towards piece D.

Sew a small cream rectangle the other end of the blue rectangle
3. Sew a piece B to one end of a piece C. Press the seam towards piece C.
Sew a small cream rectangle to a small blue print rectangle
4. Sew the other piece C to the other side of piece B in the unit made in step 3. Press the seam towards piece C.

Sew a small blue rectangle to the other side of the cream rectangle
5. Sew a piece A to one side of the unit made in step 2. Press the seam towards the step 2 unit.

Sew a large cream rectangle to one side of the unit from step 2
6. Sew a piece A to one side of the unit made in step 4. Press the seam towards the step 4 unit.

Sew a long cream rectangle to one side of the unit from step 4
7. Sew the units from steps 5 & 6 together. Match up piece a from the unit in step 4 with the free side of the unit made in step 5. Press the seam towards the unit made in step 5.

Units from step 5 & 6 sewn together to create one block
Naturally, I made another three blocks as I wanted to see what they look like together. Here they are. A great thing about this block arrangement is that there are no seams to match except in the middle.

Four blocks together
As I am sitting here I just looked at the floor and saw a bin with fabric in it and thought that the fabric in it would look good in this block – more stash blasting when I have a spare moment or two.
Once I finished these four, I started wondering how this would play out in a full quilt. Back to EQ7. Wow – what a cool design popped out when I started playing with the colours in various areas of the layout. But… That’s a story for another day so keep an eye on Story Time Monday over the next couple weeks to see how it turns out. Now, I’m off to start cutting up the rest of the fabrics so I can finish this quilt top for you all.
Oh! And be sure to come back for Stash Blasting Wednesday next week as I have another great give away to share.
Happy Quilting!

Disclosure Note: I buy and use the products mentioned in this post and write about them without influence from the designer or any other commercial interests. I have included links to the products on Amazon.com and may receive a small commission if you purchase from these links. This doesn’t cost you any more to purchase these items but it does help me maintain this website, so I hope that you will please use these links.

Hi Jen,
I always look forward to your blogs and like how you have a different focus each day. Very creative! I also have EQ7 but I haven’t used it yet. Any suggestions on how to get started? It looks a bit scary and confusing. Thanks.
Thanks Linda. I suggest taking online class – I know that Quilt University had some. QU is closing at the end of the year but many of the instructors are moving over to The Academy of Quilting to teach so maybe the EQ classes will be there. Also the EQ website is a great resource. Just playing and trying out things will also help to familiarize yourself with what EQ can do.