

Hey Everyone, welcome back to Stash Blasting Wednesday.
First of all I must apologize for the quality of my photos this week – my husband had a wedding to shoot and took the camera I usually use for my photographs with him and so I had to use the point and shoot which just doesn’t do quite as good a job. Oh well, I did the best I could with the tool I had.
Last week on Stash Blasting Wednesday I started Improv Designing With a Jelly Roll and a Charm Pack by sewing the strips and cutting them up and sewing again. I made a couple of different blocks and thought I had an idea of what I would do with them at the end of last weeks post.
Boy did that idea change once I got going again today.
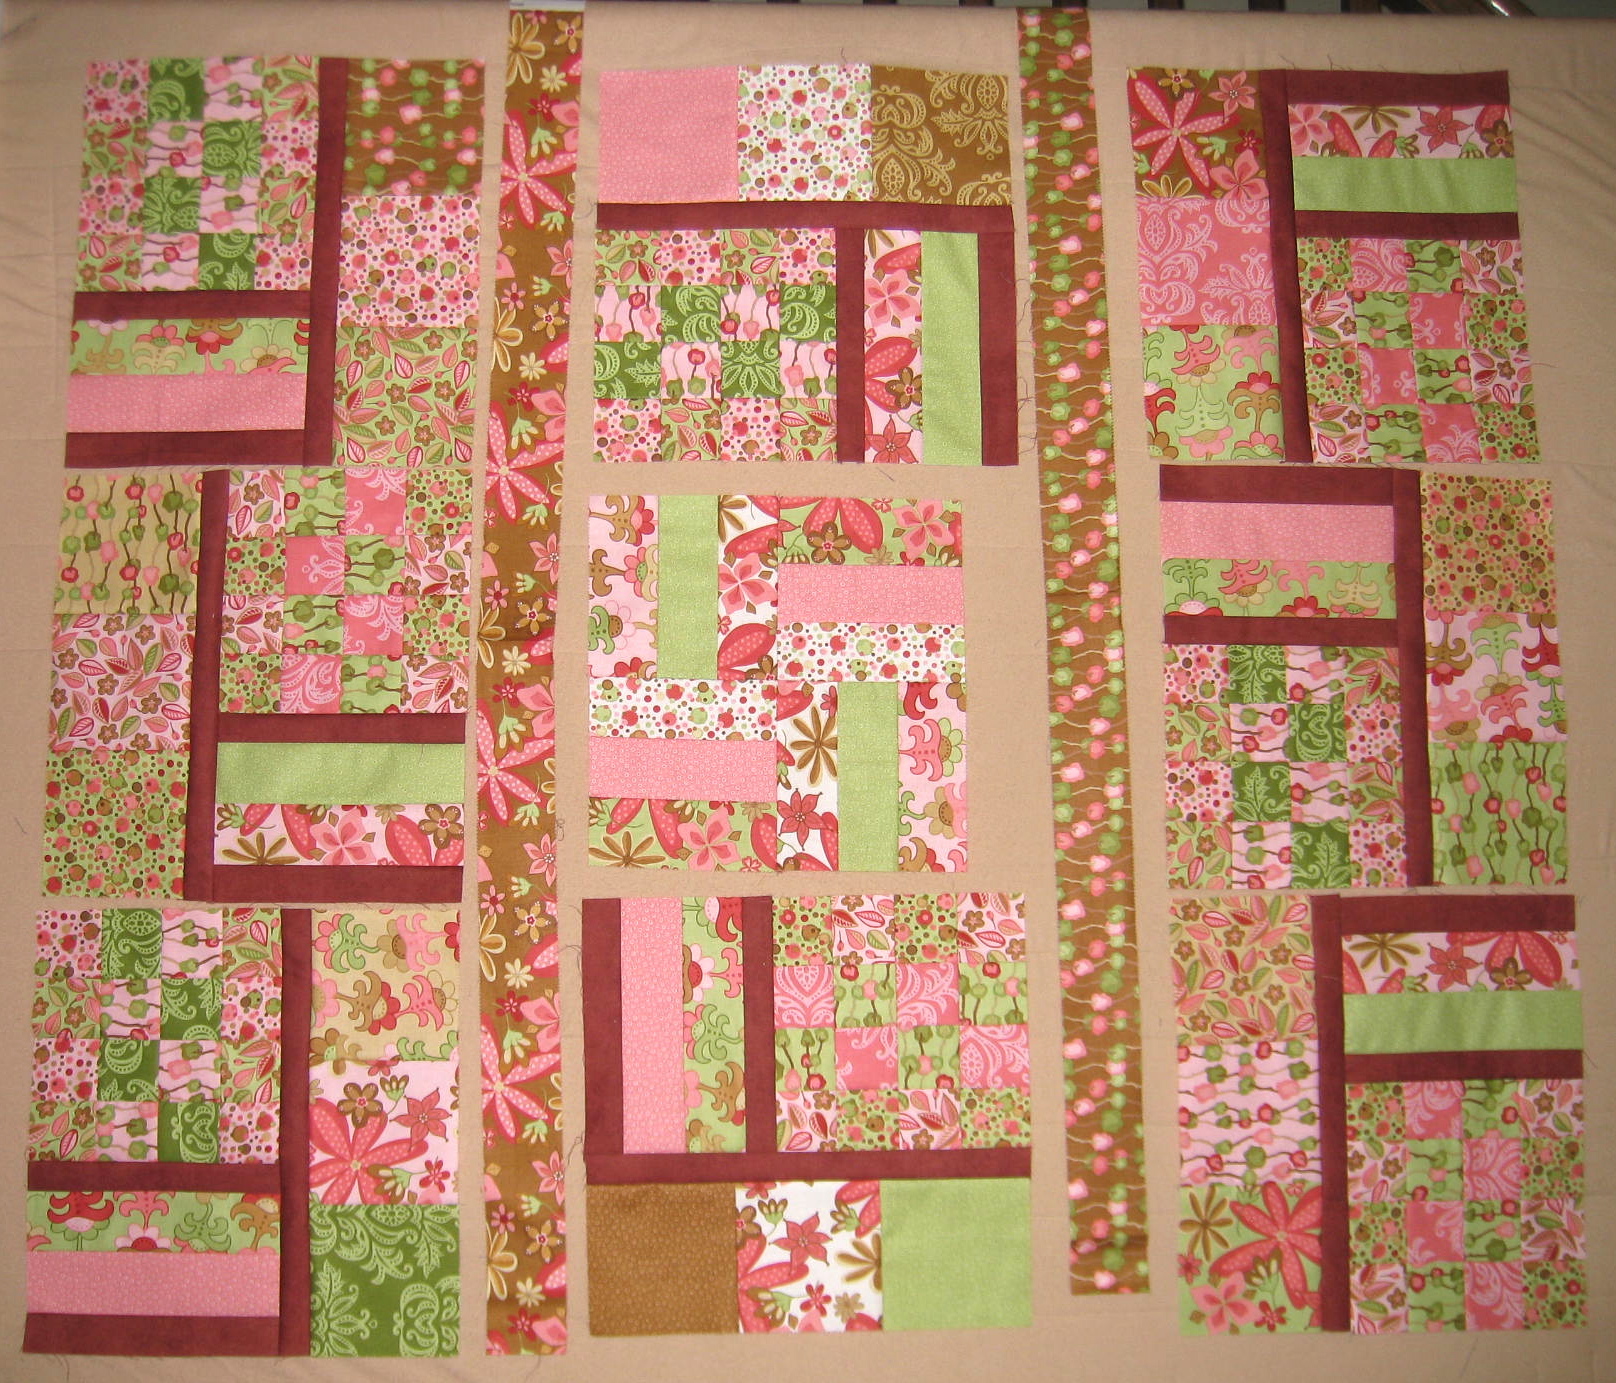
This is what I had on the design wall when I started out today to finish up this quilt. My plan was to make the quilt as a strip quilt with 3 large sections made up of the blocks from last week, 2 strips of charm packs and a couple of skinny sections.

The original idea
As I looked at it I thought what if I put these 3 different shapes together into large blocks. I had to add the 1 inch sashing strips to define the different sizes and blocks as the fabrics just all blended together resulting in no definition between the pieces. This is the large block I came up with.

The large block
The first configuration is pretty simple and has the rail fence blocks running down the centre. I wasn’t quite as keen on this as I thought I would be. The other issue is that the rail fence blocks are smaller than the other blocks and will require some filler.

The first layout
I still had two of the 16 patch blocks left over along with four of the strip blocks and really didn’t want them left over so made a couple of more blocks. I removed two of the rail fence blocks and placed them in the centre section top and bottom.
Centre block surrounded by the other blocks
With all of the left over pieces I made a centre block. Here it is in the centre of the quilt.

New centre block made with the leftover pieces
I am not keen on the skinny strips on either side of the centre section so I have moved them to the sides as well as changed the block configuration around. Much better.

Skinny strips moved to the sides
Now what if there was the rail fence block in the middle of this layout?

Rail fence block in the middle
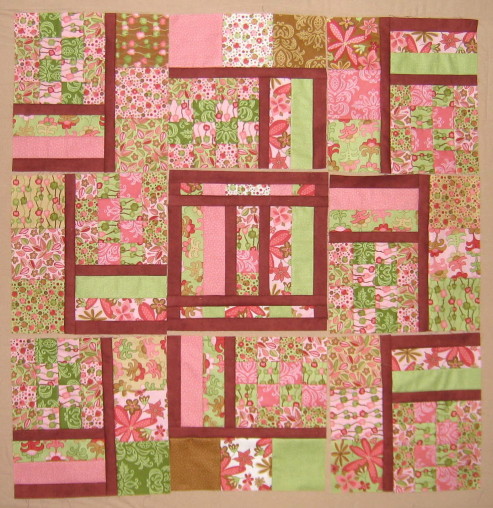
Oh boy – now which layout should I use and which centre block. What do you think? Leave a comment and let me know which is your favourite – Layout #1, Layout #2 or Layout #3.
Layout #1
Layout #2
Layout #3
I have one other issue with this design and that is the blocks which I thought were 14 inches square have turned out to be 13 ½″ x 14″. The reason being is that the charm squares when 3 are put together equal 14 but when added to the other section of the block were a half inch short. Depending which layout I use to put it together will determine what I do to fix the problem.
Happy Quilting!


Layout 3. It looks like a Modern quilt, really interesting and my eyes kept moving all over it trying to work out what’s what, whereas the other two I get stuck in the middle. Does that make sense?
Layout 3 seems to be the best one!
I like #3 also. I would move the three squares top center & bottom center – so the pick square is not next to the pink bar. Same as bottom – green square next to the green bar. Very nice – cozy looking.
I like layout #1 the best. it spreads the dark sashing fabric out a bit more regularly….I would suggest you be sure to use some of that sashing in the borders and/or binding.glad to see others have this same problem. I could spend my whole life coming to a final conclusion on a quilt like this. really lovely fabrics. s
I prefer #1. The colors are more evenly spread out and I prefer the rail fence to the other arrangement for the center.
Layout 3–the others are too busy. Your blog is one of the few crafter/quilting ones that I read every single entry. Keep it up.