Hey Everyone, welcome back to Technique Tuesday.
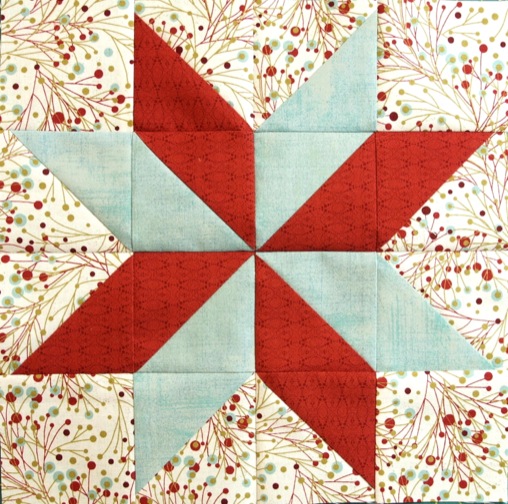
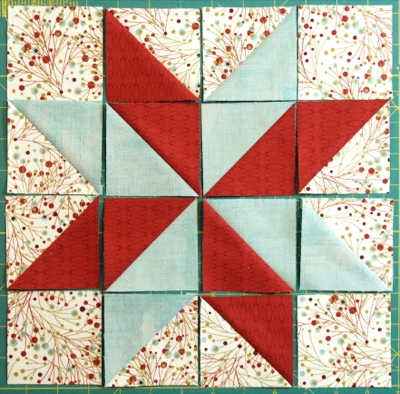
Here is a super-easy method to make a Lemoyne Star using half-square triangles.
The other day I had a request via e-mail to help find a pattern to make a 10″ LeMoyne star block. I did a search of my own on the internet and didn’t come up with a whole lot. I thought okay why not just do a blog post on how to make one. So here it is.
The LeMoyne star is an eight pointed star that can be made in a couple of ways. Back in August I did a post on how to make an eight pointed star which used set in pieces and diamond shapes – not the easy method.
Here is a much easier method using half square triangles.
I chose to make my block with three co-ordinating Christmas fabrics which I have had in my stash for many years. In fact I bought the fabric at Hetties Patch in Adelaide, South Australia. It is the Figgy Pudding line from Moda. The fabrics need to contrast enough so that the star pops off the background. I chose a light background with a medium and dark fabric for the star.
Cutting Instructions
Background
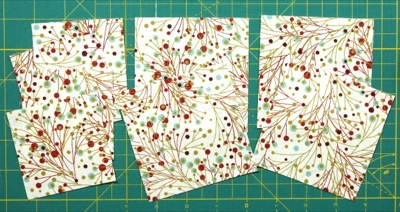
- Cut 4 – 3″ squares for the corner pieces
- Cut 4 – 3 ¾″ squares for the half square triangles
Star Fabric #1
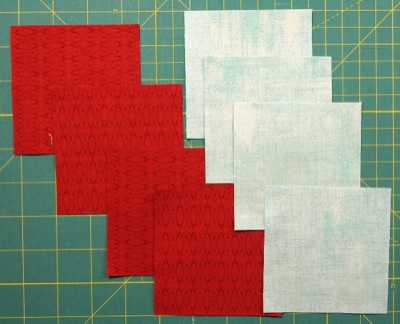
- Cut 4 – 3 ¾″ squares for the half square triangles
Star Fabric #2
- Cut 4 – 3 ¾″ squares for the half square triangles
Making the Block
1. Follow the instructions on how to make half square triangles as posted previously on Technique Tuesday. Make 4 HSTs with the background and star fabric #1, 4 with the background and star fabric #2, and 4 with the 2 star fabrics.
2. Square off each half square triangle to 3″. I like to use the Squaring Up Ruler from Quilt in a Day.
3. Layout the squares and half square triangles as in the photo below.
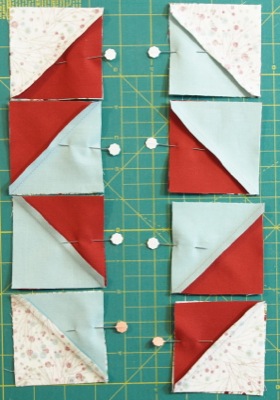
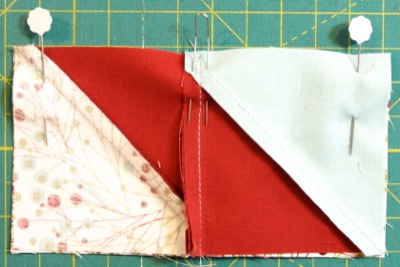
4. Sew together squares 1 & 2 in each row and squares 3 & 4 in each row. I pin them together on the side that needs to be sewn so as not to get any of the pieces turned around – this will help eliminate any reverse sewing.
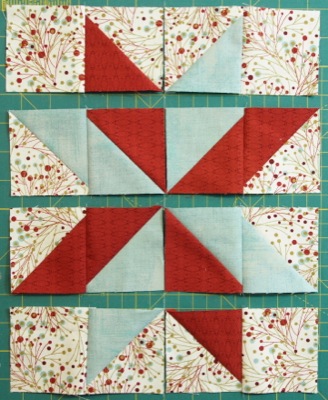
5. Press the seams in row 1 & 3 towards the first and third squares, in row 2 & 4 press towards the second and fourth squares. This will ensure they all next together when the rows are sewn together.
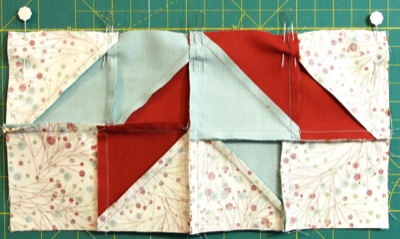
6. Lay the units back out as they were in step 3. Now you have the option of sewing them together as rows or as squares. I chose to sew them together as squares.
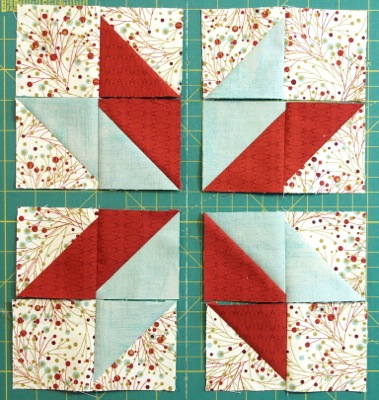
7. Sew the first units of rows 1 & 2 and 3 & 4 together to make two squares. Repeat with the second units in each row. You may wish to pin or not. There will be 4 squares total. Press the seam in the first 2 squares made towards the top of the block and the second two squares towards the bottom of the block.
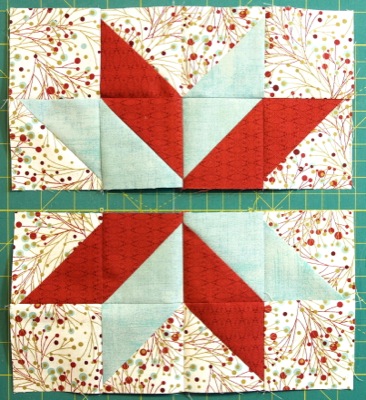
8. Lay out the squares as they were in step 3. Sew the top two squares together and the bottom two squares to create two halves. Press the seams in opposite directions.
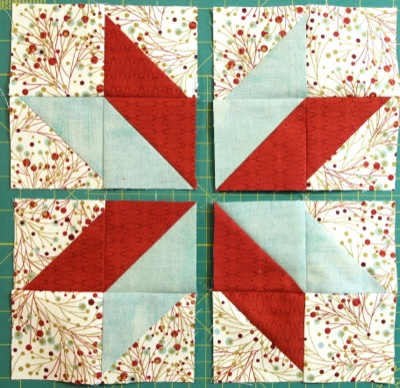
9. Sew the two halves together to create the 10 ½″ block. I always pin when sewing units together with more than one seam to match. Press the seam in either direction or make a pinwheel centre if you know how – this will just allow the middle of the block to sit flatter. If you have already pressed the seam the pinwheel will not work very well. I pressed before I thought to make the pinwheel.
An easy way to make the LeMoyne star – no cutting diamonds, no setting in pieces and no templates.
Happy Quilting!

Download these instructions as a PDF formatted so you can print them out.
BONUS cutting instructions for 9 LeMoyne Star sizes 4″ to 20″





Hi Jenn!
Thanks so much for this wonderful easy LeMoyne star block pattern. I love the LeMoyne star, but didn’t like the set-in diamond shapes that it usually required. I am in the process of making a couple of medallion quilts and was looking for a wonderful block for the second last border of one of them, and I do believe that I’ve found it!!!
Thank you soooo much!
Linda
Right on Linda. Thanks so much. Please share your finished quilt with us when you have it finished.
This is lovely! Thank you!
Thank you Twila. Glad you like it.
hi jen! thanks for your post – i wanted to use a lemoyne star for my friend’s engagement quilt and this is incredibly helpful. what would the measurements be for a 12″ block?
The measurements for a 12 inch block would be to cut the background fabric 4- 3 ½″ squares and 4- 4 ¼″ squares, Star #1 fabric 4- 4 ¼″ and Star #2 fabric 4- 4 ¼″ squares. The half square triangles are squared down to 3 ½″. Enjoy and have fun. Send a pic when you are done and I will feature it here on the blog.
BEST Lemoyne star pattern I have seen, and I have been looking for A LONG time!! Thanks for adding how to press the seams throughout the pattern!
Thanks Sharon, glad my post has been helpful for you. It is a lovely block. Jen
Thank you so much for this! I have been searching online for an easy method to make a Lemoyne star block!
You are most welcome Jane, glad you found it. Have fun!
I have been looking for this pattern for a while. I did not want to pay $35 for the tool. Thanks you so much!
Jerry You are most welcome. Jen
I am a novice at this. I’ve never made a quilt before, but I really want to try this, and I am hoping I can handle this pattern. I just have one quick question. Is there somewhere on your site that will help to calculate exactly how much fabric I will need to purchase to make each square? I am trying to measure how much fabric I will need to make a quilt large enough for a queen size spread.
Thanks!
Hi Jackie I’m afraid that I do not have anything to calculate the yardage on my site but a 3″ x WOF strip will yield 12 squares which will make 3 blocks. The 3 ¾″ x WOF strips will yield 10 squares which will make 2.5 blocks. Figure out how many blocks you are going to make and then you will be able to figure how much you need. For example: 12 blocks you will need 4 – 3″ strips and 5 – 3 ¾″ strips of each fabric. Then 4 x 3 = 12 inches and 5 x 3 ¾″ = 18.75 inches. I always add on another few inches just in case of a cutting oops or if you are pre-washing the fabrics then they will shrink so it is always a good idea to buy a bit extra. I hope this helps. Jen
Hi Jen! Your instructions are fantastic! I am completely new to sewing and fully understand your step by step instructions!! The pictures for step 1 are great. You really helped me put a visual to my project. Thanks so much for taking the time to explain in great detail how to create the Lemoyne Star Block.Thanks!!!! Madeline
You are most welcome Madeline. I glad you found them and that they were such a big help. Jen
I’m so happy I stumbled upon your written instructions as I’d forgotten about using HST for this star. This is keeping me from spending $49 plus shipping for the Accu Die cut, I’m pretty sure that I would not get my money out of it for just one project that I want to make using this design. My stars will be in solid fabrics as well, hence making just HST’s will work very well. I fell in love with the “Rainbow Lemoyne Star Pillow” by Sherry Rose and had decided that I just have to make it. I purchased all fabrics for it today, so I can now get started on it immediately. Great job with all of your photography, It helps not to have to visualize it all.
Heidi, that’s awesome that my post has helped you with your project. Happy Quilting Jen
I need to print this. Where is the option to print?
Hi Edna,
There is now a button at the top of the post for a print option!
Thanks,
Jen
Ive been looking for the perfect block for the front of a sweatshirt or bag and this was it. Im no expert quilter at all so im very VERY surprised at how beautiful this turned out. Thank you so much for all your instructions and pictures!!
I have decided i think ill make a bunch more and make a quilt. Thank you for inspiring me. 🙂
That’s fantastic Hannah, so glad you enjoyed making the block and inspired to create more.