Hey Everyone, welcome back to Coffee Talk Saturday.
The other day half the members of the fibre arts group I belong to went to an Encaustic workshop with Patty Chapman of WaxDreams, a local Encaustic artist in Barrie. I had no idea what I was going to be doing when I signed up for the class but I am always up to learning something new. I didn’t think I had ever heard of this art form before but it turns out that I have as there was an encaustic artist at Ridge West Gallery last fall.
There are different forms of encaustic art and they all involve wax and the heating of the wax to create the artwork. Some forms use wax and resin mixed together – this is the form I saw last fall. I was quite intrigued when I saw it last year.
Our workshop involved only Crayola crayons, hot irons and a hot stylus. No chemicals whatsoever were used in our creations. Everything we used to make our artwork could be recycled at the end of the workshop as well – so no waste to the landfill. I can’t say that for my quilting seeing how there is no place to recycle bits of fabric that are too small to keep as scraps.
No special abilities or techniques are needed to create these masterpieces. All one needs is a willingness to play and have fun.
The crayons are melted on the iron then transferred to the paper. Glossy finished paper works best such as glossy card stock, glossy bristol board or photograph paper.
The iron is used as the paint brush and what a paint brush it is. Now the iron has to be a flat surface with no ridges or holes in it so that it can create a vacuum against the paper and transfer the wax. The possibilities are endless and believe me you never know what you are going to get. With each set of the iron a new design emerges.
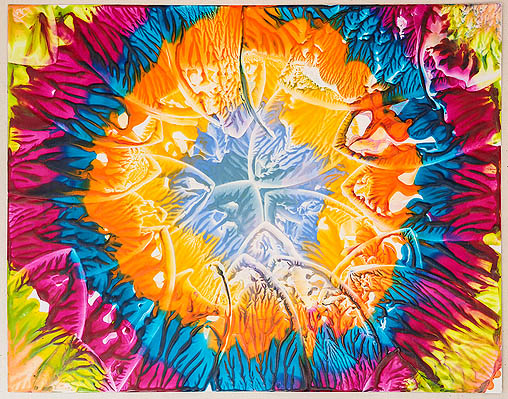
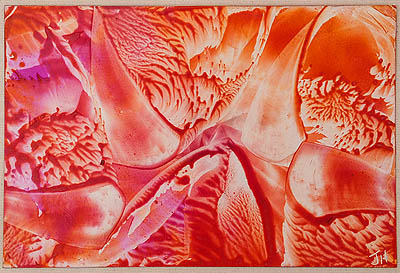
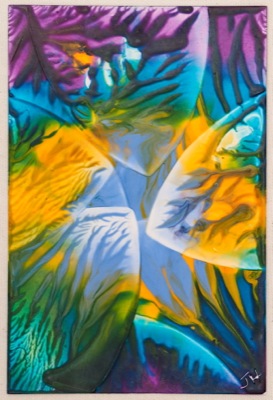
I had so much fun I just have to share my creations with you. The one at the top of the page I have named, Looking In.
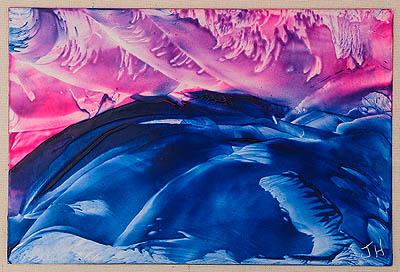
Creation 1 – Storm Brewing
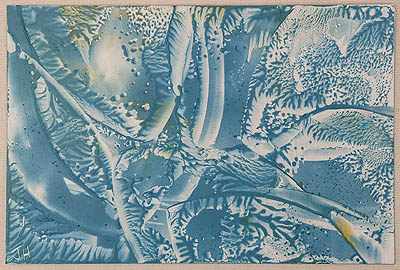
Creation 2 – Ice Crystals
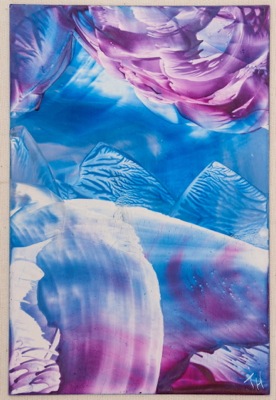
Creation 3 – Blue Mountains
Creation 4 – Stalagmites
Creation 5 – On Fire
Creation 6 – In A Bubble
I bought a kit so I can play some more at home and I just happen to have a 96 box of Crayola crayons waiting to be melted. Now to put it all onto fabric and then add some thread play – oh I can’t wait.
Happy Quilting!






Jen,
Those are amazing! I have a couple questions. How do you transfer those to fabric (or can you) and how do you clean your iron after? I would love to do this on fabric. Also, does it make the fabric stiff or can you use it for sewing like any other dyed fabric? Can you wash it afterwards? Any damage to your washer?
Linda, I am not sure how to transfer to fabric – will have to experiment with that so will let you know. No idea how stiff it will make the fabric but when I figure it out I will let you know. The iron we just wiped off on paper towel and seeing how the wax was still melted it worked like a charm.
Haven’t you been having fun?! I love these colors and your designs, just gorgeous.
Yes, Juliet it was so much fun. Can’t wait to make some more.
What a fun looking “new” art project. I don’t dare try it or I will have far too much more stuff around here to play with!!! (I usually dive in with both feet and then try to figure out where I am keeping the things I need for projects!)
Take your fabric scraps outside for the birds to pick and use for their nests! I throw my hair from my hairbrush outside for them this time of year! They will love you for it!
Claudia thanks for the tip re the scraps. When spring arrives and the birds return I will do just that. The painting was lots of fun and yes I bought the kit so I can do it at home. When I will get to it I am not sure, LOL. When I have some spare time.
The wax images should transfer to fabric quite easily; just lay the design, face down, on the fabric, place a tissue over (so that you don’t transfer wax to undesired places) and iron slowly (and with the heat turned up a little from where were using to make the wax designs); lift the card from the first corner and iron the rest if the imprint is Ok under that corner. Remove the card from the fabric as you iron. The waxed fabric will be stiffened but it might be possible to wash the wax out and leave the colour if the stiffness is a problem.
Barry, thank you for the info. I will give it a try and see what happens.
Interesting ! I have done the coloring in technique, but am going to try to go bigger and more daring. Thanks for sharing.
I’d also be interested in transferring to fabrics. Maybe you need to experiment and then do a tutorial
While I appreciate your having fun exploring with heating crayons to make art … this is NOT Encaustic! Encaustics is a fine art process that involves beeswax, resin & fine pigments … crayons are not included in this kind of process. Just a little FYI.
There are better encaustic paints to use than Crayola crayons but melting crayons is an encaustic process and the result is encaustic art.
Encaustic art doesn’t have to involve resin (and is a much safer process if it doesn’t) or pigment – just heat.
Jen You can use up all your tiny pieces of fabric by starting off with a piece of calico the size of a medium picture frame. Next literally throw small(teeny weeny) pieces of fabric on to the calico abd then cover with some net or see through material .Finish with a variety of threads and stitches in random colours and squigkes a lovely unique piece
Elizabeth, that sounds like lots of fun and I can use it for at blog post as well. Thanks for sharing the idea with me.
OH MY GOSH! I am going to get some crayons tomorrow. This looks like a really neat technique. I will also be looking for a class so I can learn more about it.
Christina it was so much fun. You really should give it a try.
Did you use the fabric crayons or just regular crayons?
Robin, for these pieces we used regular crayons as we were working on paper. I am going to try the regular ones on fabric and see how it goes especially since there are many more colours available in regular as opposed to the fabric crayons.
Please explain how to use iron and stylus? What kind of iron and stylus? Your work is beautiful!
Agatha, this was a fun class I took one afternoon using wax crayons, paper and a flat iron with no holes. The ones that are used for waxing skis have a flat head, also some craft irons do as well. The craft irons are easier to manage as they are smaller. The stylus was just a dental pick I think to make extra lines in the hot wax.
Hi Jen Would love to know more about this beautiful work, regards Elizabeth x
I just did this once Elizabeth and thought it would be something I would like to pursue further but sadly have not done it again.