Hey Everyone, welcome back to Stash Blasting Wednesday.
Last week I highlighted one of my favourite quilt blocks called the Card Trick block and how to make it. It is a block made with all triangles so a bit tricky if you are just learning how to quilt.
One of the comments on the post was that he saw it as rectangles and squares rather than half square triangles and quarter square triangles. I started looking at the block and saw the same thing – rectangles and squares – I had never looked at it like this prior to the concept being pointed out to me.
It is very interesting how our mind sees one thing one way while another’s mind sees it a totally different way.
So his comment got me to thinking and I thought why not give it a try with the rectangles and squares and see how it goes together.
Here goes with my method using squares and rectangles.
I’m just going to pull scraps out of the bin for this piece since I don’t have an actual pattern to work from and it is a bit of an experiment for me.
I decided to go with blue and yellow.
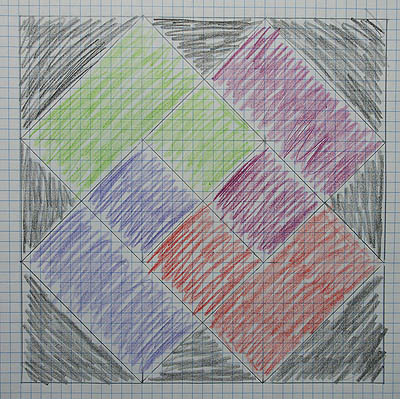
First though I drew a graphic of the block on graph paper to figure out where the pieces needed to go and calculate the size of the pieces. I even did some colouring with pencil crayons.
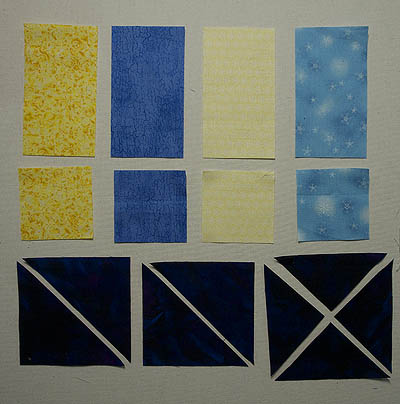
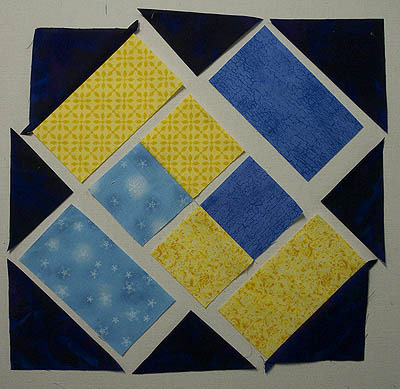
Pieces all cut and ready to begin.
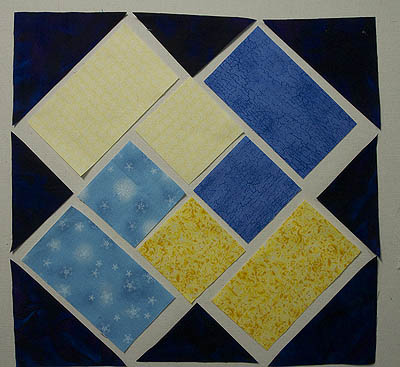
Once again I laid out the pieces in the position they appear in the block so not to get anything turned around or mixed up.
I decided I wasn’t happy with the light yellow so changed it for a darker one.
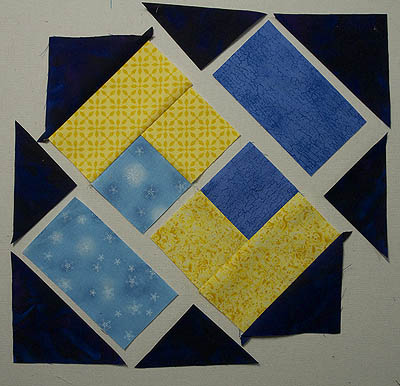
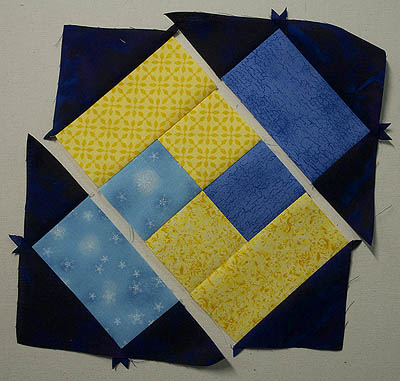
This block is sewn together on point which means from corner to corner going in one direction. I have started sewing the centre section together first.
The black corner triangles sewn to the coloured rectangles and the centre for squares sewn into pairs.
The square pairs sewn to the appropriate rectangle/triangle combo.
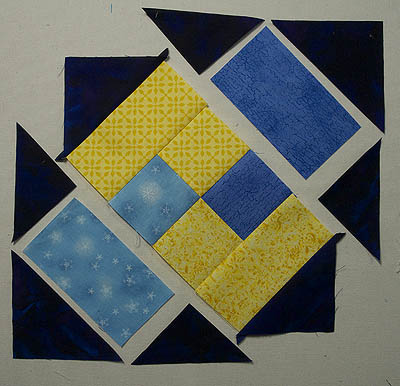
Then the two sections sewn together to make the centre of the block.
The small triangles also known as setting triangles are sewn to the rectangles first.
Then the corner triangles are the last to go on.
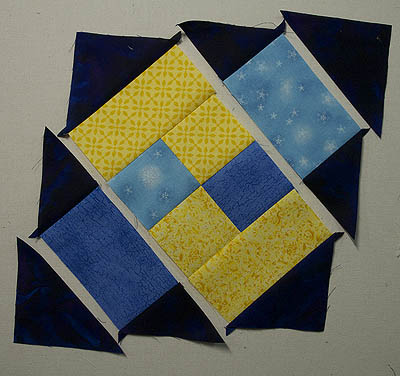
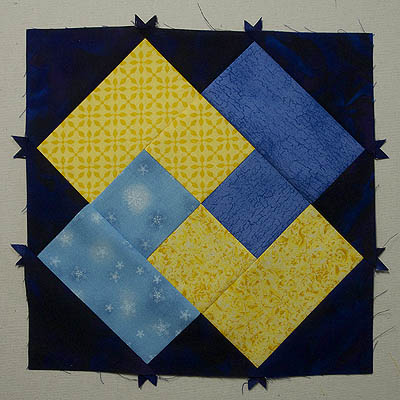
Finally the side pieces are sewn to the centre piece to create a 9 ½″ square.
This method is definitely quicker and easier than sewing all of those triangles together but I am not sure I like the final look as well. I shouldn’t have changed out the yellow as I don’t have enough contrast now between the two yellows and it is hard to see the card definition – you know what they say always go with your first choice especially in multiple choice exams.
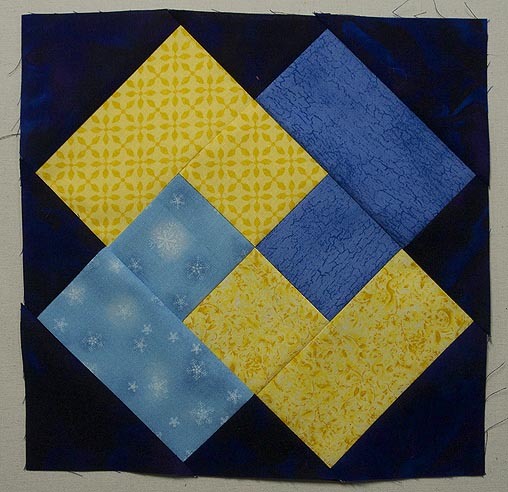
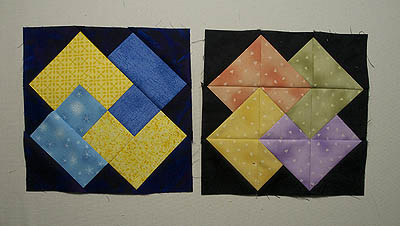
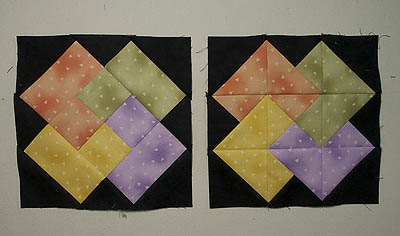
Here are last week’s block and my test piece side by side.
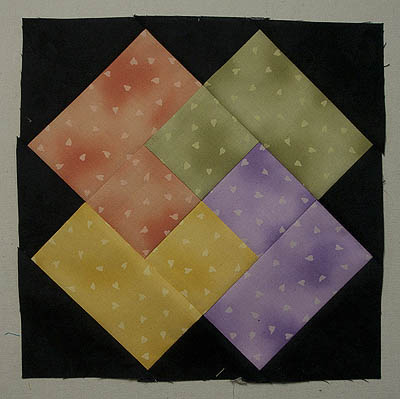
I created another block with the fabrics I used for the card trick block last week so I could compare the two. And this is what it looks like.
Here they are side by side. I should have been more careful with where I placed my centre squares – on which side of the rectangle. In today’s block (on the left) the cards are overlapping in a counter clockwise direction and in the last week’s block (on the right) in a clockwise direction. Paying attention to these types of details is a good thing if you want the blocks to look the same.
Pretty much the same result with the two construction methods but I do find that the first constructions method has just a bit more dimension and definition in the block with all the different seam lines.
Depending if you want quick and easy or slow and fiddly will determine which method you use or I use. The alternate construction method is definitely better for a beginner quilter.
Happy Quilting!





I had a pattern that was made this way. I have done two tops with this technique.
Jen, I agree with you that the first method gives the details and magic of the block. The second method looses the impact for me.
Yes, Diane the first method does provide the magic of the block. I to like it better.
Although the second method’s construction appeared to be simpler, I much prefer the lines of the first try. It makes the design pop! I think I will give this block a try – and use lots of spray starch to lessen the chance of distortion on the bias.
Donna, the second method is much easier but like you I agree that the lines in the first method are what make the design pop. Have fun playing with this one – spray starch is a good idea on the bias pieces although I never use it.
I have not decided which method I want to use but there are not any instructions as to what size you cut the pieces for the second way using blocks and rectangles. Could you tell me what those are. I love this block either way.
Thank you
Debbie
Hi Debbie I will have to figure them out and get back to you with the dimensions as I did this block quite some time ago. Jen
Do you have the sizes to cut the material for this block please
I luv the Card Trick Block, also Blanche Curtis Gilley!!
This is the original Eleanor Burns method I learned many years ago and have always taught it this way, especially to beginners as they are always successful right away. And I think it looks better.