
Hey there, welcome back to the Quilt Challenge that Ruth from Arbee Designs and I are having fun with this month. It is almost the last day of July so next week we will have to call it the August Quilt Challenge.
If you missed my last post you can find it here, July 2021 Quilt Challenge – Week 2.5. And to learn all about the instructions/guidelines for this week check out Ruth’s blog post.
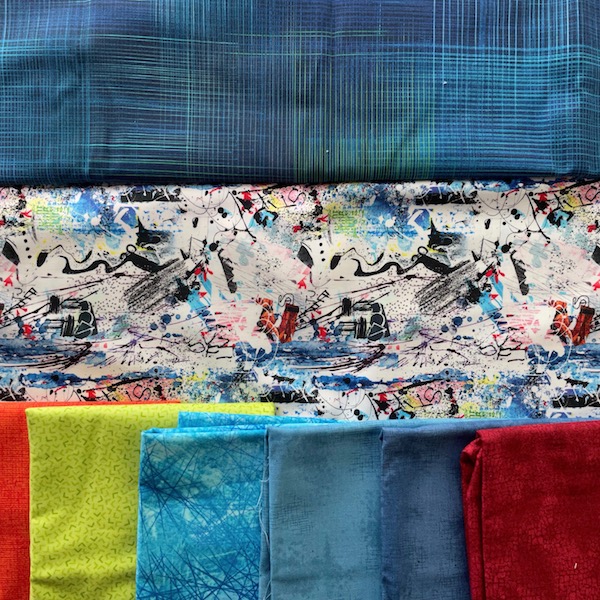
The last two blog posts I did line drawings of the busy fabrics I had chosen. I wasn’t sure which line drawing I would go with and decided that the squiggles and splashes would be fun to do.
I decided that I would do this block as an appliqué block since it had so many squiggly lines and not easy curves to piece. I set about gathering the coordinating fabrics that I chose back in my post, Quilt Challenge – Week 1. I definitely had enough to put a different fabric in each shape.
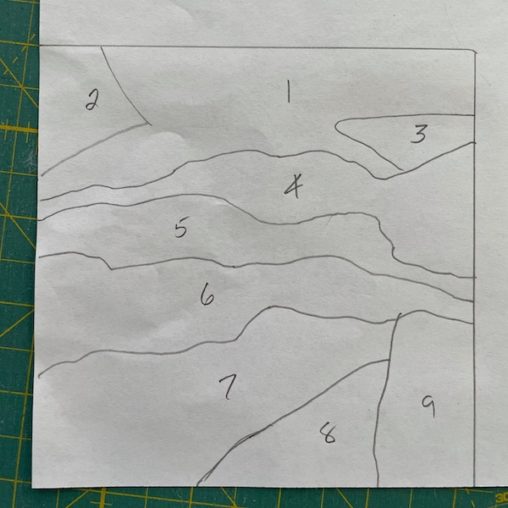
After numbering all the sections as seen in the photo above I traced the pieces from the back of the paper onto fusible web. If you are new to fusible web check out my blog post all about how to use fusible web. There are many different types of fusible web some with paper on both sides, some with paper on only one side, some with no paper and some that have a tacky feel once on the fabric making it easy to reposition before the final fusing in place. This is the type I like best.
I’ve traced my pieces and left some space around the pencil line. I will cut on the pencil line once the piece has been fused to the fabric.
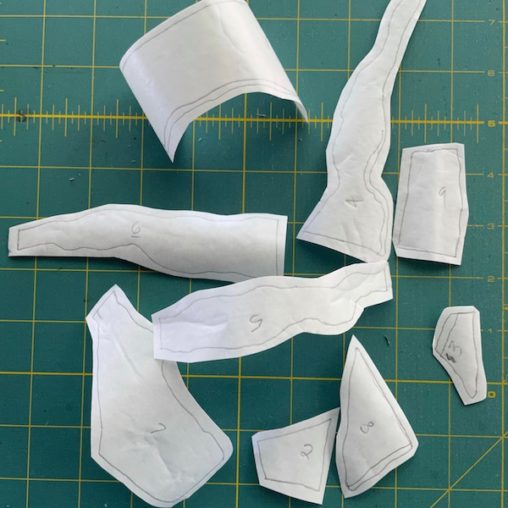
Remember to fuse to the back of the fabric otherwise you will be starting over from scratch. Trust me everyone does it once even my husband when he was helping me get ready for a workshop I was teaching. He had to start over from scratch.
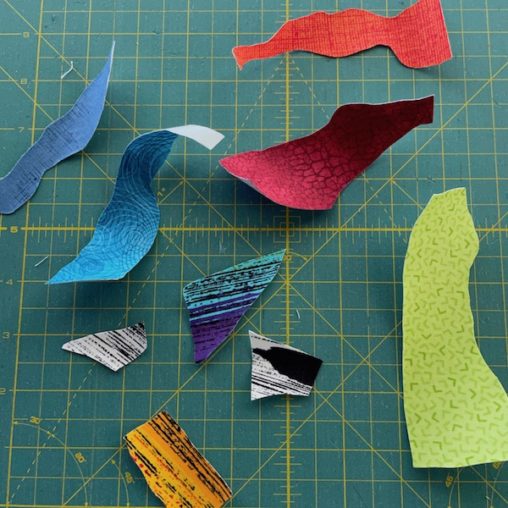
Now is the time to cut the pieces out on the lines.
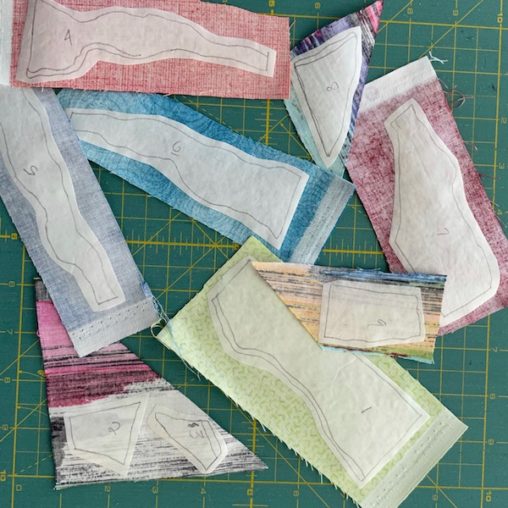
Once the pieces are cut out I decided to build the block all as one unit. Here’s a great tutorial on building an applique as one unit, in this case a Pink Dahlia.
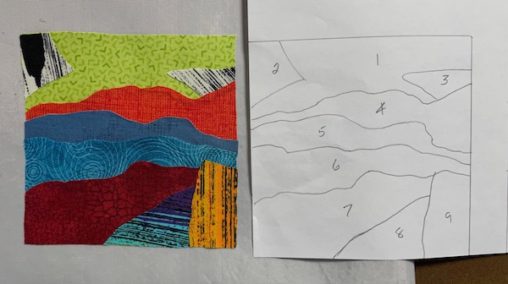
Once it is all fused together I can then treat it as one unit and in this case it is a five inch square. What I do with it next I’m not sure so I will have to wait until next week for the next set of instructions.
Until then……
Happy Quilting


