

Hey Everyone, welcome back to Technique Tuesday on Thursday this week.
Quilt as you go is a very popular method of quilting and implies just that quilt as you go. The quilting is done with the piecing through all three layers of the quilt. When the piecing is done the quilting is also complete.
Most times the quilt is made up of several blocks often using enough for a king size quilt. This method of quilting makes it very easy to make a king size quilt manageable with a domestic machine.
My piece that I have created is just one 16 ½″ block of black and white fabrics. To begin I cut my piece of batting and drew lines at 2 ½″ intervals starting from one corner to another. In the end though I really only needed the corner to corner line to start. I used my Trace ‘n Mark pen to draw the lines on the batting.

Lines drawn on batting at 2 ½″ intervals
Next I cut a backing the same size as the batting.

Backing cut and on top of batting
I had a whole bunch of pre-cut 2 ½″ strips I had bought years ago for another project and well there they sit in the drawer so I figured why not I’ll use them for this. The first strip I lined up with the line that ran from one corner to the opposite on the batting.

First strip in place from corner to corner
The second strip I placed on top of the first.

Second strip in place and ready to sew
Using a walking foot or dual feed foot is essential since three layers are under the foot. By using either of these feet the fabric will be fed through evenly and there will be no puckering or shifting. Sew the two pieces of fabric in place with a ¼″ seam.

Strips sewn together with a ¼″ seam
Strips sewn on either side of the black strip. Press towards the fabric on top.

Two strips in place
Continue sewing the strips on. I alternated from side to side just to prevent any shifting of the backing. As well I used black thread for piecing so that it would blend in with the backing.

More strips added
Once all the strips were on I turned it over and trimmed off all of the excess fabric to square up the piece.

Back side of piece ready to be trimmed
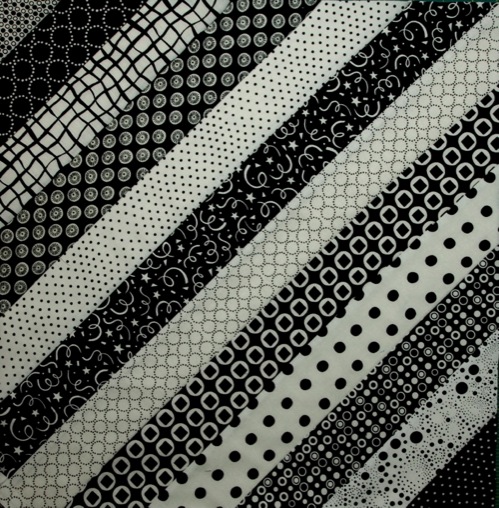
This piece is a stand alone piece so all it needs now is a binding.
Piece squared up and ready for binding and embellishing
If I were making blocks for a quilt then the finishing would be a bit different but I’ll leave that for another post.
Happy Quilting!


Thanks Jen. I haven’t tried QAYG yet, but was thinking of doing some Christmas potholders this way.
Thought I would share my king size quilt I made using this technique
http://web.missouri.edu/~ajkpq4/ISLT7360/final-project/final-website/black_white_king.html
Very nice BroAJK. Thanks for sharing.
In England we call the black and white quilt ‘stitch and flip’. with ‘quilt as you go more often squares worked and then attatched together with borders worked and attatched again seperately like BRO AJK
I love quilt as you go! There’s a technique by Betty Cotton that is really cool. The quilts are reversible when you’re done. Nancy’s Notions carries a batting called ‘no-shift batting’ that’s only 18″ wide which makes it perfect for quilting small sections without worrying about shifting. You press the layers with high heat and steam and it forms a temporary baste – you can reshift and press before quilting if you need to. Enjoy!
Maria, thanks for sharing. I will have to look into this batting.