

Hey Everyone, welcome back to UFO Spotlight Saturday.
Well, the last post for The Wreath Quilt has finally arrived. It started out as a small Stitch Along Sunday piece and has ended up as a wall hanging at 26 inches square.
Last Saturday I left off with wanting to add something to the centre of the quilt. On Wednesday I revealed what I did for the centre of the piece – another small wreath with a brown background.
I couldn’t leave well enough alone and just finish it off once the centre was added. No I decided that the corners needed something.
So I created another large wreath on the brown background and cut it into four squares. Now to figure out how I want to put these pieces into the corners.
The Corner Pieces
Option #1
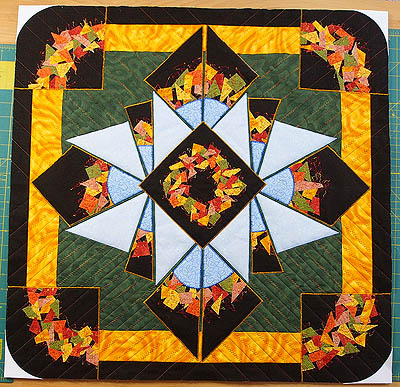
The squares placed flush with the corner of the yellow border. What I don’t like about this option is that the corners of the squares don’t quite line up with the corner sections of the wreath. I do like how the piece is framed in a circle with this positioning.
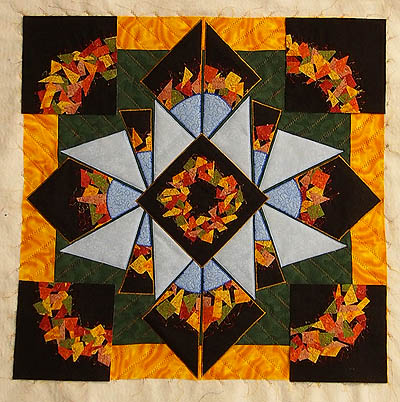
Squares flush to the corners
Option #2
Placing the squares so that the wreath part on the square is lined up with the yellow border creating the illusion of a curved corner. This placement means I need to add in another border of brown to finish off the edges.
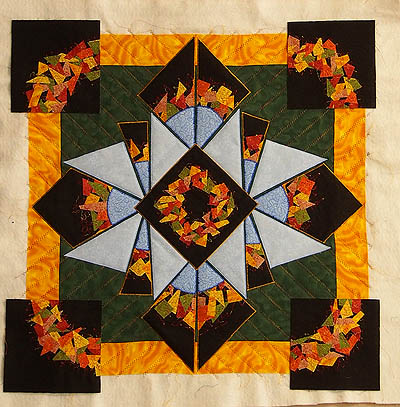
Squares not flush with corner
Option #3
Creating triangles in the corners out of the wreath squares to match the pieces in the middle.
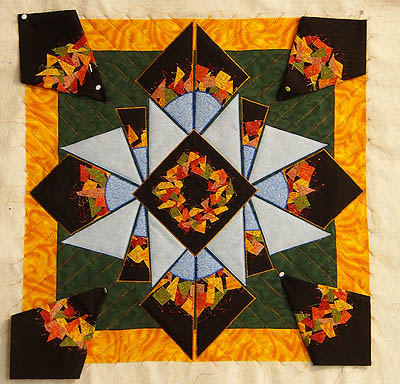
Triangles in the corners
Adding the Corners
I added the brown border by sewing it directly to the batting and backing – kind of like the stitch ‘n flip method. I could have stopped at this point even as it looks great.

Brown border added
But I didn’t stop and I appliquéd on the corner squares. I decided that more quilting was needed in the corners as just the zigzag quilting wasn’t enough for me. I did straight stitch quilting between the zigzag lines. I also carried it up into the corner pieces as they were looking pretty bare and out of place.
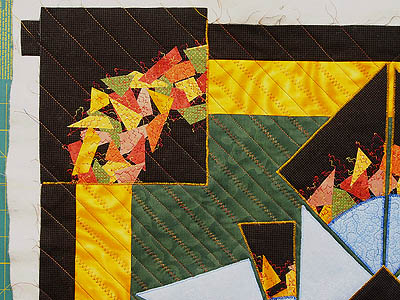
More quilting added to corners
Rounding the Corners
I placed small piece of white paper on the corners to see if I wanted to have rounded corners or keep them square. Keeping them square would have been so much easier for finishing the quilt but no I rounded them.
Checking out round corners
I used the Curved Corner Cutter to cut the edges. Unfortunately, I didn’t take a photo of this process. Sorry.
Adding Blue
With the quilt basically complete I decided that I should add in the blue to the corner squares to be the same as the middle and give it a bit more symmetry. I added in a blue piece with a rounded edge to mimic the corners. I used the corner cutter ruler to cut these edges so that they would all be the same.
Once fused in place I stippled over the area and then did the zigzag on the edges.
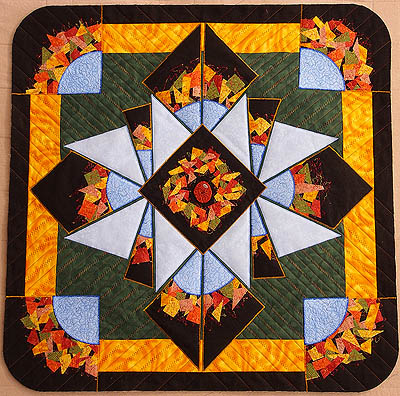
Blue pieces added to corners
Binding the Quilt
I would really have liked to bind the quilt with the brown fabric but I had run out of it – I only had a fat quarter and a bit to begin with. But remember the piece was only to be 8 ½″ square so that would have been plenty.
Then I decided to face the quilt. Cutting the facing on the bias and piecing it together I added it to the quilt. The corners wouldn’t work for me. I ripped them out three times each with no success – there was always a piping like edge when I pressed it over. I believe that is because there were too many layers in the corners and with the fusible on the corner squares it just wouldn’t play nice.
After throwing the piece across my studio I gave up to frustration and went to bed.
The next morning I ripped off the facing and was going to bind it in the dark green – not ideal but it would have to do. But then, Michael came down and he suggested that I edge the piece with the satin stitch in brown. I thought well that may just work so I gave it a try. I stitched around the edge three times and it turned out very well. I used a 30 weight rayon thread for the edging. A new way to bind a quilt – pretty sure I will use it again.
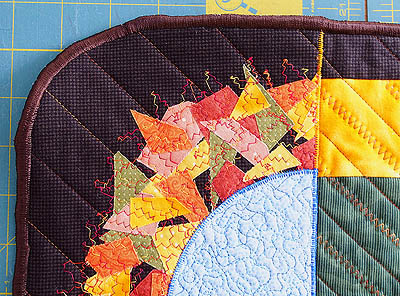
Satin stitch binding
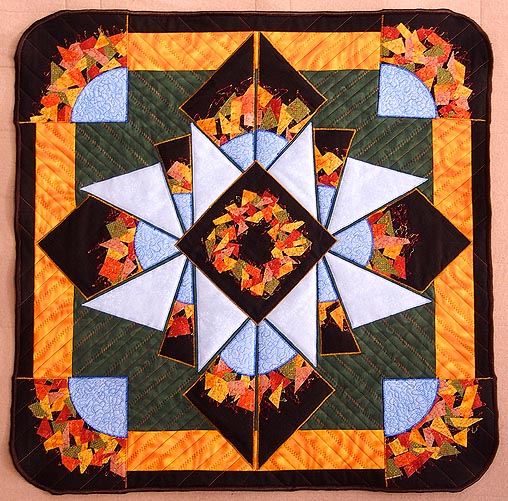
So the piece is done and has been taken to the museum in Orillia to hang for the next 2 ½ months in the Women’s Art Show.
The Wreath Quilt
I hope you have enjoyed my posts on the process I went through to create this piece. I have certainly enjoyed sharing the process with you.
Next week a new UFO to finish up and share with you.
Happy Quilting!


Thanks for sharing. It has been a fun process!Kinda of taking lemons and turning them into lemonade! Very fun! Wonderful end quilt.
Barb so glad you enjoyed the process of making this piece. Yes, it kind of was like taking lemons and turning them into lemonade. Also kind of like a box of chocolates – not knowing what you are going to get. I am looking forward to my next lemon. Jen