

Hey Everyone, welcome back to Technique Tuesday.
Last fall I started a series on stabilizers and didn’t get the last one posted and seeing how I haven’t started with the rulers yet I thought maybe I should finish off this series of posts.
The first week I took a look at the tear-away stabilizers, week two was all about leave-in stabilizers and the third week featured heavier stabilizers.
Wash-Away Stabilizer
The wash-away stabilizer is exactly what the name suggests: when you are done with it, it can be washed away with water. Some products only need to be sprayed with water where as others need to be fully immersed in water and often times fairly hot water to dissolve the stabilizer. Make sure to read all instructions on the product you are using prior to starting your project.
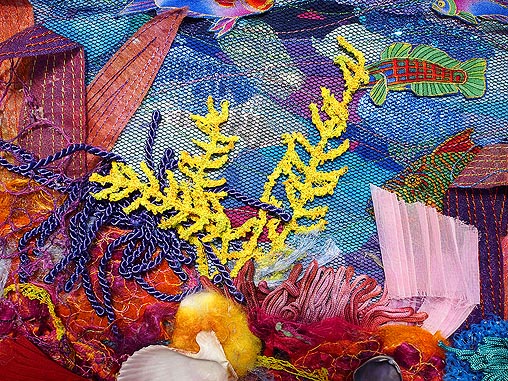
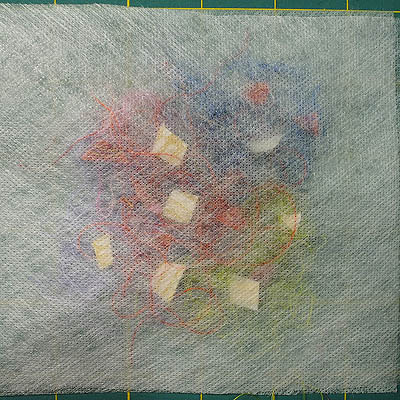
These ones that need to be dissolved in hot water are often used when creating thread play pieces to get rid of all the stabilizer and leave only the thread behind. I have used this type of wash-away to make little bits of seaweed and such for a piece that I did years ago with Liz Scobie when I was living in Australia. You can see the seaweed in the photo at the top of the page. Here is a picture of the full project.
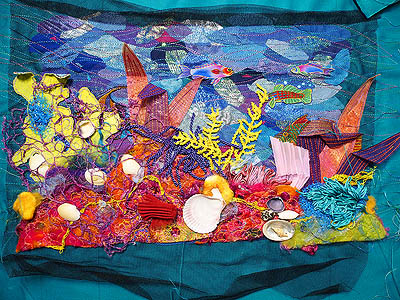
An underwater scene
The wash-away stabilizers can be used behind appliqué pieces or other embellishment areas but I do suggest making sure the fabric is colour fast before starting as you don’t want any of the colours running on the front creating a new design on your masterpiece.
They are also popular for stabilzing embroidery work.
I do own a roll of wash-away stabilizer so I thought I would give it a try and see how it works. I’ve decided to try using it for a piece of thread play – hey there is no harm in trying as all I will lose is a small piece of stabilizer, some fabric bits and thread. Experimenting is fun.
Playing with Wash-Away
The wash-away that I have is Aqua-Mesh and it comes on a roll in a clear plastic tube for storage.

Roll of Aqua-mesh
To begin I cut two small 5 ½″ squares.
Then I pulled out my stash of thread bits – yep I have a bag of thread bits that I collect. I don’t keep them all but every now and then I add to it. The ends of spools that will never get used and the threads I clip off when tying off ends.
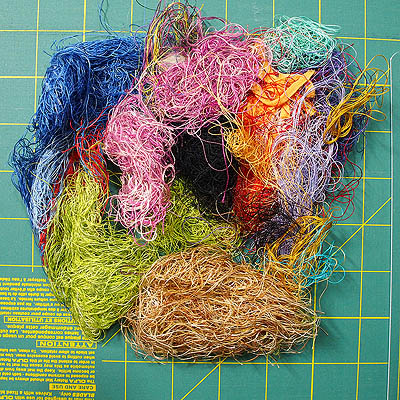
A bird’s nest of thread
I placed a few bit of thread on one of the squares as well as a few tiny pieces of fabric.
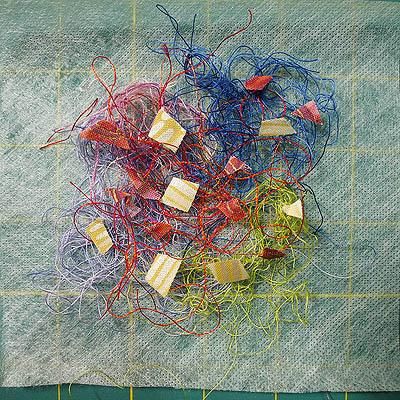
Threads and bit of fabric on stabilizer
Place the other square on top to sandwich the threads. With this being a small piece I didn’t bother to put it in a hoop but I think with a larger piece I would just to make sure everything stays together.
Threads covered with second square
Some free motion stitching with a light yellow thread. The key to this is to make sure you go over and over the stitching otherwise everything will just fall apart when the water is added.

Free motion stitching done on top
After running it under the tap of warm water this is what I have. And it all stayed together as one piece. The light yellow thread I used for the free motion stitching barely shows up which was my goal.
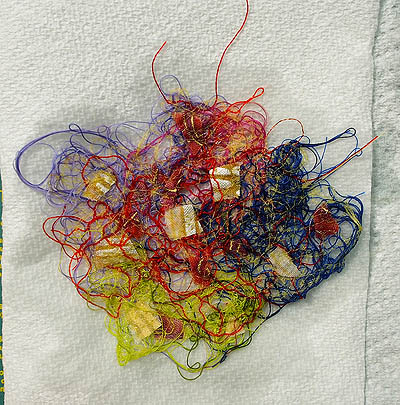
Soaking up the excess water
As I wait for it to dry I’m thinking it might just make a nice little impressionistic flower for a future Stitch Along Sunday piece. It will take some time to dry as it was pretty soaked and it was feeling a bit sticky so I’m not sure all the wash-away has been washed away. It might need to go under the tap of water again before I can use it in a project.
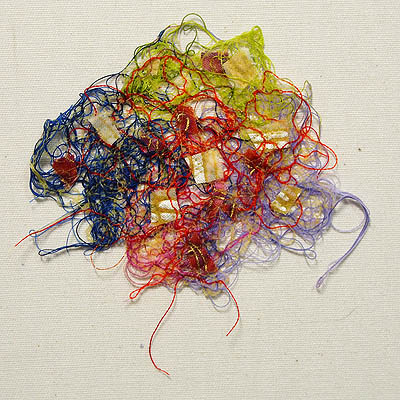
Almost dry
The experiment was definitely a success and I am certainly going to do some more of this in the future. I forgot how much fun this is.
That’s it on stabilizers.
Happy Quilting!


Thank You for showing how to do this. it’s something I have wanted to try but didn’t know if it would work.
Thanks for all the info on stablizer.
Judy, you are most welcome. And yes it does work – I can’t wait to do more. Have an idea in mind which I will incorporate with using up some of my scraps. Have a great day.
Hi Jen,
I so appreciate you doing this series on stabilizers. I have actually never taken a workshop that used them, and I do a tremendous amount of quilting from either instructions off the internet, or from magazines or books without a teacher, and I’ve often not fully understood the use of stabilizers and why each one is used and exactly for what. I now feel much more informed around this topic!
Thank you so much for taking the time to do this!
Linda
Linda, that’s awesome that these posts helped to inform you about stabilizers – they can be a bit confusing and there are so many out there. Happy Quilting Jen