
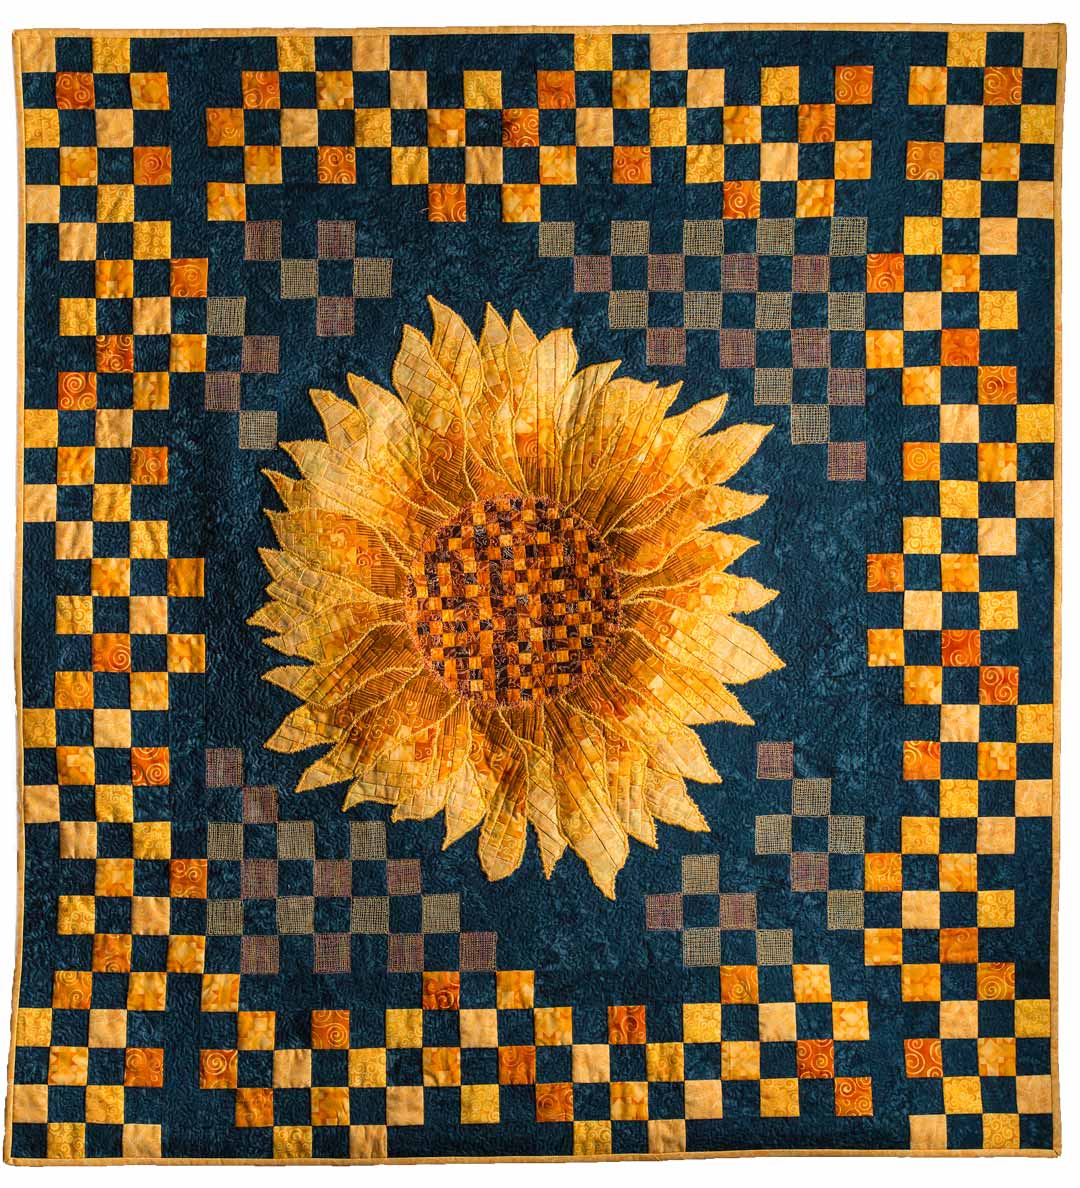

The final story in my series of the four art quilts I just completed for my show which opened this past Friday at Ridge West Gallery. The show runs to the end of June with the Gallery open Thursday to Friday 11-5pm or by appointment other times and days. Stop in to check out some really fabulous artwork.
The Sunflower is the only one of my art quilts that I didn’t start in a class. In fact, I have developed the technique and idea into a class which I teach to fellow quilters.
Buy the Sunflower Quilt pattern now complete with step by step instructions.
I love flowers of all kinds and I had always wanted to make a sunflower quilt so thought why not try it for this show. There was a field of sunflowers near where I live that was just magnificent last summer with the yellow heads standing tall at the end of the stalks soaking in the sun.
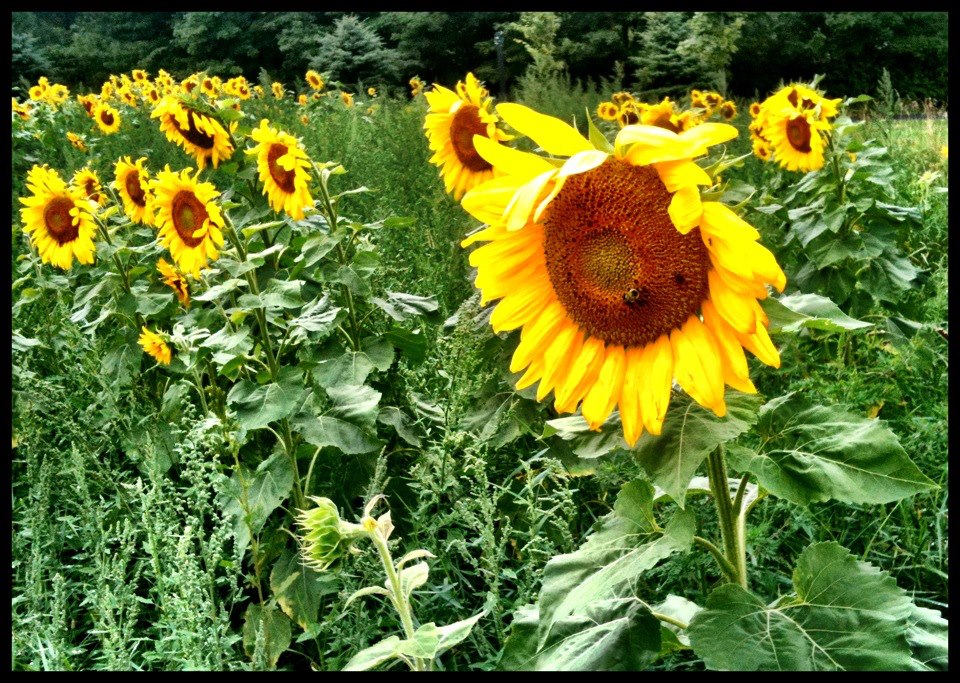
My inspiration for this quilt
I started with a sketch on paper which I drew free hand. The plan was only to make half a sunflower and then as I kept designing and planning the quilt the flower grew to a full sunflower.
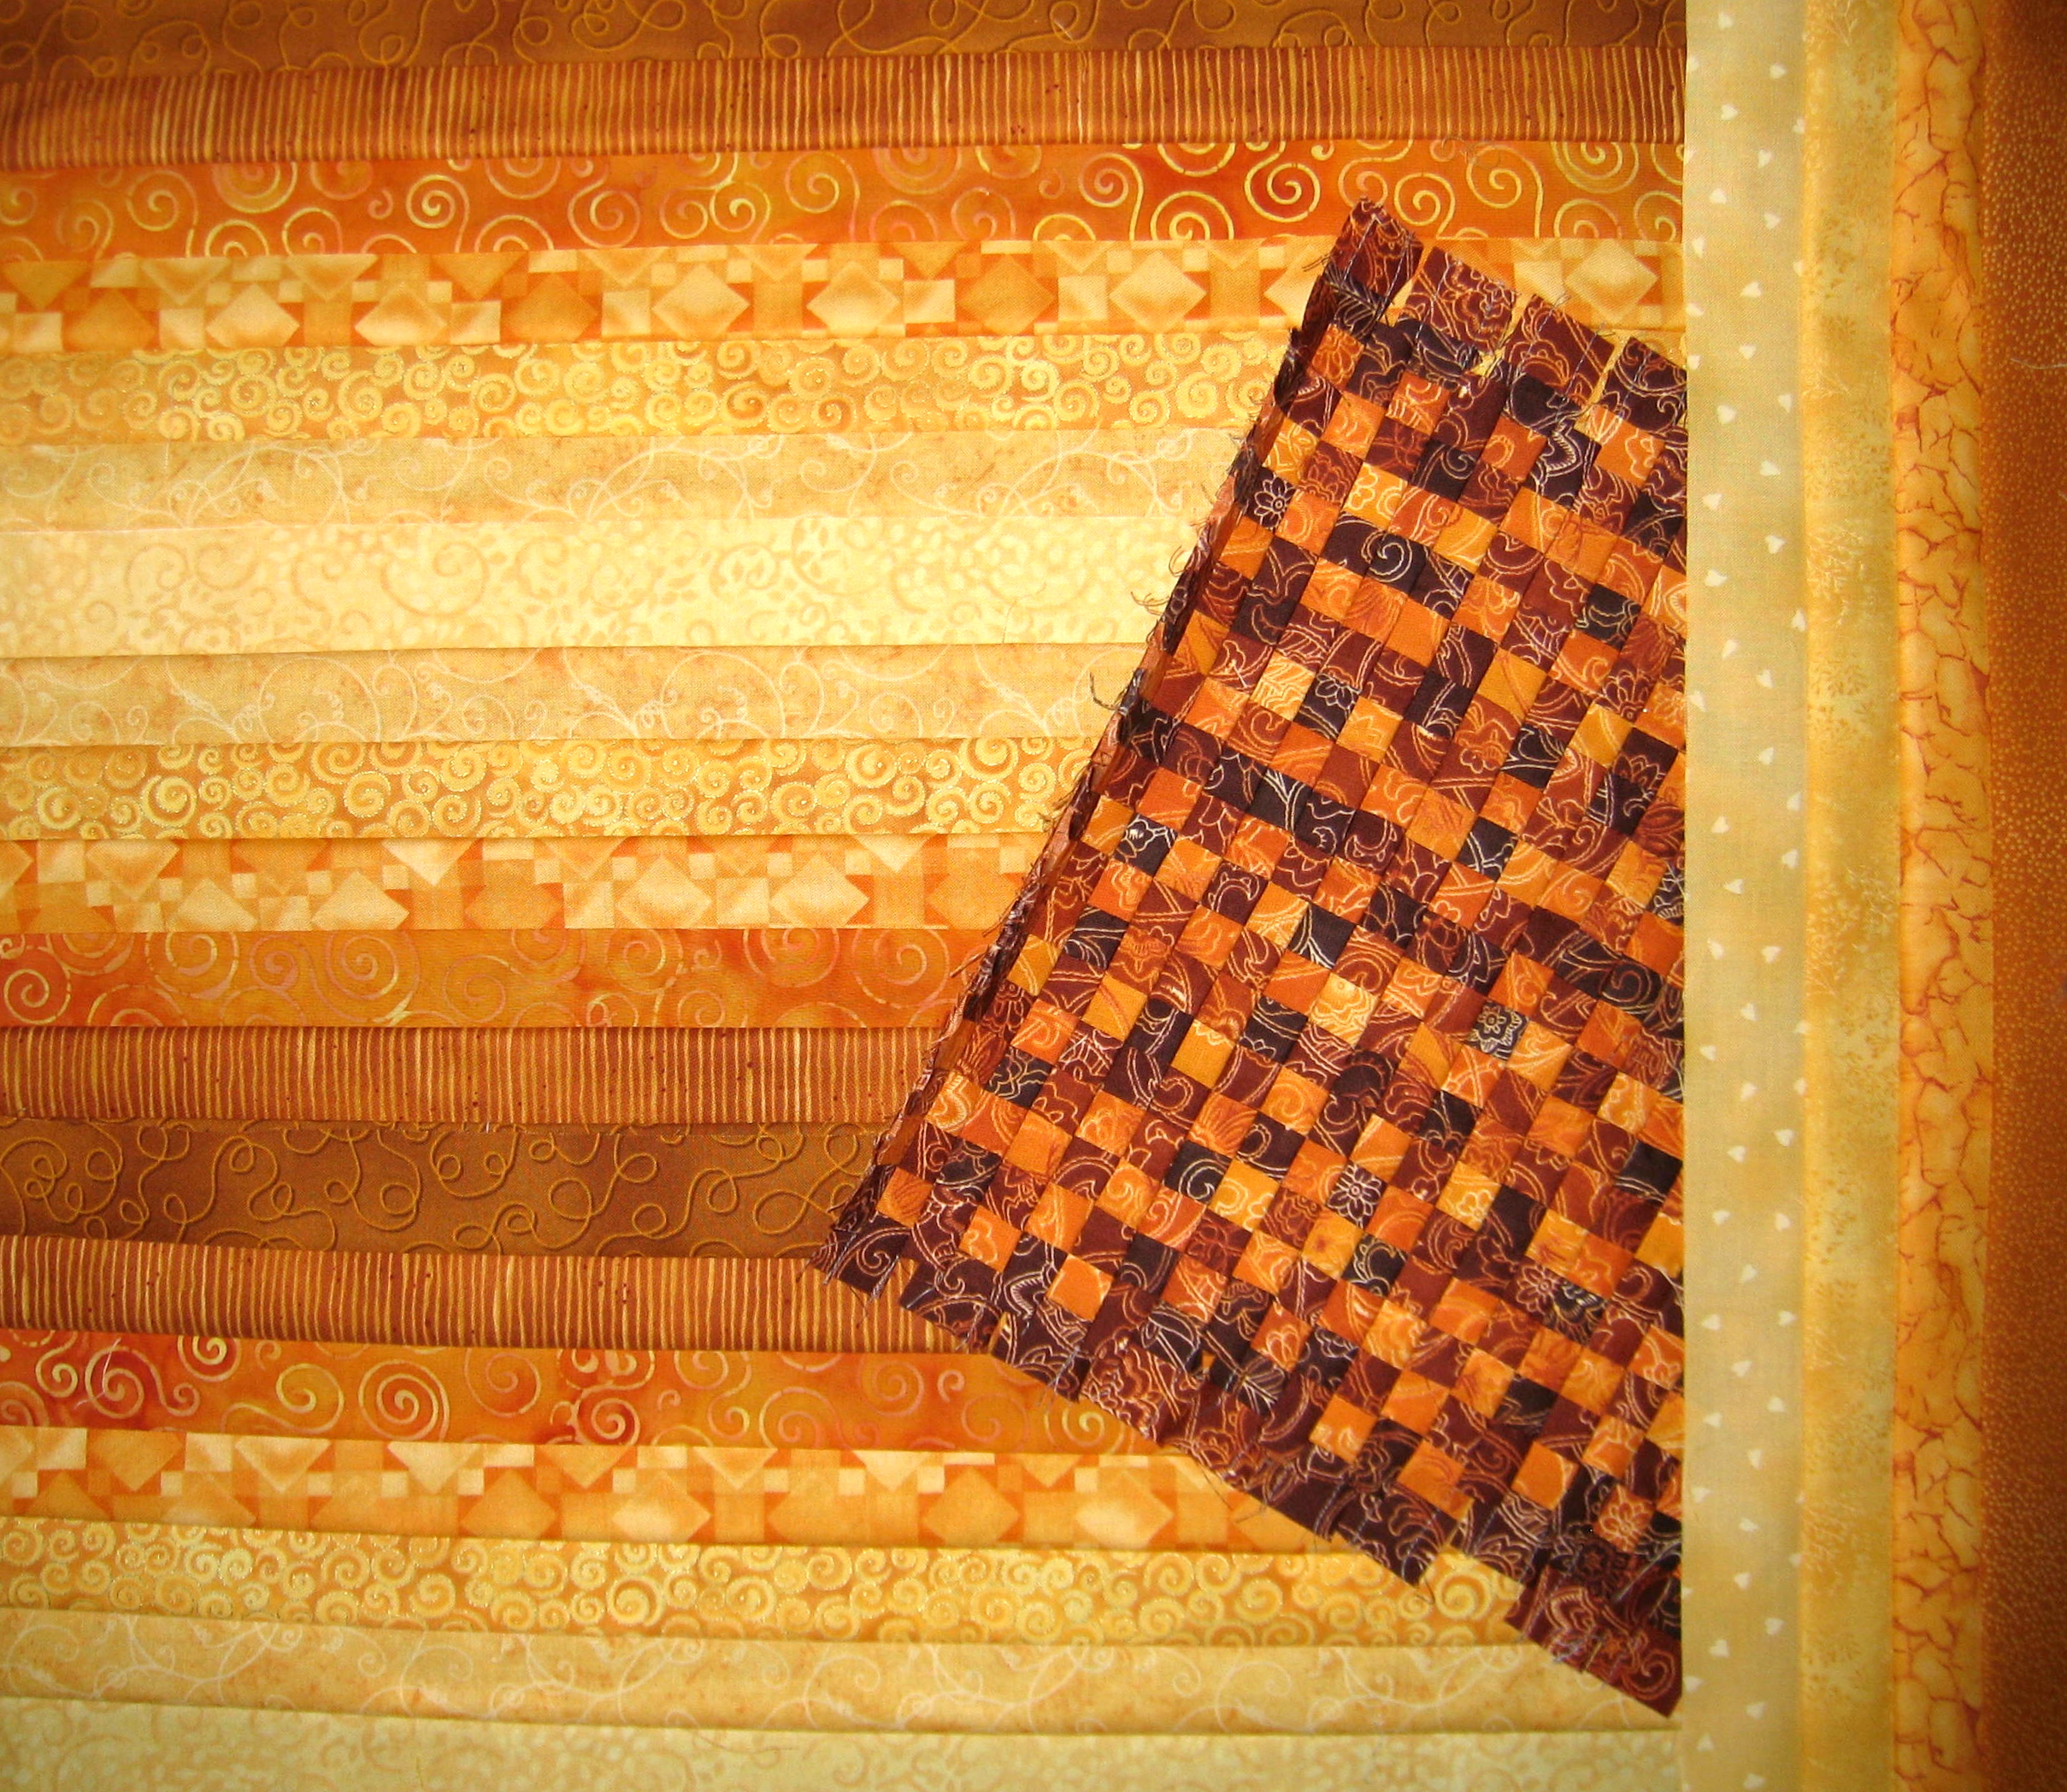
The centre of the flower was made from one piece of fabric that was gradiated from dark brown to an orange with a pattern printed on it. Here is a photo of the same fabric but in a different colour way.
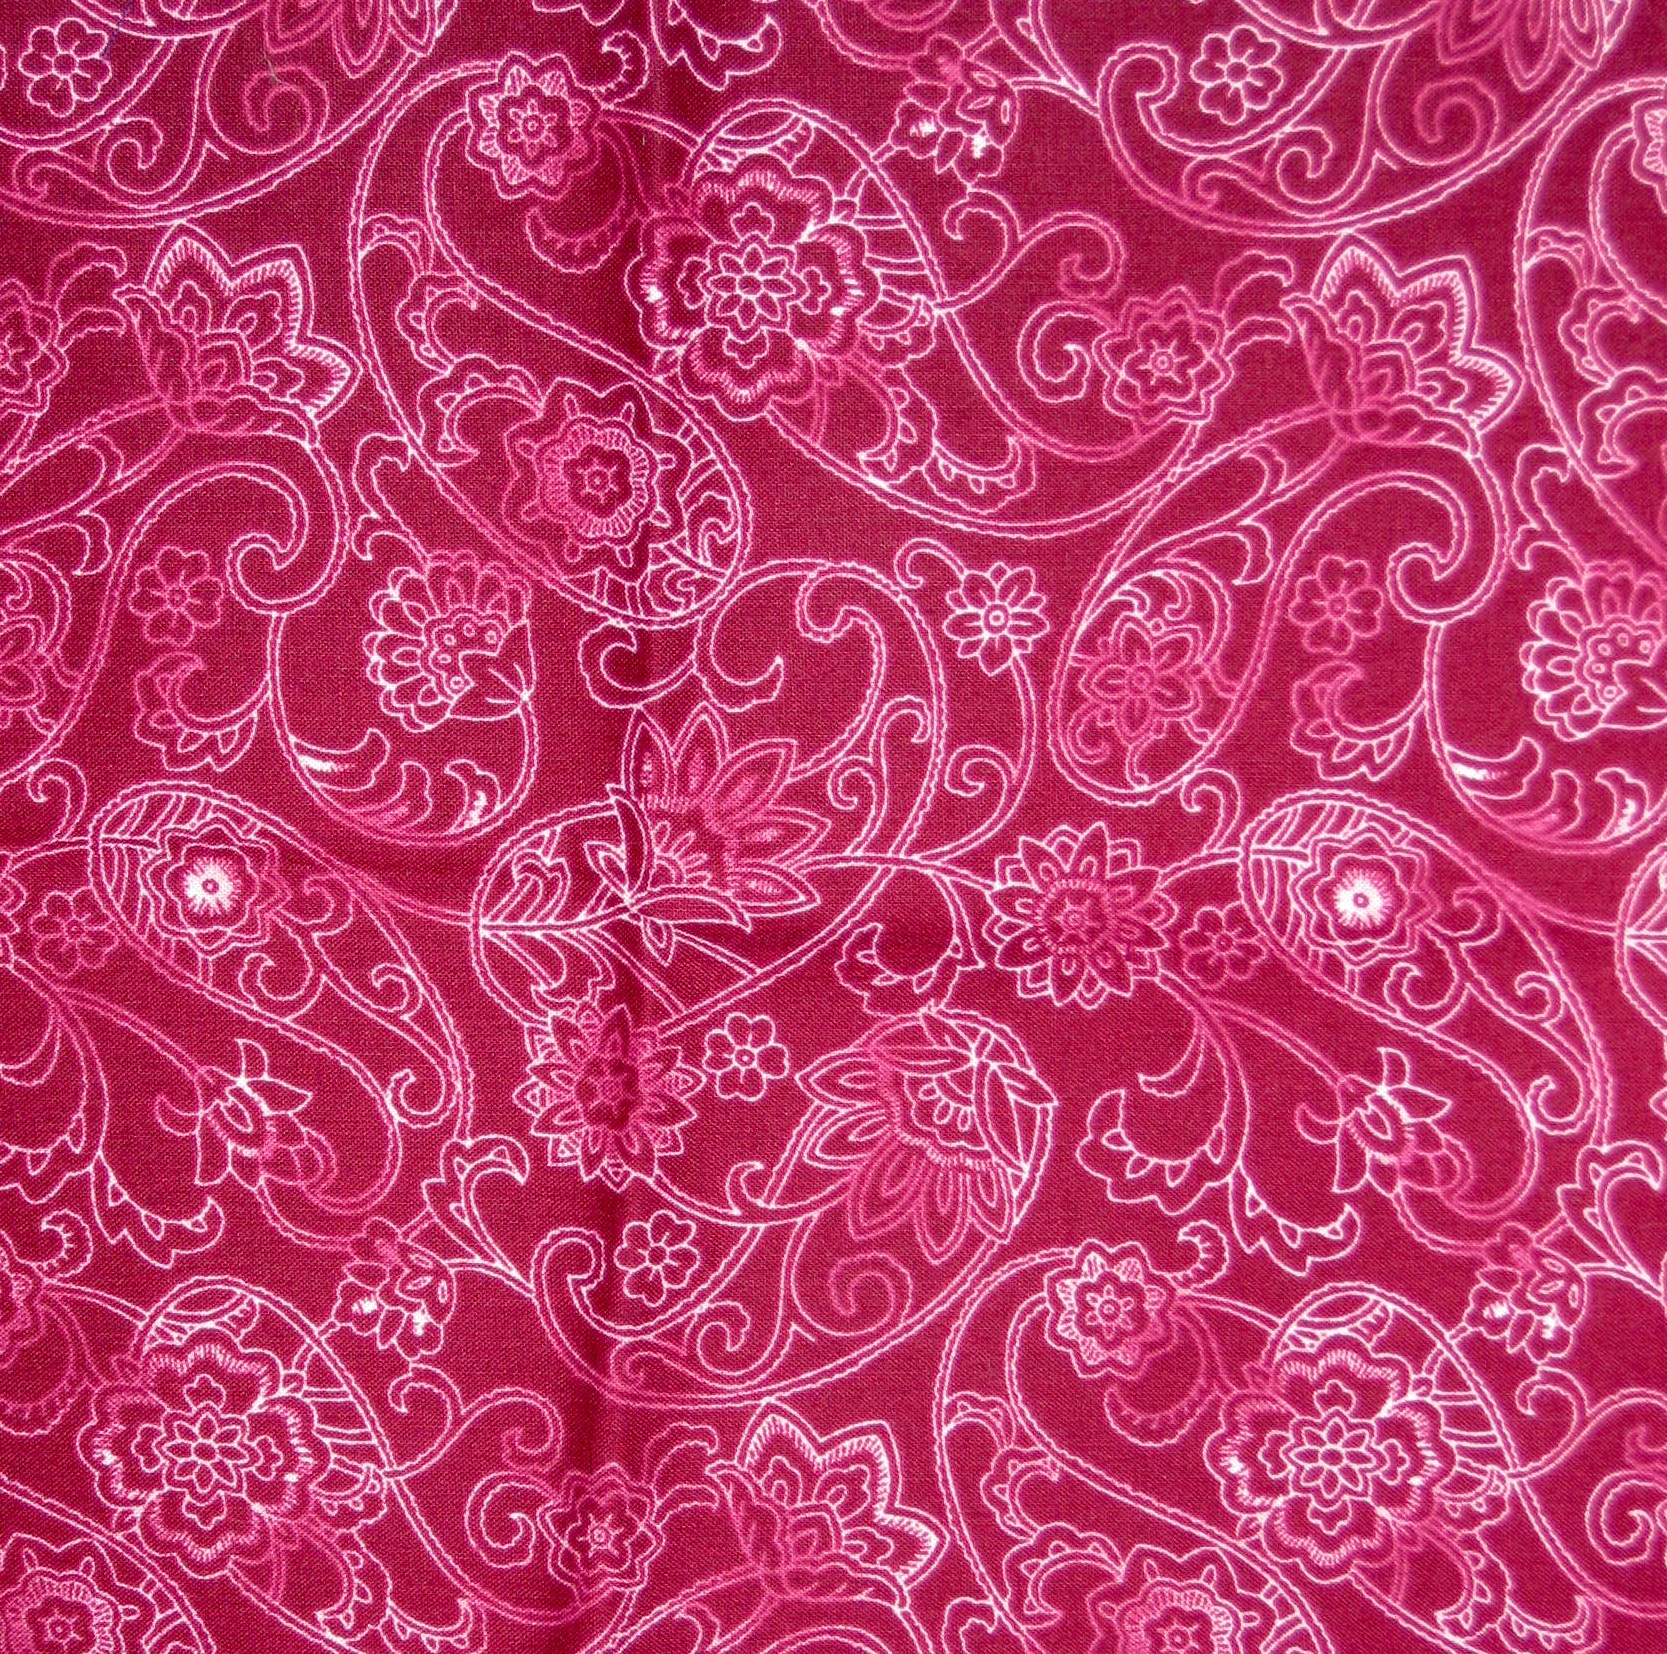
The same type of fabric was used for the centre
I wanted the centre to look like the sunflower seeds and thought how can I do this without appliquéing pieces on. Small squares I figured would do the trick. The fabric was cut into one inch strips. The light and dark strips were strategically placed and sewn together.
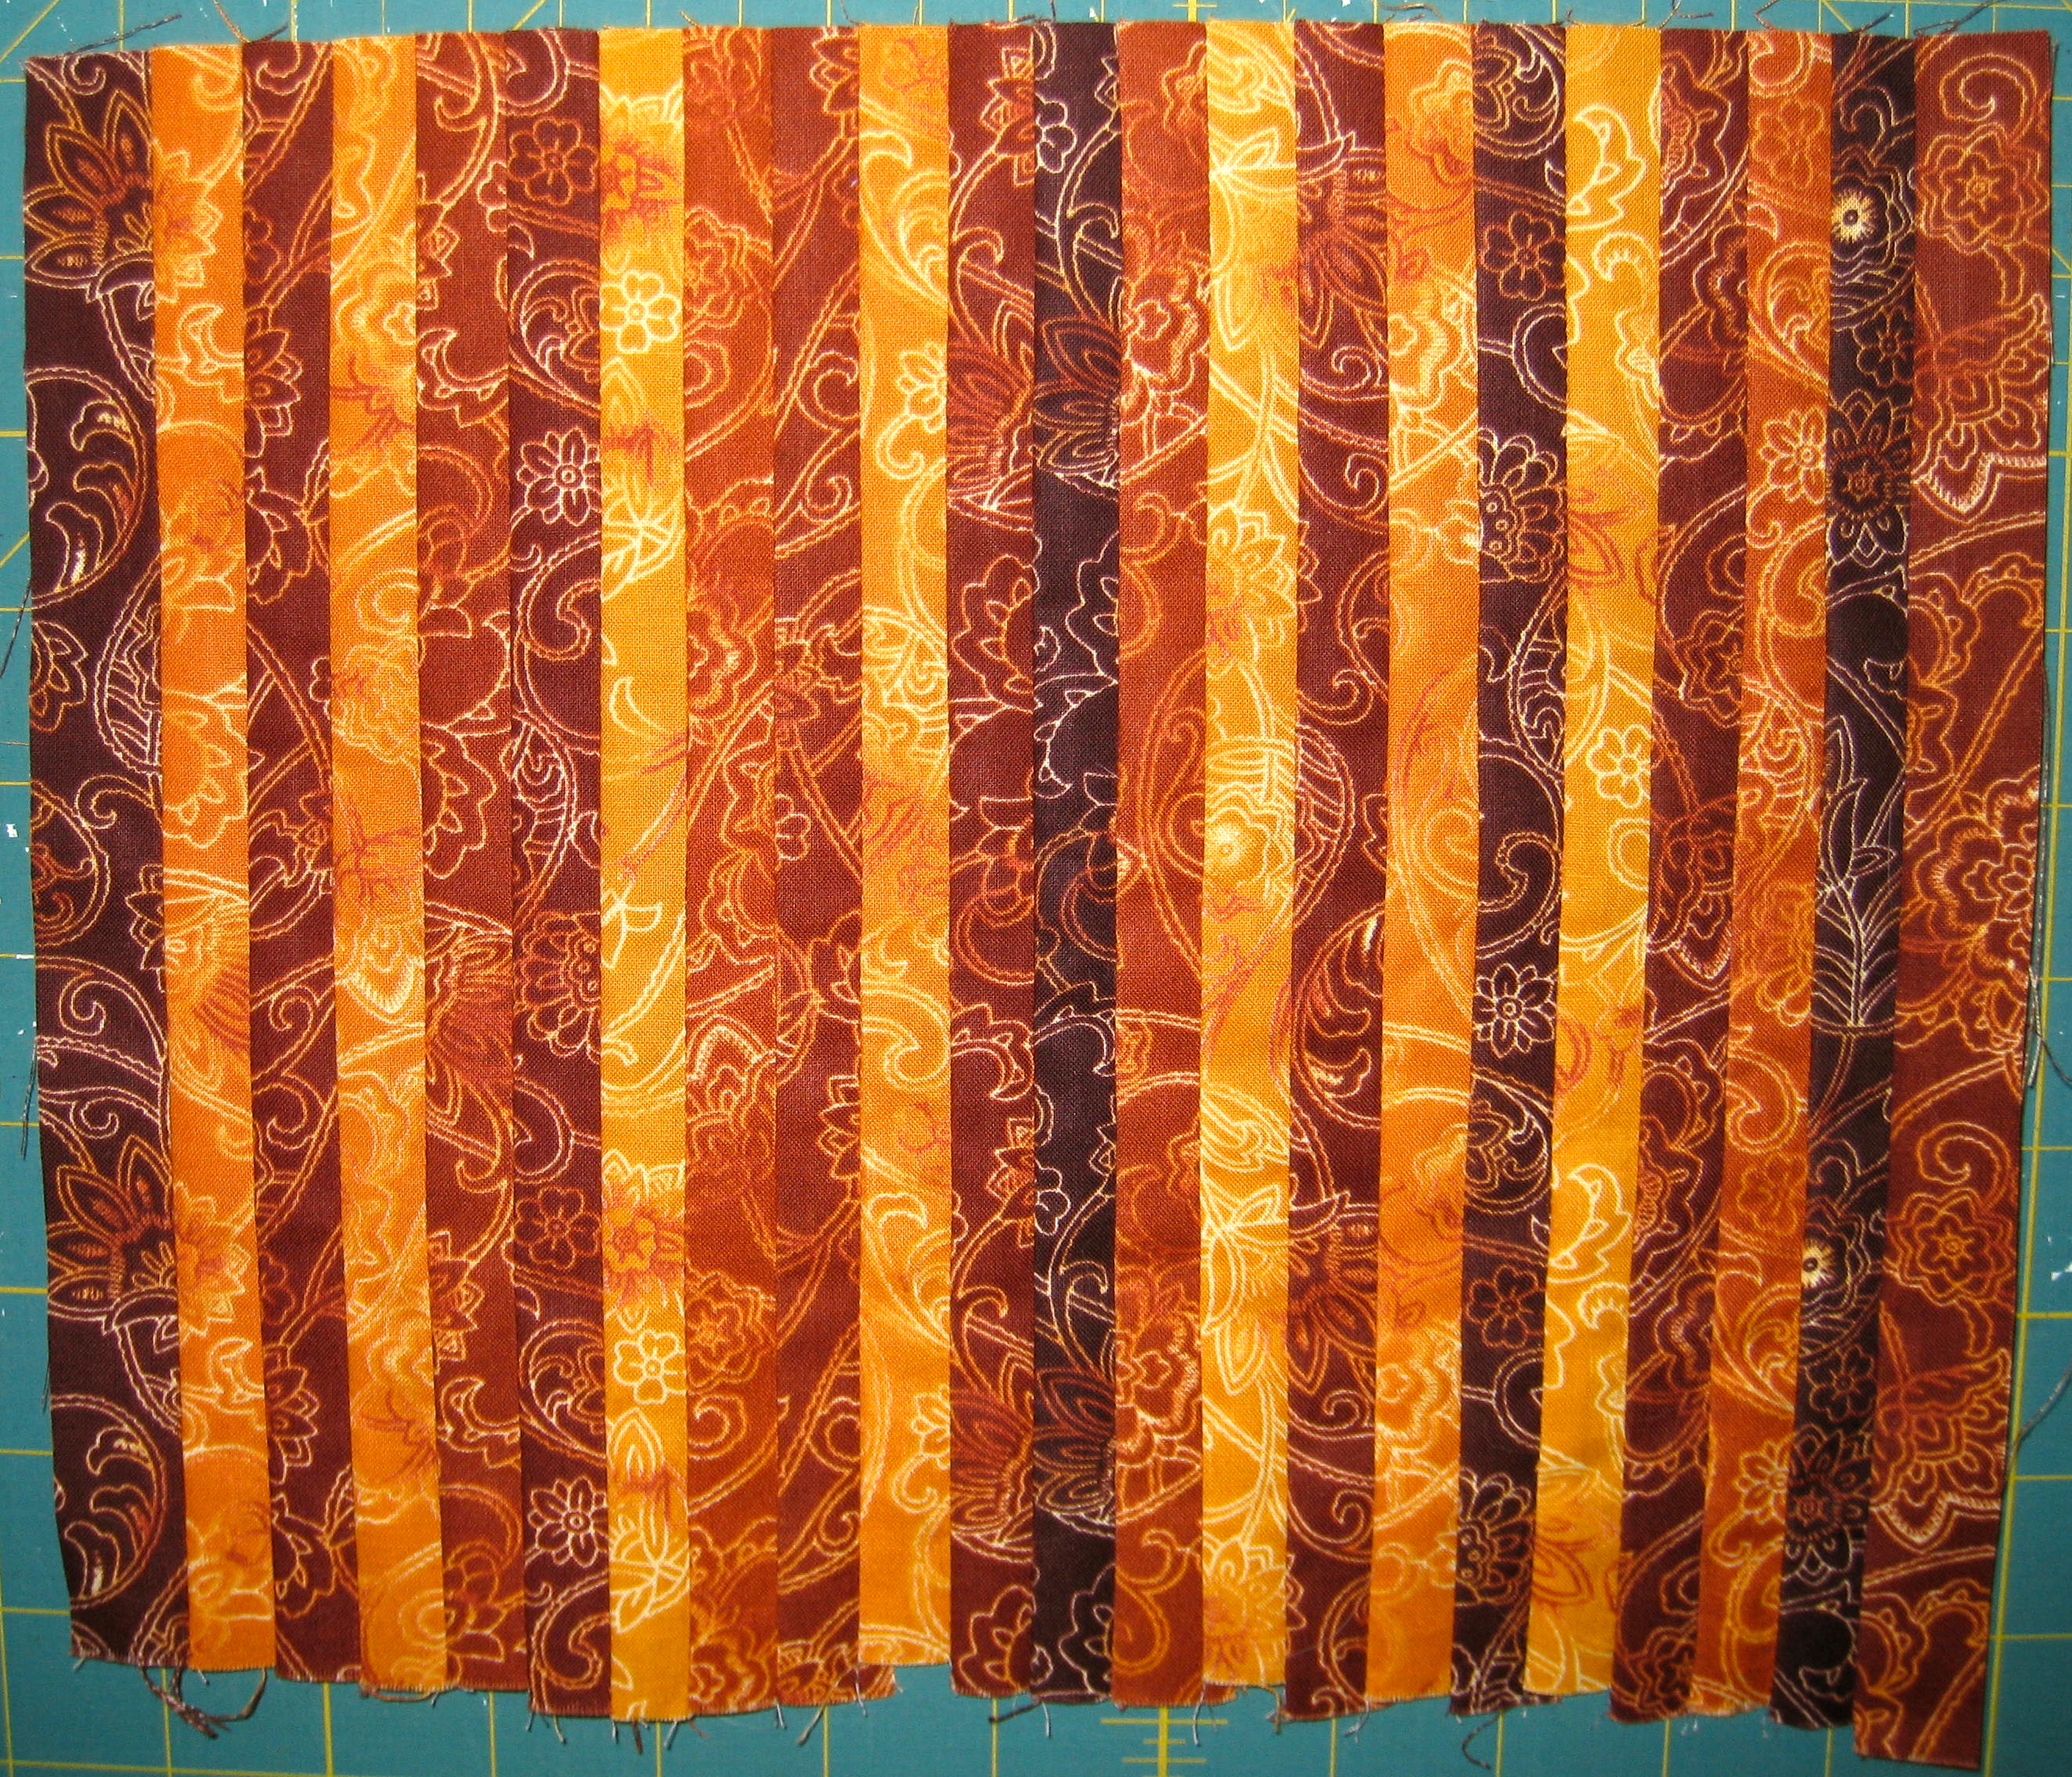
The strips sewn together as one large strip set
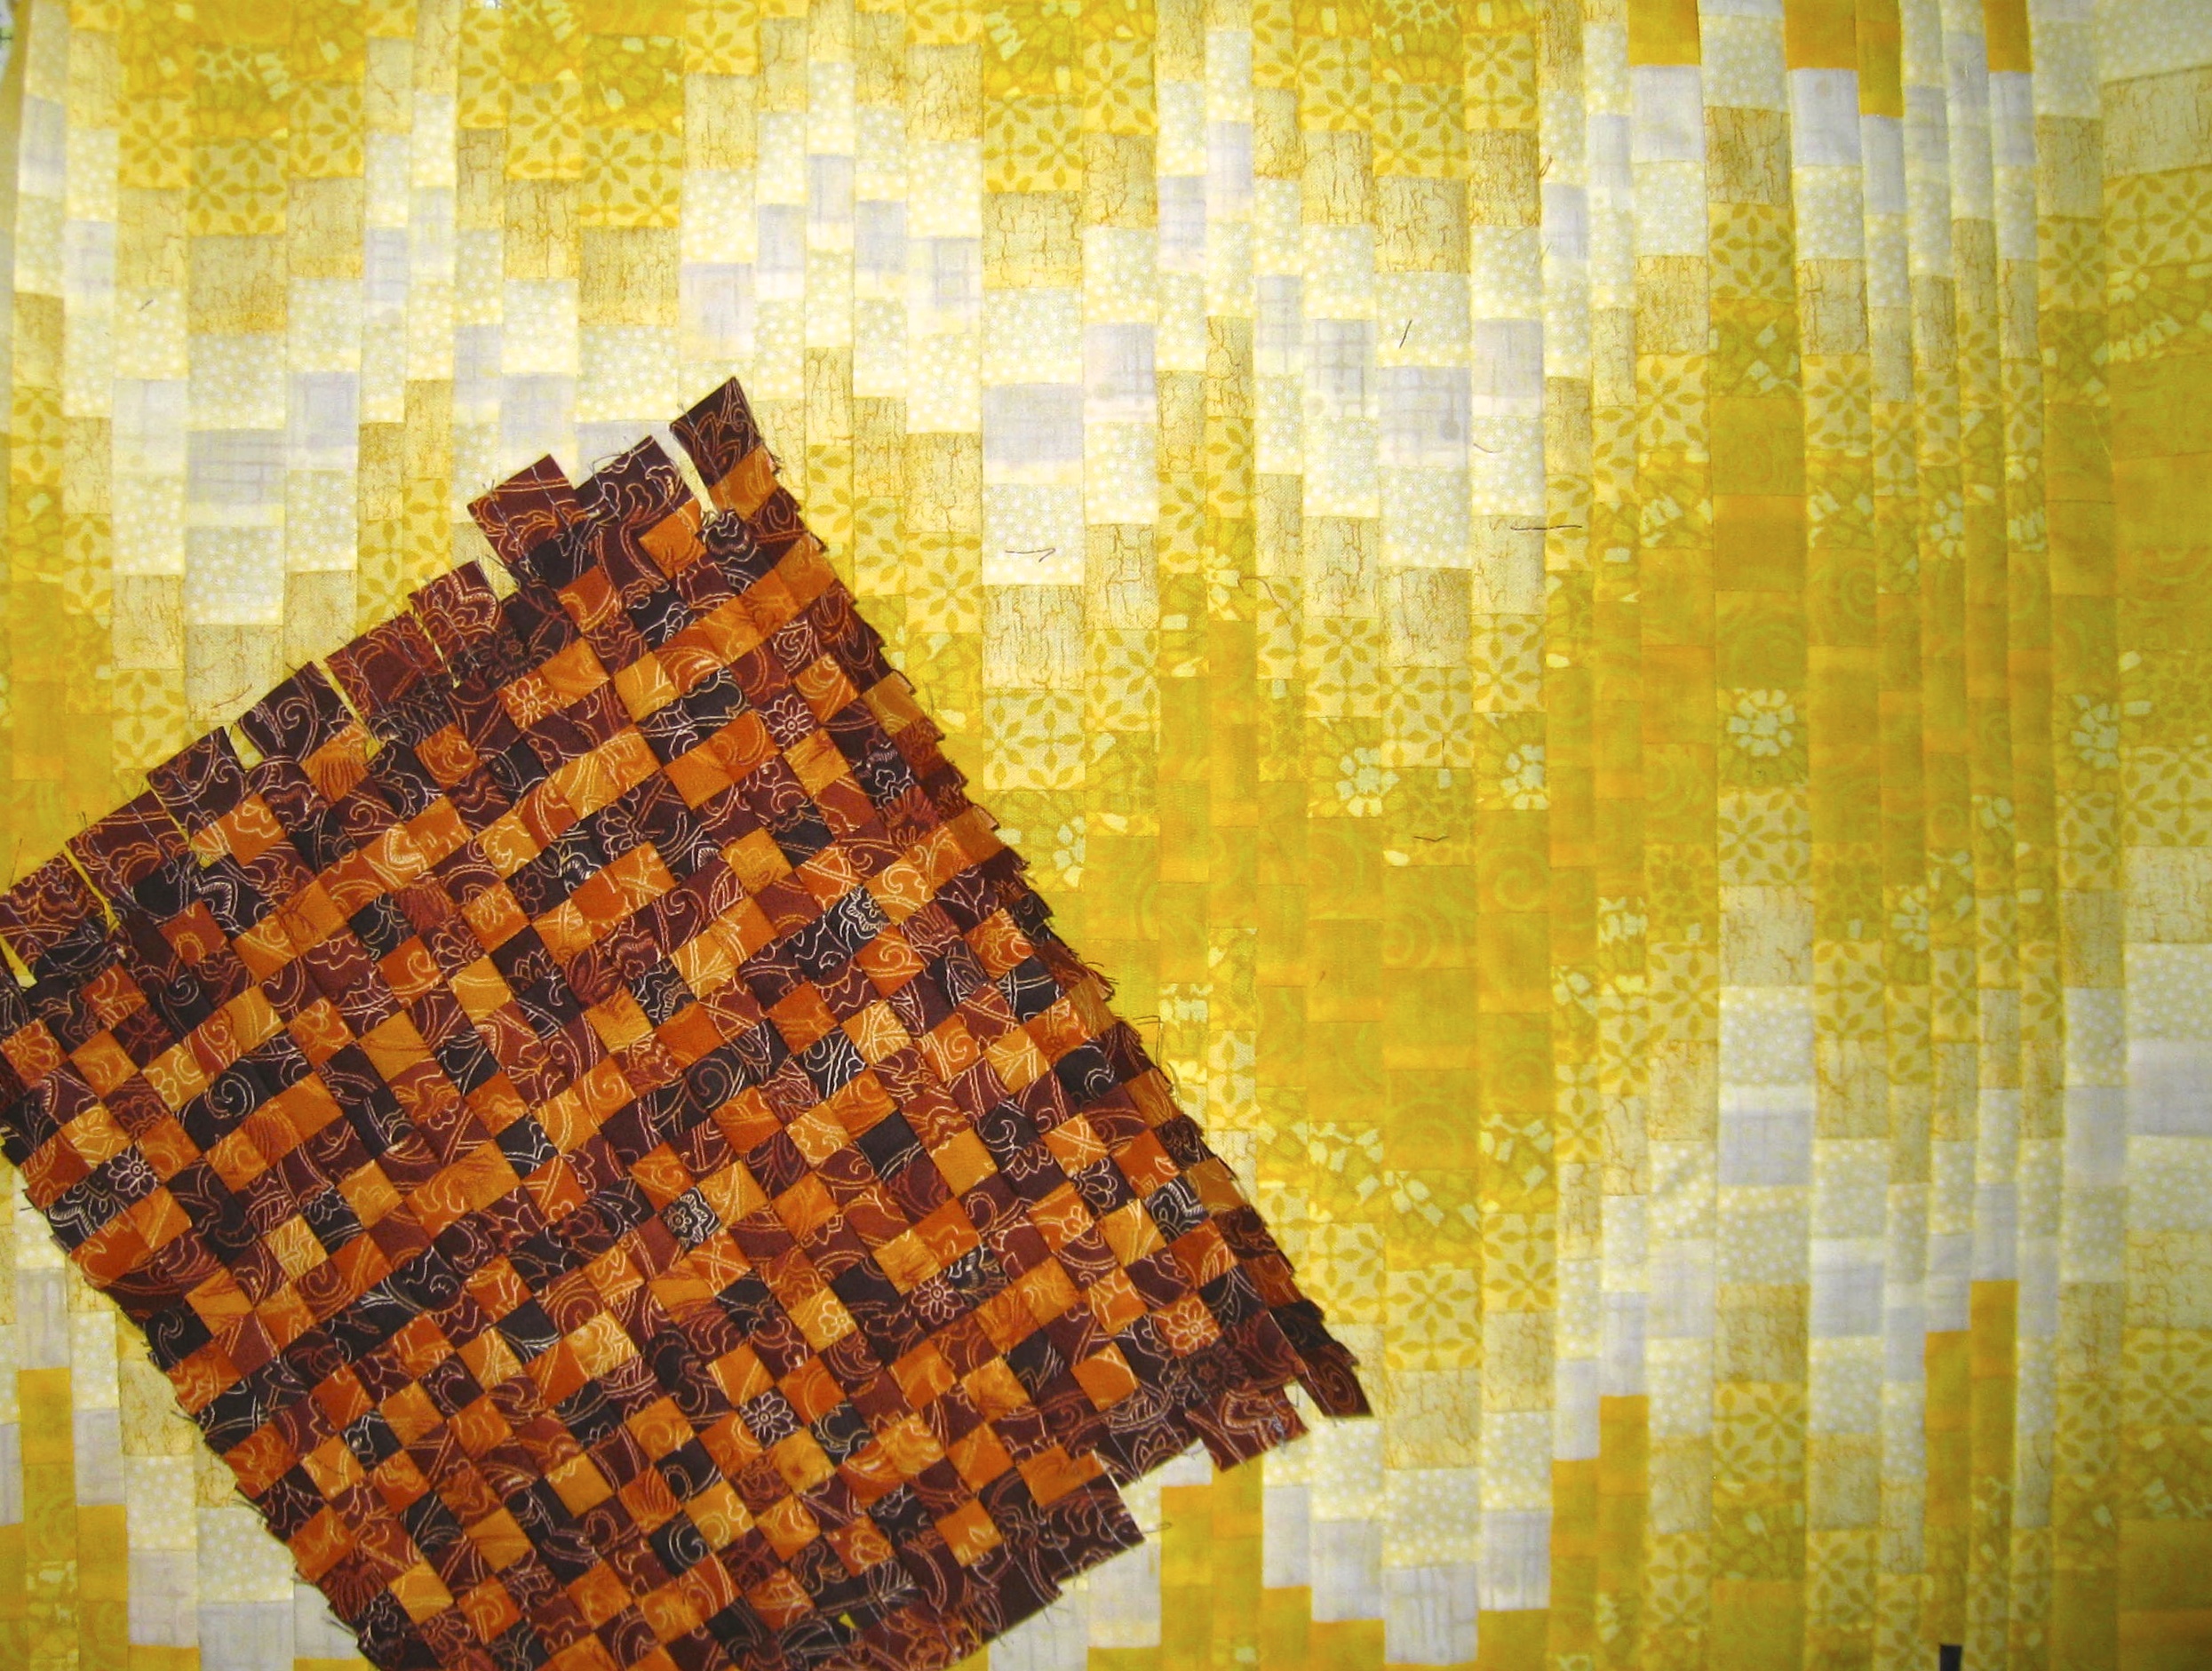
Once all the strips were sewn together to create one piece I recut the piece into one inch strips and sewed them all together again. The final result was a piece of made up of ½″ squares. They almost look like they are woven together with the different colours and values of fabric. Boy did the strips shrink – I started with a half a metre of fabric and ended up with enough to make 2 – 10 inch diameter centres. How long did this take me you ask – about 4 ½ hours.

The centre piece complete
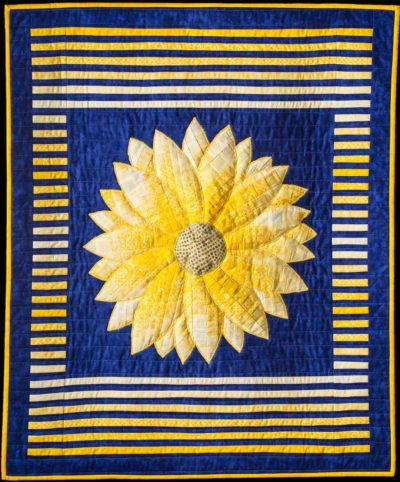
Moving forward I began to develop a plan for the petals. I wanted to do them as Bargello so had to pick fabrics for a colour run from light to dark. The first set that I did was far to yellow and did not go well with the centre – it would look much better as a daisy.
The yellow was just too bright to go with the centre
The second set of fabrics I chose were more on the golden yellow side and worked much better for the sunflower. I spent a lot of time cutting strips, sewing strips together, recutting them and resewing them into a Bargello. There was really no rhyme or reason to the Bargello design as long as it had some movement in it. I made 4 different Bargello sets to cut the petals from.
These go together much better
The petals were all done with fusible web and appliquéd to the background. Picking the background was an undertaking as well but after auditioning many fabrics I settled on a very dark teal.
Petals all fused in place – no stitching
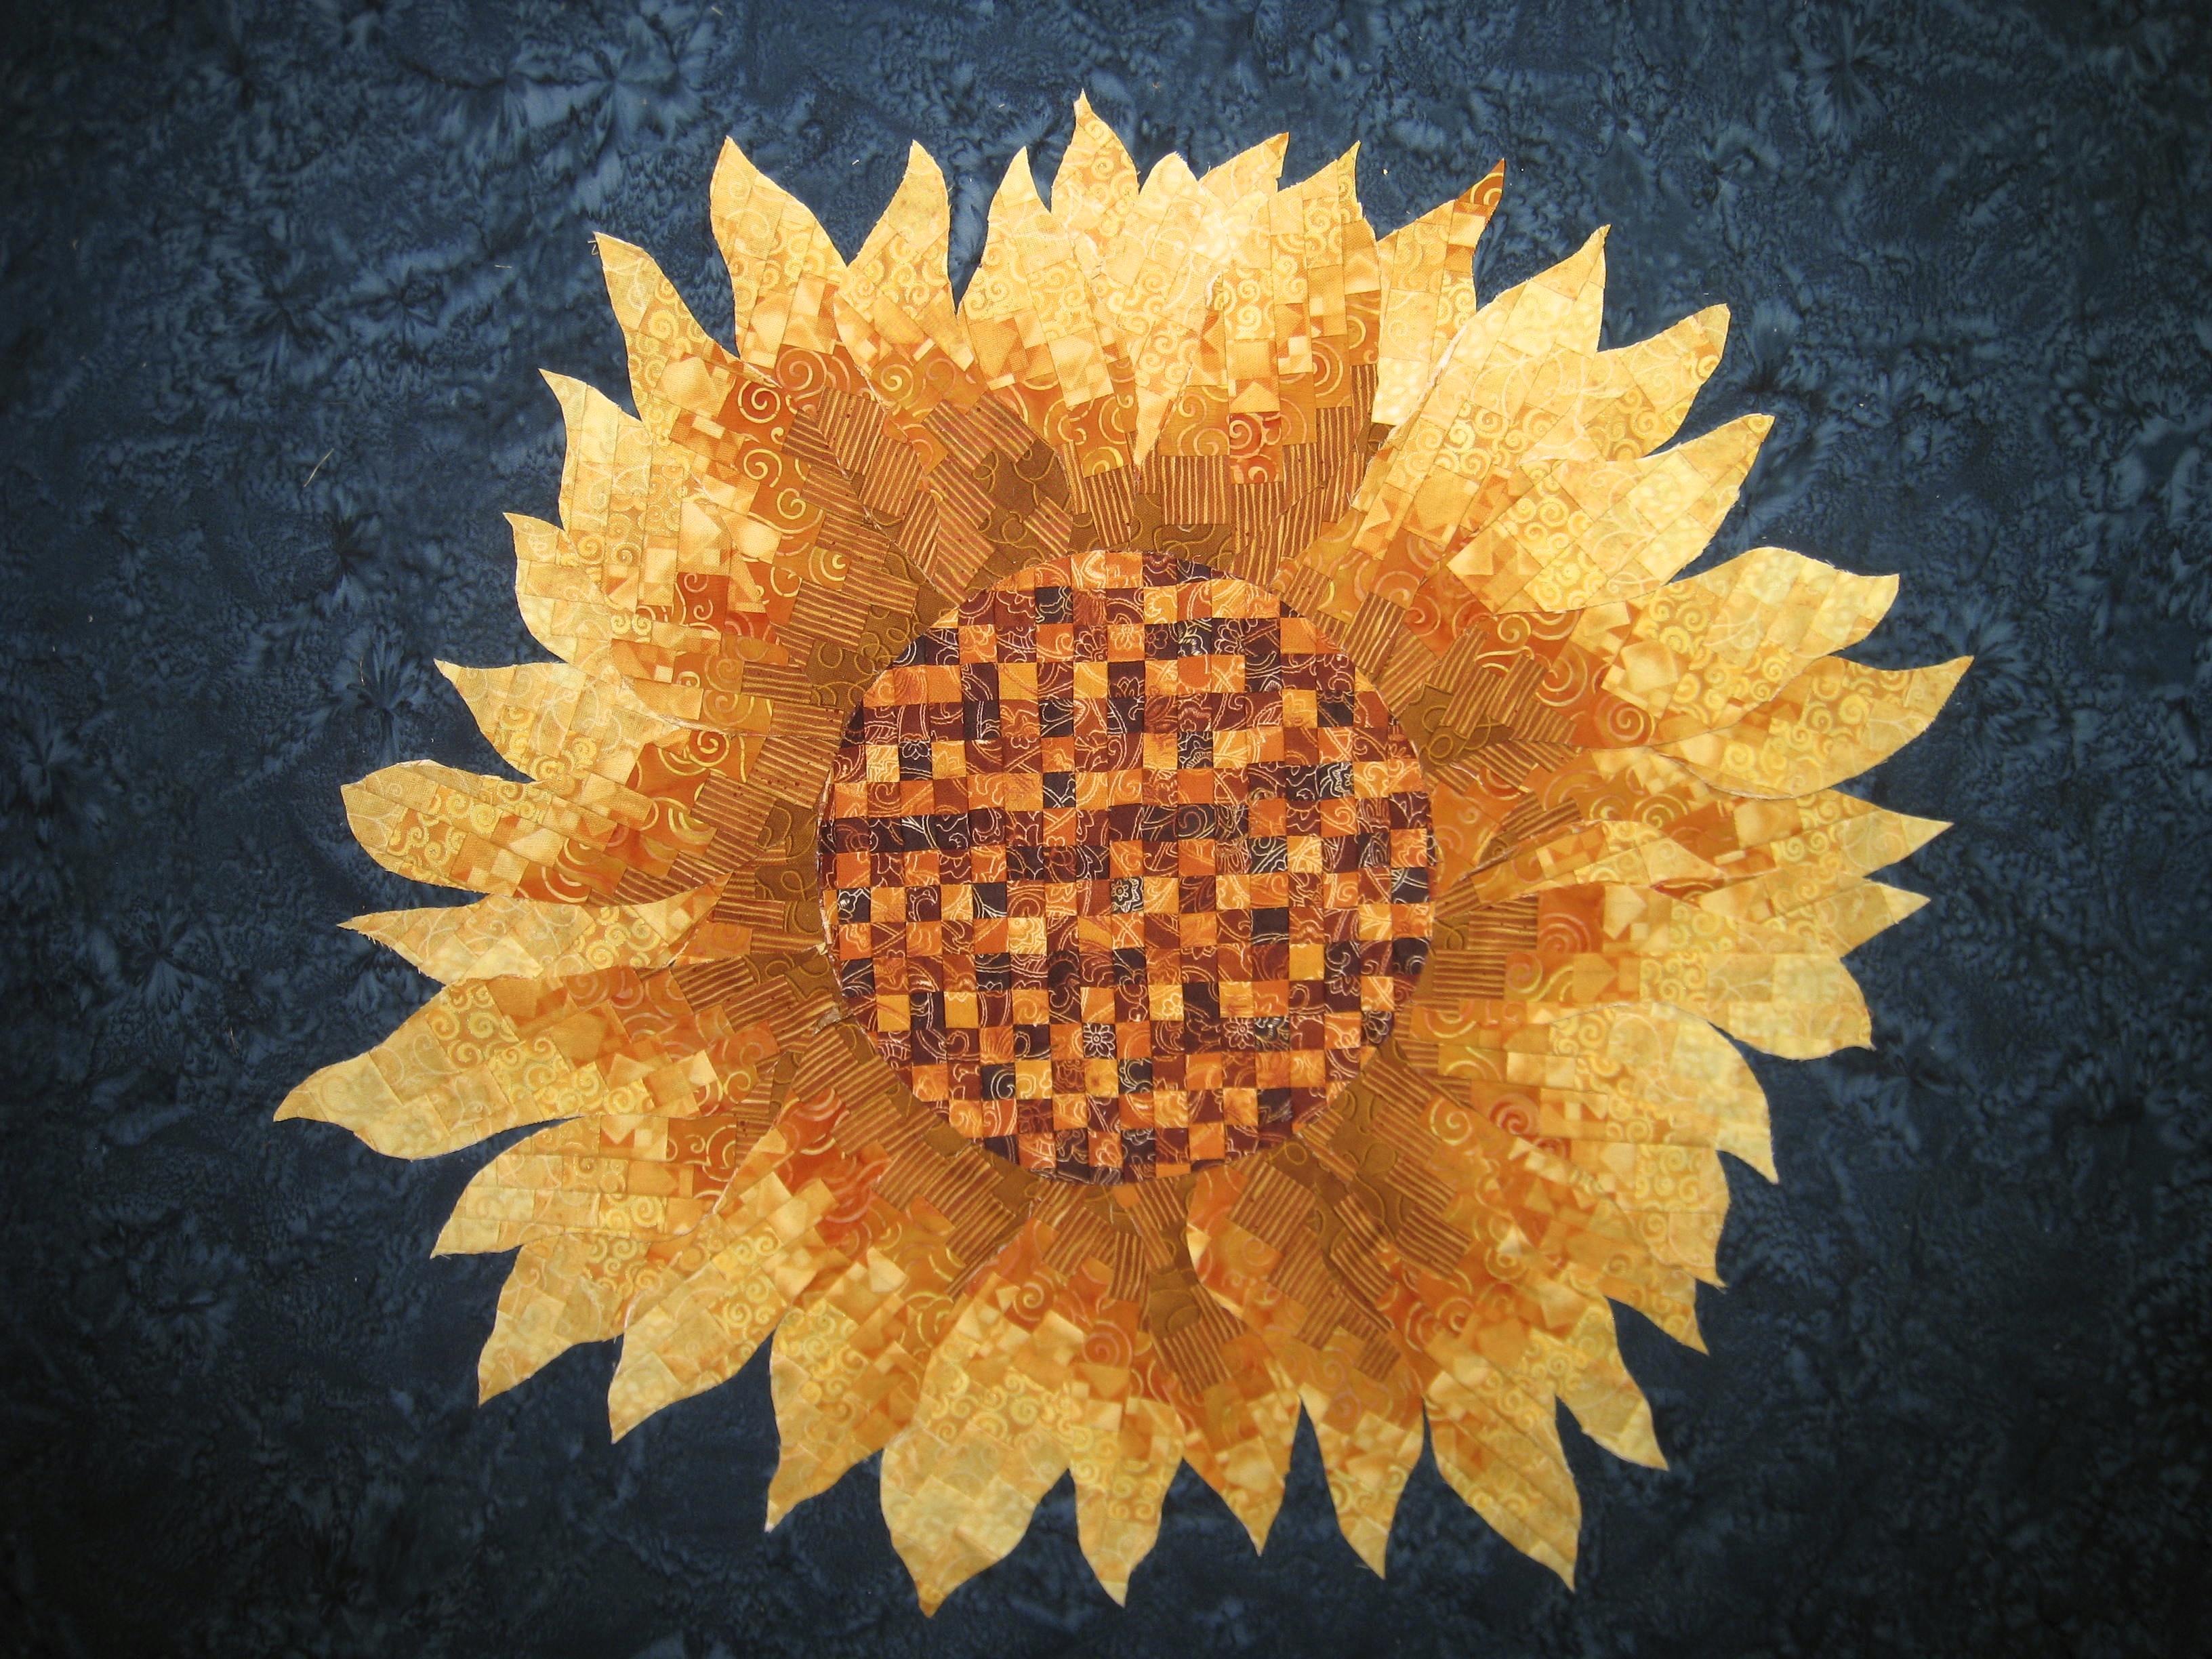
The Bargello produced an effect that was beyond what I was expecting and it looked fantastic. It created movement within the sunflower radiating from the centre out to the tips of the petals. Each petal was stitched with a free motion zigzag which was not uniform but rather quite jagged as petals are not completely smooth. Once the stitching was done the sunflower looked like it had come alive. I used a combination of different Sulky Blendables for the stitching.
Petals stitched in place – what a difference the stitching makes
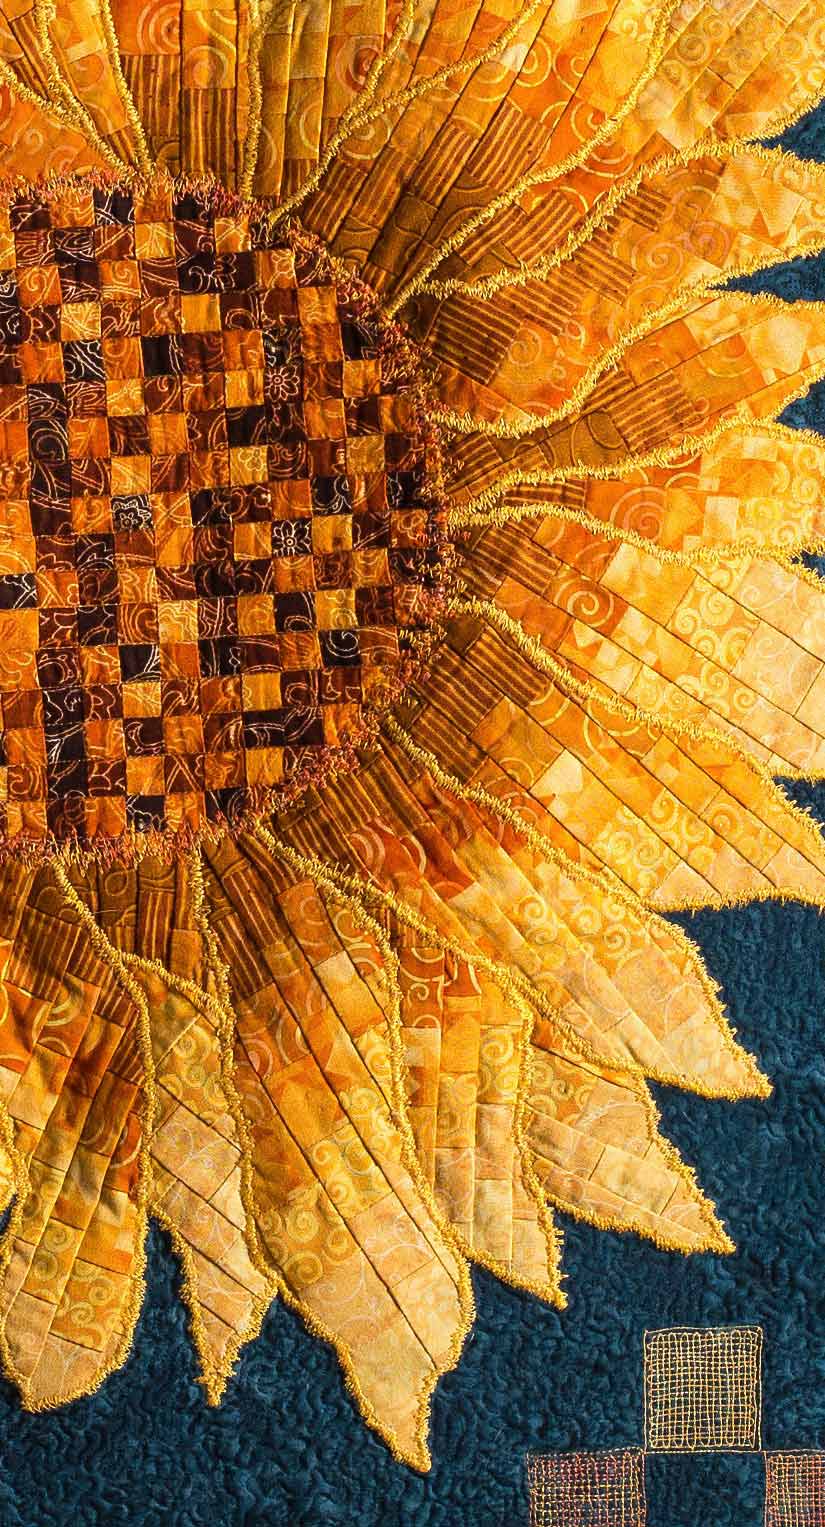
A close up of the stitching
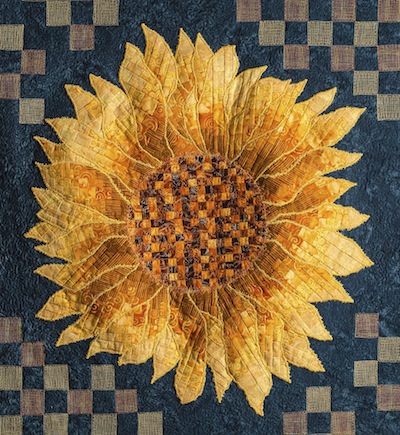
I had limited background fabric so needed to create a border with fabrics from the flower and the background. More strip piecing and sewing were undertaken to create this checkered patchwork design. The dark teal background was stippled with a matching thread. To carry the yellow checkered design towards the quilt I made little squares with free motion thread play. Once again using the Sulky Blendables.

The stitched squares on the background connect the border with the sunflower
All the seams in the sunflower were stitch in the ditch quilted to hold it in place. I used Bottom Line by Superior for this. The sunflower does have a bit of a ripple to it and a 3D effect which I think makes it look like it is ready to pop off the background.
My idea of turning Bargello into an appliquéd flower was very successful. I have to say that I am looking forward to making other flowers this way and teaching quilters the technique as well.
If you’d like to see this workshop at your guild or local quilt store or group just drop me a note.
You can also buy this pattern now!
I have an entire series of Bargello Flower patterns:


Happy Quilting!


I love,love, that this is all Bargello. One block. So darn convincing that it is going to pop out of that quilt!
Thanks, Sara. You should see it in real live – it really does look like it will jump off the quilt.
You are one extremely talented quilter Jen! What a great concept!
Thanks Jo-Ann, I love this technique – so much depth and dimension with it.
Your sunflower is just amazing! I love Bargello, what you have done with it is fantastic!
Thank you Claudia, working on some more flowers which I hope to unveil by the end of the month.
This is just gorgeous and I love your step by step explanation of how you did it, what talent and patience you have!
Wow this quilt is gorgeous! The various pieced and appliqued layers give it a remarkable texture!
I really like this one Jen, I think it has to be my favorite. I really like the ideas you used as well as the finished result. I have to say that I’m also looking forward to seeing your next flowers.
I can’t get over the 3 dimensional look of the flower. I really like the solution that you came up with to make the center look like sunflower seeds.
Thanks Jessica. It really did turn out very well. Better than I hoped for, actually. Of course, the pictures do a good job, but to see it in person, very cool.
Jen- your sunflower is masterful! I have loved sunflowers since taking photos of (and in) fields of them in the South of France. You’ve done a beautiful job with your complementary color scheme as well.
Wow!!! The dimensionality of the sunflower is really amazing. What a beautiful result of the method you used for the petals and the center! Well worth all that work. 😀
Thanks so much Lynette. I’ve had a number of requests to teach the technique so a workshop is in the works and available for booking. Yay!
Beautiful quilt and I love the way you did the center! Thanks for sharing.
Freemotion by the River Linky Party Tuesday
This quilt is gorgeous!! I love the sunflowers, and the fabrics and stitching on this created such a beautiful effect!
Jen,
What a great idea and so well executed. I enjoyed reading about your process. It was the next best thing to being at the gallery.
Thanks, Ann
Thanks, Ann. So glad you enjoyed the story.
I would NEVER have the patience, but it is beautiful.
Yes, this is one that patience is definitely needed for.
This is absolutely stunning! Beautiful and masterful. Thanks for sharing it at Freemotion By the River linky Party.
Your welcome Patricia
I absolutely adore sunflowers! It looks so real. Is there a pattern you are selling? I would love to make one of my own
Thanks, Darla I hope to have the patterns out sometime in June. I will put an update in the next newsletter as to their ETA.
Oh, this is one of a kind, indeed! Really great! It took me some time to work out petails – awersome work!
Thanks so much Ann. Glad you like it.