
 Hey Everyone, welcome back to Stitch Along Sunday.
The last Sunday in September brings another art quilt challenge to an end.
If you missed last week then check out my piece at September Week 4.
This weeks rules can be found on Ruth’s blog – September Week 5 Rules. As well don’t forget to check out the September Gallery to see what everyone else is up to.
The rules this week were to finish the quilt any way I wanted and to add a hanging sleeve. Check out last weeks Technique Tuesday post on How To Make A Hanging Sleeve.
I had thought I would add a border to the piece but then decided no I didn’t want to make the piece any bigger than it already is. A bit more thought and I debated between binding and facing the piece. Binding won.
I had seen a piece the other day that a friend did where she had the binding coordinating with the colour and lines in the quilt and I thought I want to do that to – so I did. Check out my Technique Tuesday post this week to see how I made this type of binding.
The binding was added to the vertical sides first and sewn in place front and back.

Side binding in place
Then the top and bottom pieces were added and sewn in place. By having the binding like this the corners are bit different with no mitred corner but a straight edge.

Note the straight edge corners on the binding
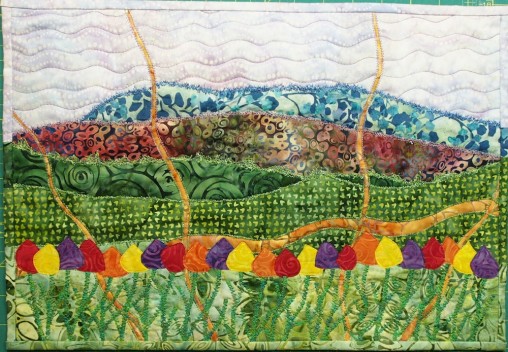
I love how the grass, trees, mountains and sky continue off into the binding by using the same fabrics in line with each part of the design. This type of binding is a bit more tedious but well worth the effort.
I added a hanging sleeve to the back and now it is ready to be hung. Check out my post on how to make a hanging sleeve to see how they are made and attached.
I wonder what Ruth is cooking up for us next month – I guess we will just have to wait until the end of the week to find out.
Happy Quilting!


I am so impressed and it is so interesting and such fun to follow, I love the final binding on your piece.