

Hey Everyone, welcome back to Technique Tuesday.
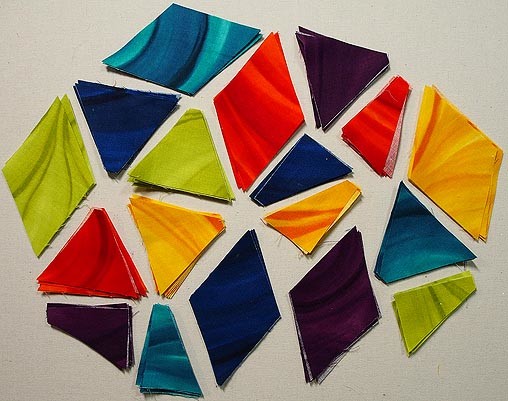
Last week I demonstrated how to cut the 3 different shapes with the Sidekick ruler from Jaybird Quilts. I used 2 ½″ strips that I already had cut from a previous project. A great way to blast that stash and get rid of strips.
The shapes can be cut in 4 different sizes from 1″ to 4″ finished. All the shapes can be cut from the same strip and there is very little waste from each strip. That’s a bonus.
Today I am going to sew some of these pieces together and see what I come up with.
Half Triangles
The half triangles are cut as left and right. To sew two together you need a left and a right. Place them side by side with the straight edges matching.
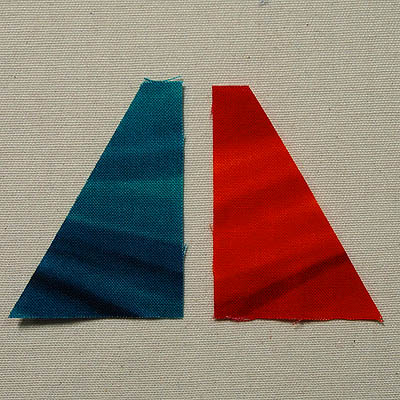
Left and right half triangles
Place one on top of the other making sure to match up the flat top edge. Sew down the straight side.
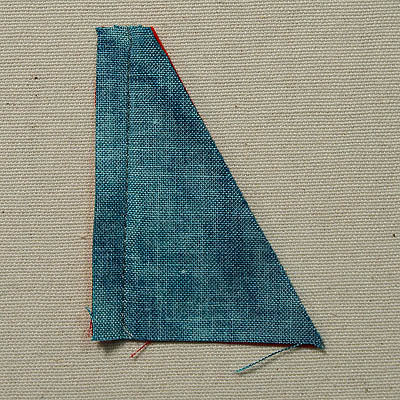
Sew together on straight edge
Press the seam. I used my Finger Pressing Tool from Clover to do the pressing today since the pieces were small and most of the edges are cut on the bias. Heat can cause this bias edge to distort or stretch out of shape as can excessive handling.
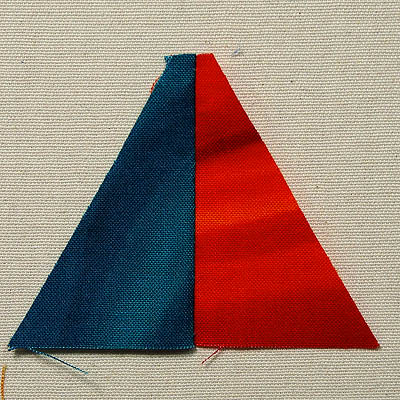
2 halves make a whole
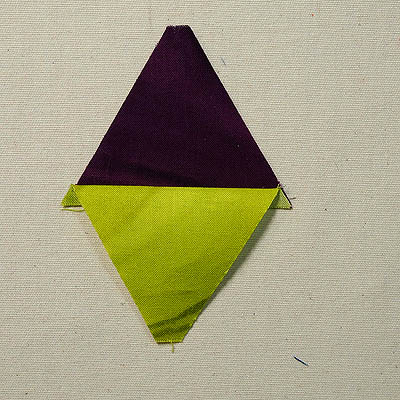
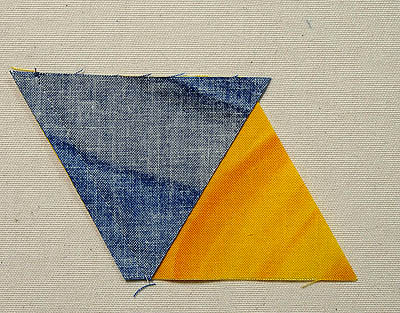
Two of these half triangles create a two coloured triangle.
Triangles
Place the triangles on top of each other so that they match up perfectly. Sew along the bottom straight edge.

Triangles right sides together
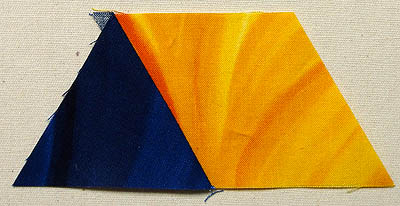
Press the seam. The triangles will be stacked on top of each other.
Two triangles together
Diamonds
The diamonds go together best if the two pointed ends are cut off blunt. To do this lay the ruler on the diamond as shown below. The 2 ½″ line is in the middle of the diamond.
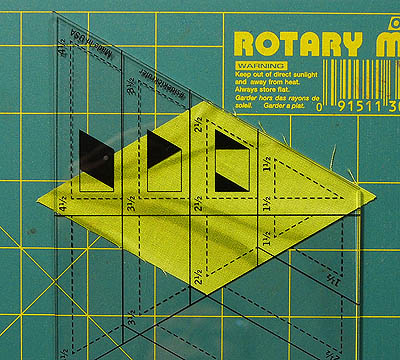
Ruler aligned on diamond to trim points off
Trim off the two ends to create a flat ended diamond.

Ends trimmed off of diamond
Place the diamonds together with the bottom one lying horizontally and the top vertically with the flat end matching the side of the diamond. With the flat ends you can line up the diamonds perfectly.
Place diamonds right sides together
Sew together. Press the seam. The diamonds are sewn into a straight row creating a parallelogram shape.
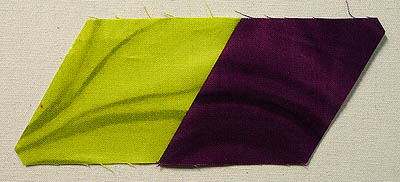
Diamonds sewn together
Triangles to Diamonds
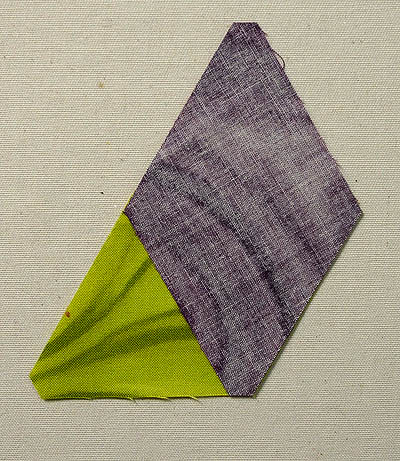
To sew a triangle to a diamond line up the blunt end of the triangle with one edge of the diamond.
Triangle sewn to diamond
Press the seam.
Triangle and diamond sewn together
Sew a second diamond to the other side of the unit made above to create a larger triangle. Align the second triangle so it’s blunt end is away from the other triangle on the edge of the diamond. The triangles can be of the same or different colours.

Red triangle added
Just a few ways to sew these shapes together. By sewing the shapes together other shapes are created which can then be sewn together to create more shapes or blocks. Join me tomorrow to see what these other shapes are.
Happy Quilting!


Trackbacks/Pingbacks