
Hey Everyone, welcome back to Technique Tuesday.
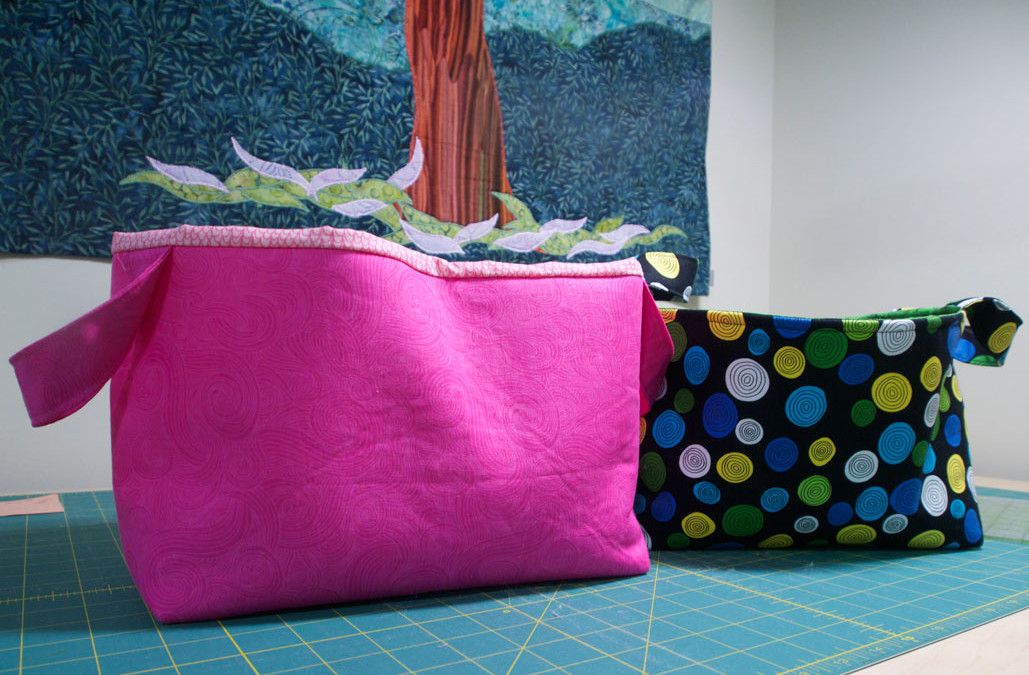
For years I have been making Santa Sacs with a box bottom and using the same method over and over again. Before Christmas a friend was over and we were making the One Hour Basket which also had a box bottom and I discovered a whole new method of making a box bottom. Our baskets are shown at the top of the page.
But first, the One Hour Basket by Hearts and Bees is really cool and it is a free pattern right here on Craftsy so check it out. I bet you can’t stop at just one. Also make sure to check out their website for some very cool quilting ideas.
I decided to give this method a go on my Santa Sacs and the best part is that the seams match up every time. Not always with my other method did the seams match up perfectly.
Once the bag is sewn together I made the box bottom in 6 easy steps.
Step 1: Measure a square in each corner.
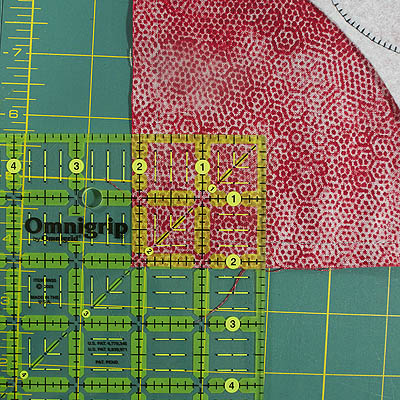
Measure the appropriate size square in corner
Step 2: Cut the square out.
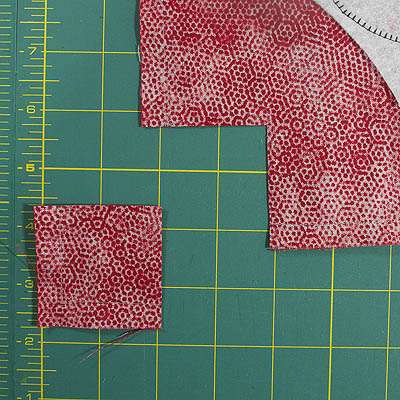
Square cut out of corner
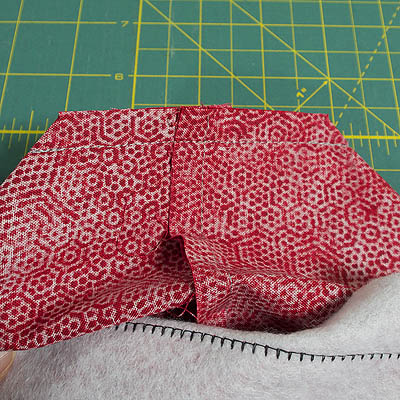
Step 3: Match the seams so they nest together.

Nest seams together
Step 4: Pin the edges together.
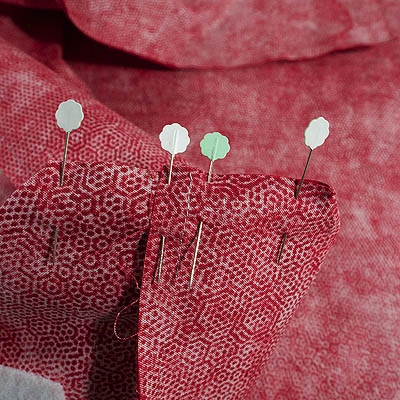
Edges pinned together
Step 5: Sew the edges together.
Edges sewn together
Step 6: To create a perfect box corner.
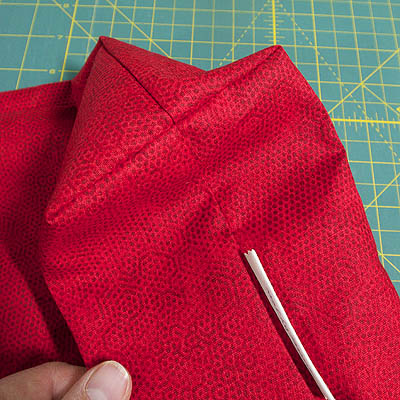
Perfect box corner
Thanks to Ali & Kelly of Hearts and Bees I now have a much faster and more efficient way of making a box bottom.
Here’s the one hour basket I made for my niece. It matches her lime green curtains.
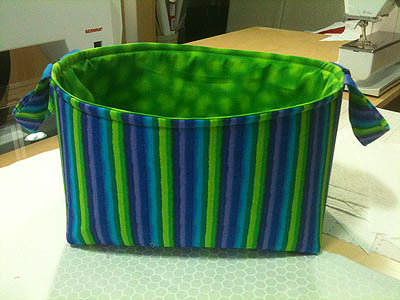
Abbygale’s one hour basket
Happy Quilting!


