
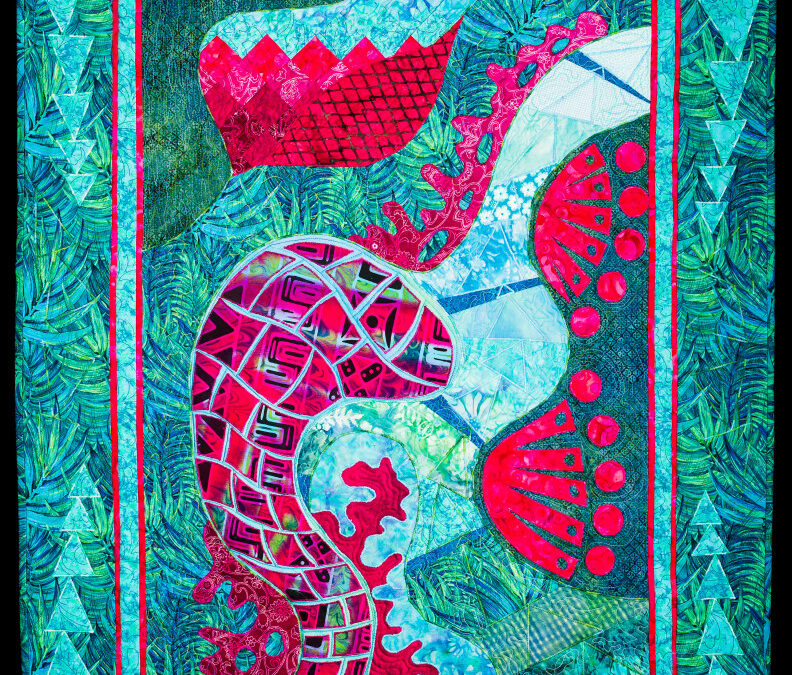

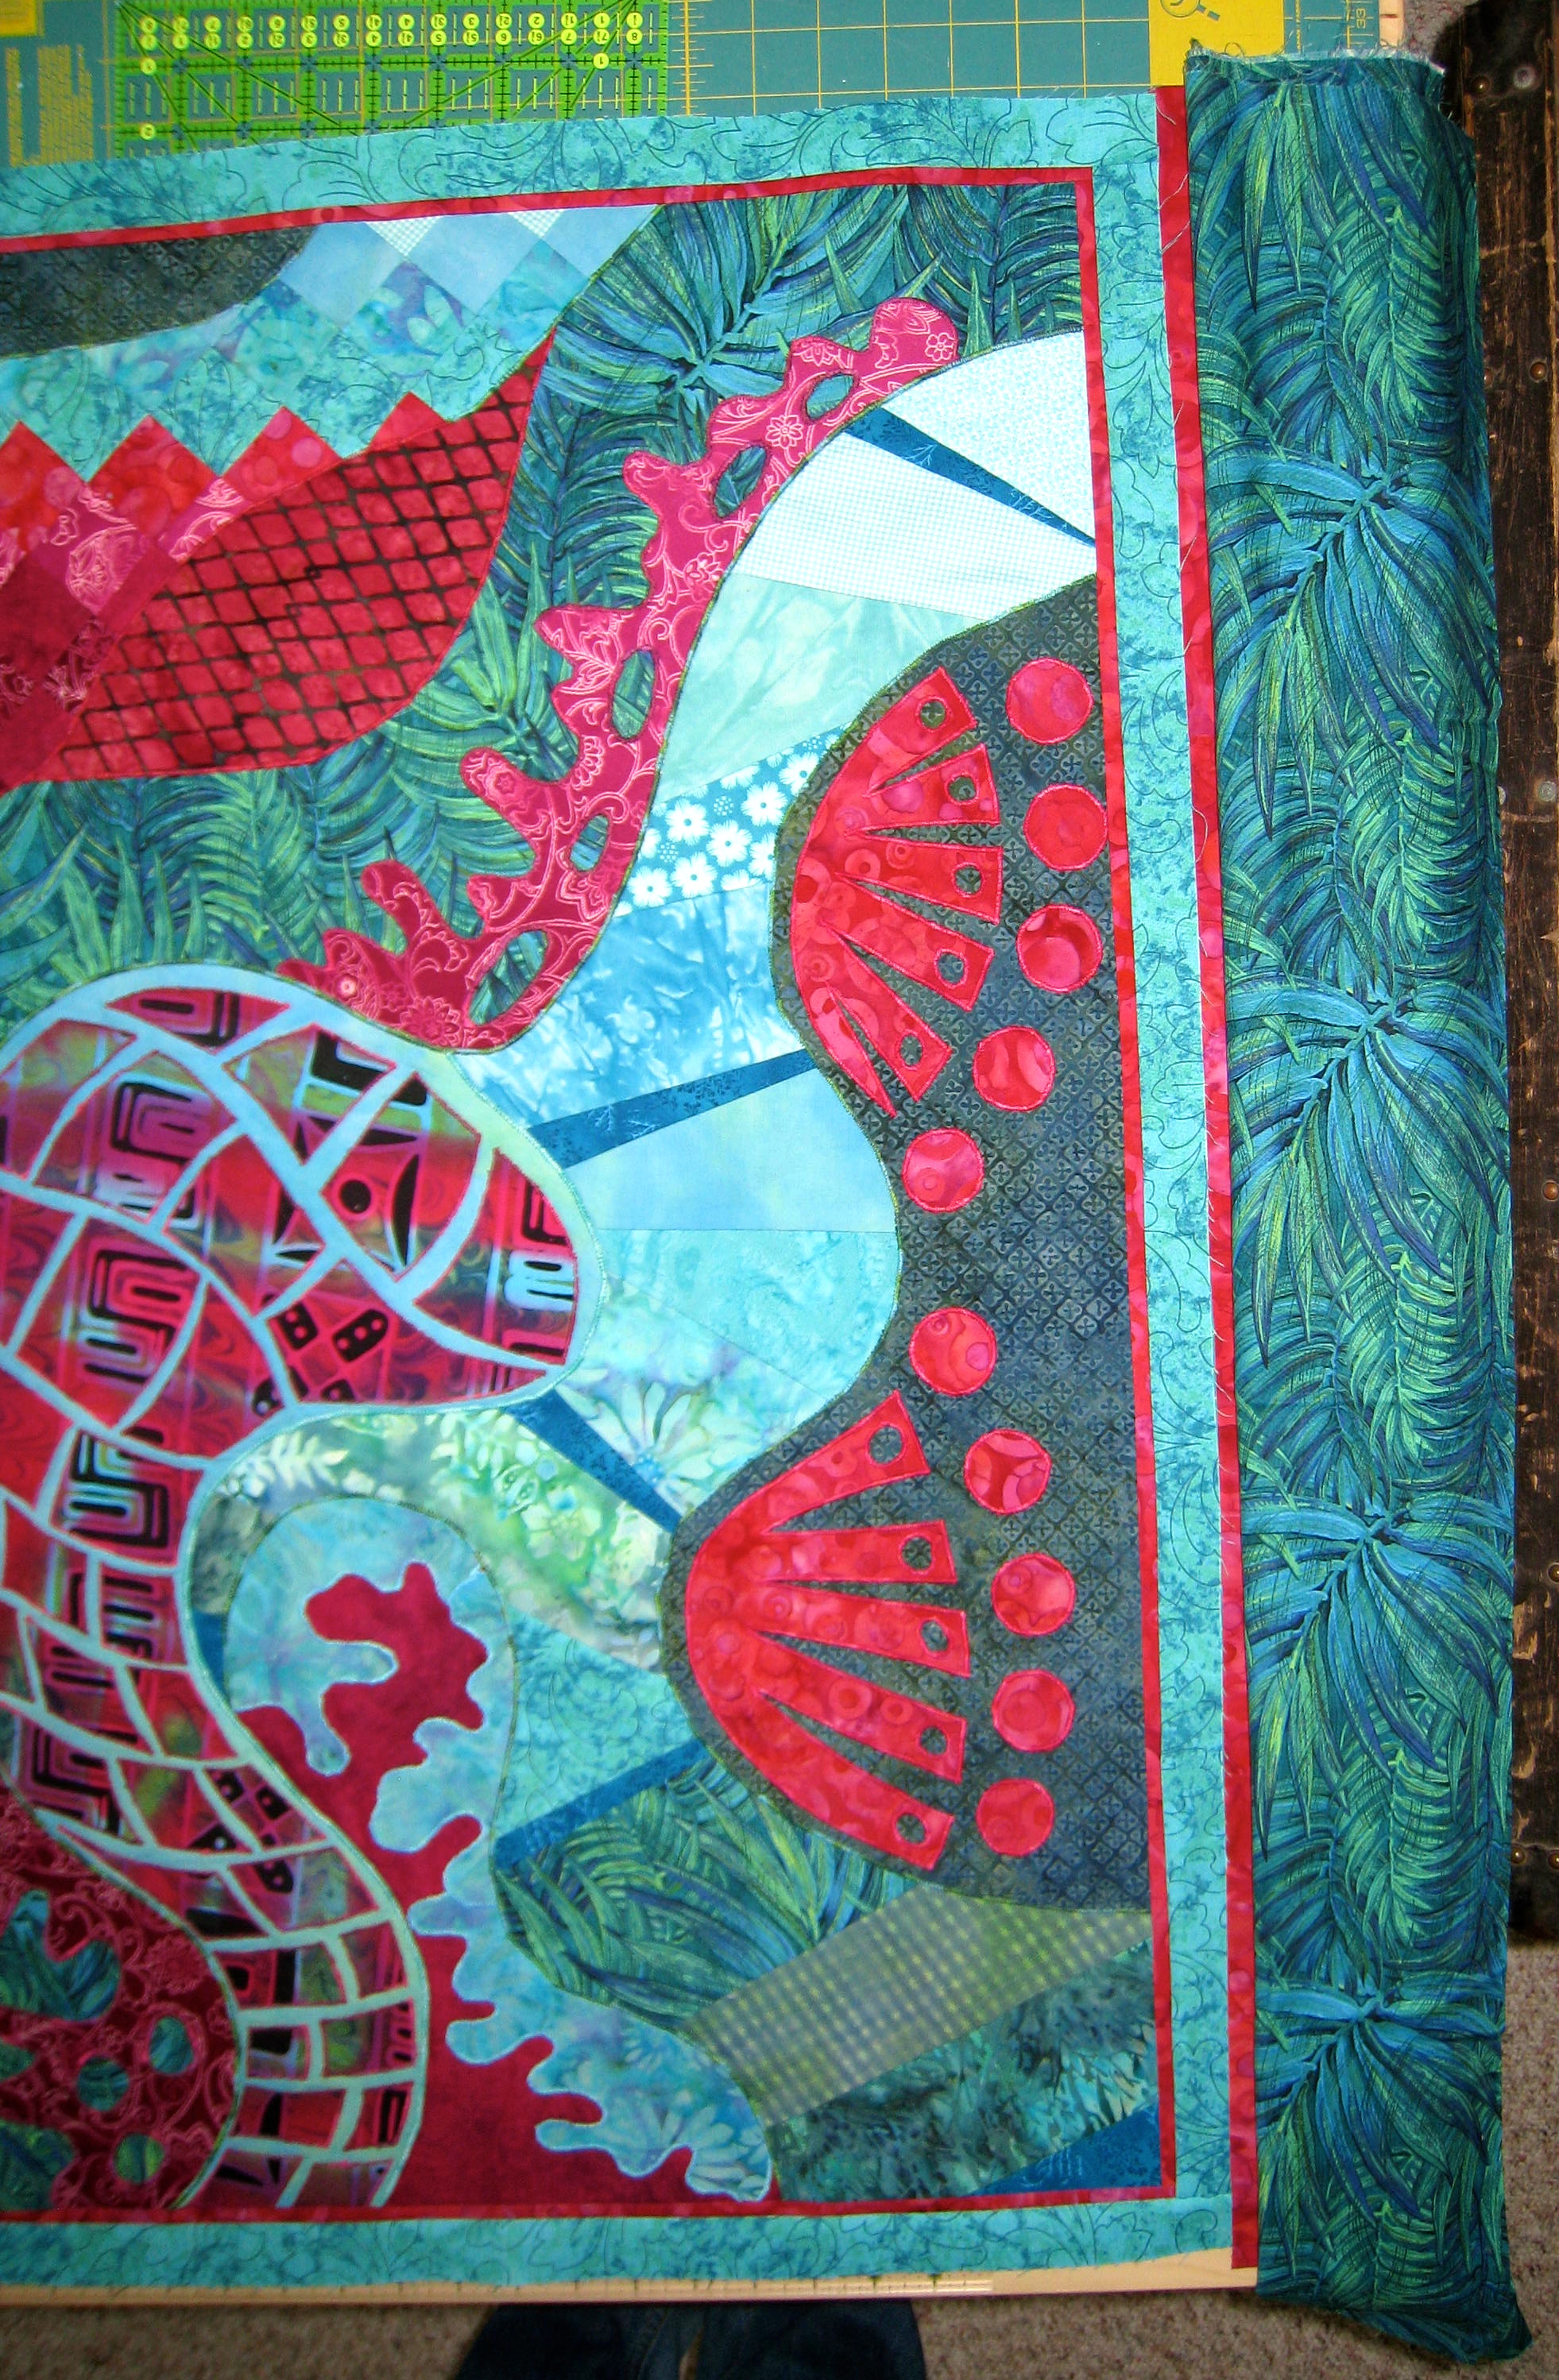
This looks way awesome in full size – click to see it larger
Hey Everyone, welcome back to Story Time Monday.
Hot off the press in the wee hours of the morning Sea Serpent was. I didn’t get this one done for the March 29th deadline and so finished it off to deliver to the gallery this morning. There was a little bit more work to it than I had originally planned – read on to find out why.
Rewind three years and I was at my very first Gloria Loughman class hosted by Patchwork by Sea in Brighton, South Australia. The class was called Playing On the Surface. Pretty much a class where you draw lines on a piece of paper and then fill in the sections with fabric – totally abstract. I had absolutely no idea what the quilt was going to look like when I started with those few lines on the 4 pieces of paper taped together.
This process of quilt making was not one I had ever used before and I found it very interesting, exciting and scary all at once. No pattern to follow just my imagination to guide me along.
I had taken a ton of fabric with me and after finally deciding on the main feature fabric I set to work finding fabrics to compliment it. Of course I had to buy more as I just didn’t have that perfect turquoise you know.
The quilt features appliqué, foundation piecing and colour wash. One of the larger sections I decided to do mosaic appliqué in with the feature fabric. Once the piece was created I put it on the design wall thinking boy that sure is cool.
The next section beside it was foundation pieced in a colour run from dark to light with a dark teal fabric interspersed in slivers every so often. I finished it and placed it up by the mosaic piece only to be surprised by this sea creature developing out of the mosaic tiles. It was a complete fluke that the sea serpent was created and a really cool fluke at that. He was even complete with eye and nose.
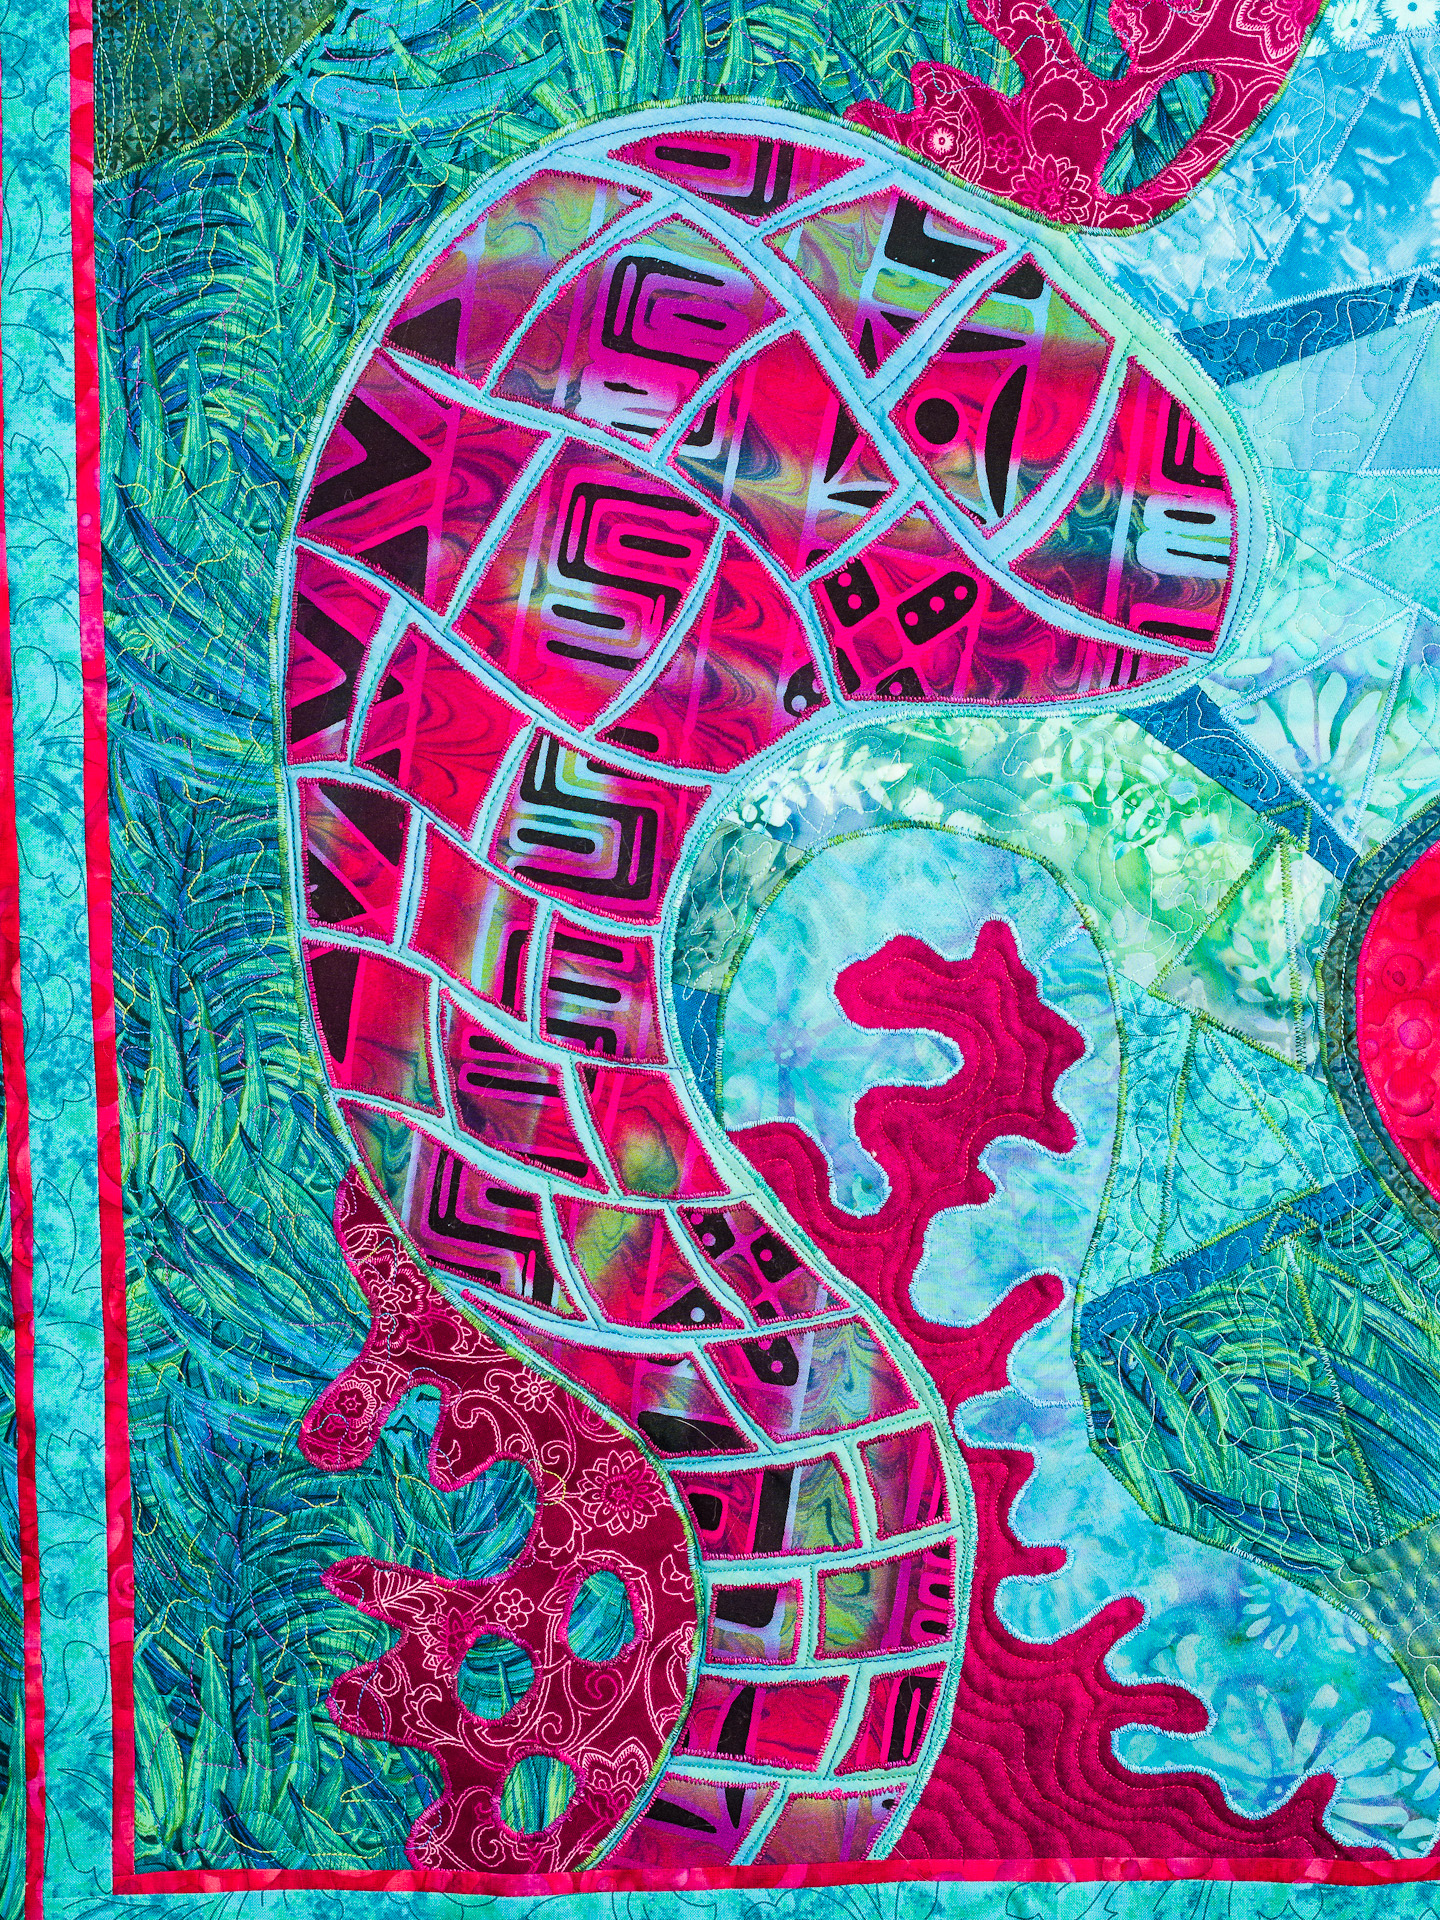
The Sea Serpent that mysteriously appeared
By the time the two day class was over I had all of my sections completed and pinned together on the tear away backing. I packed everything into the car and headed home.
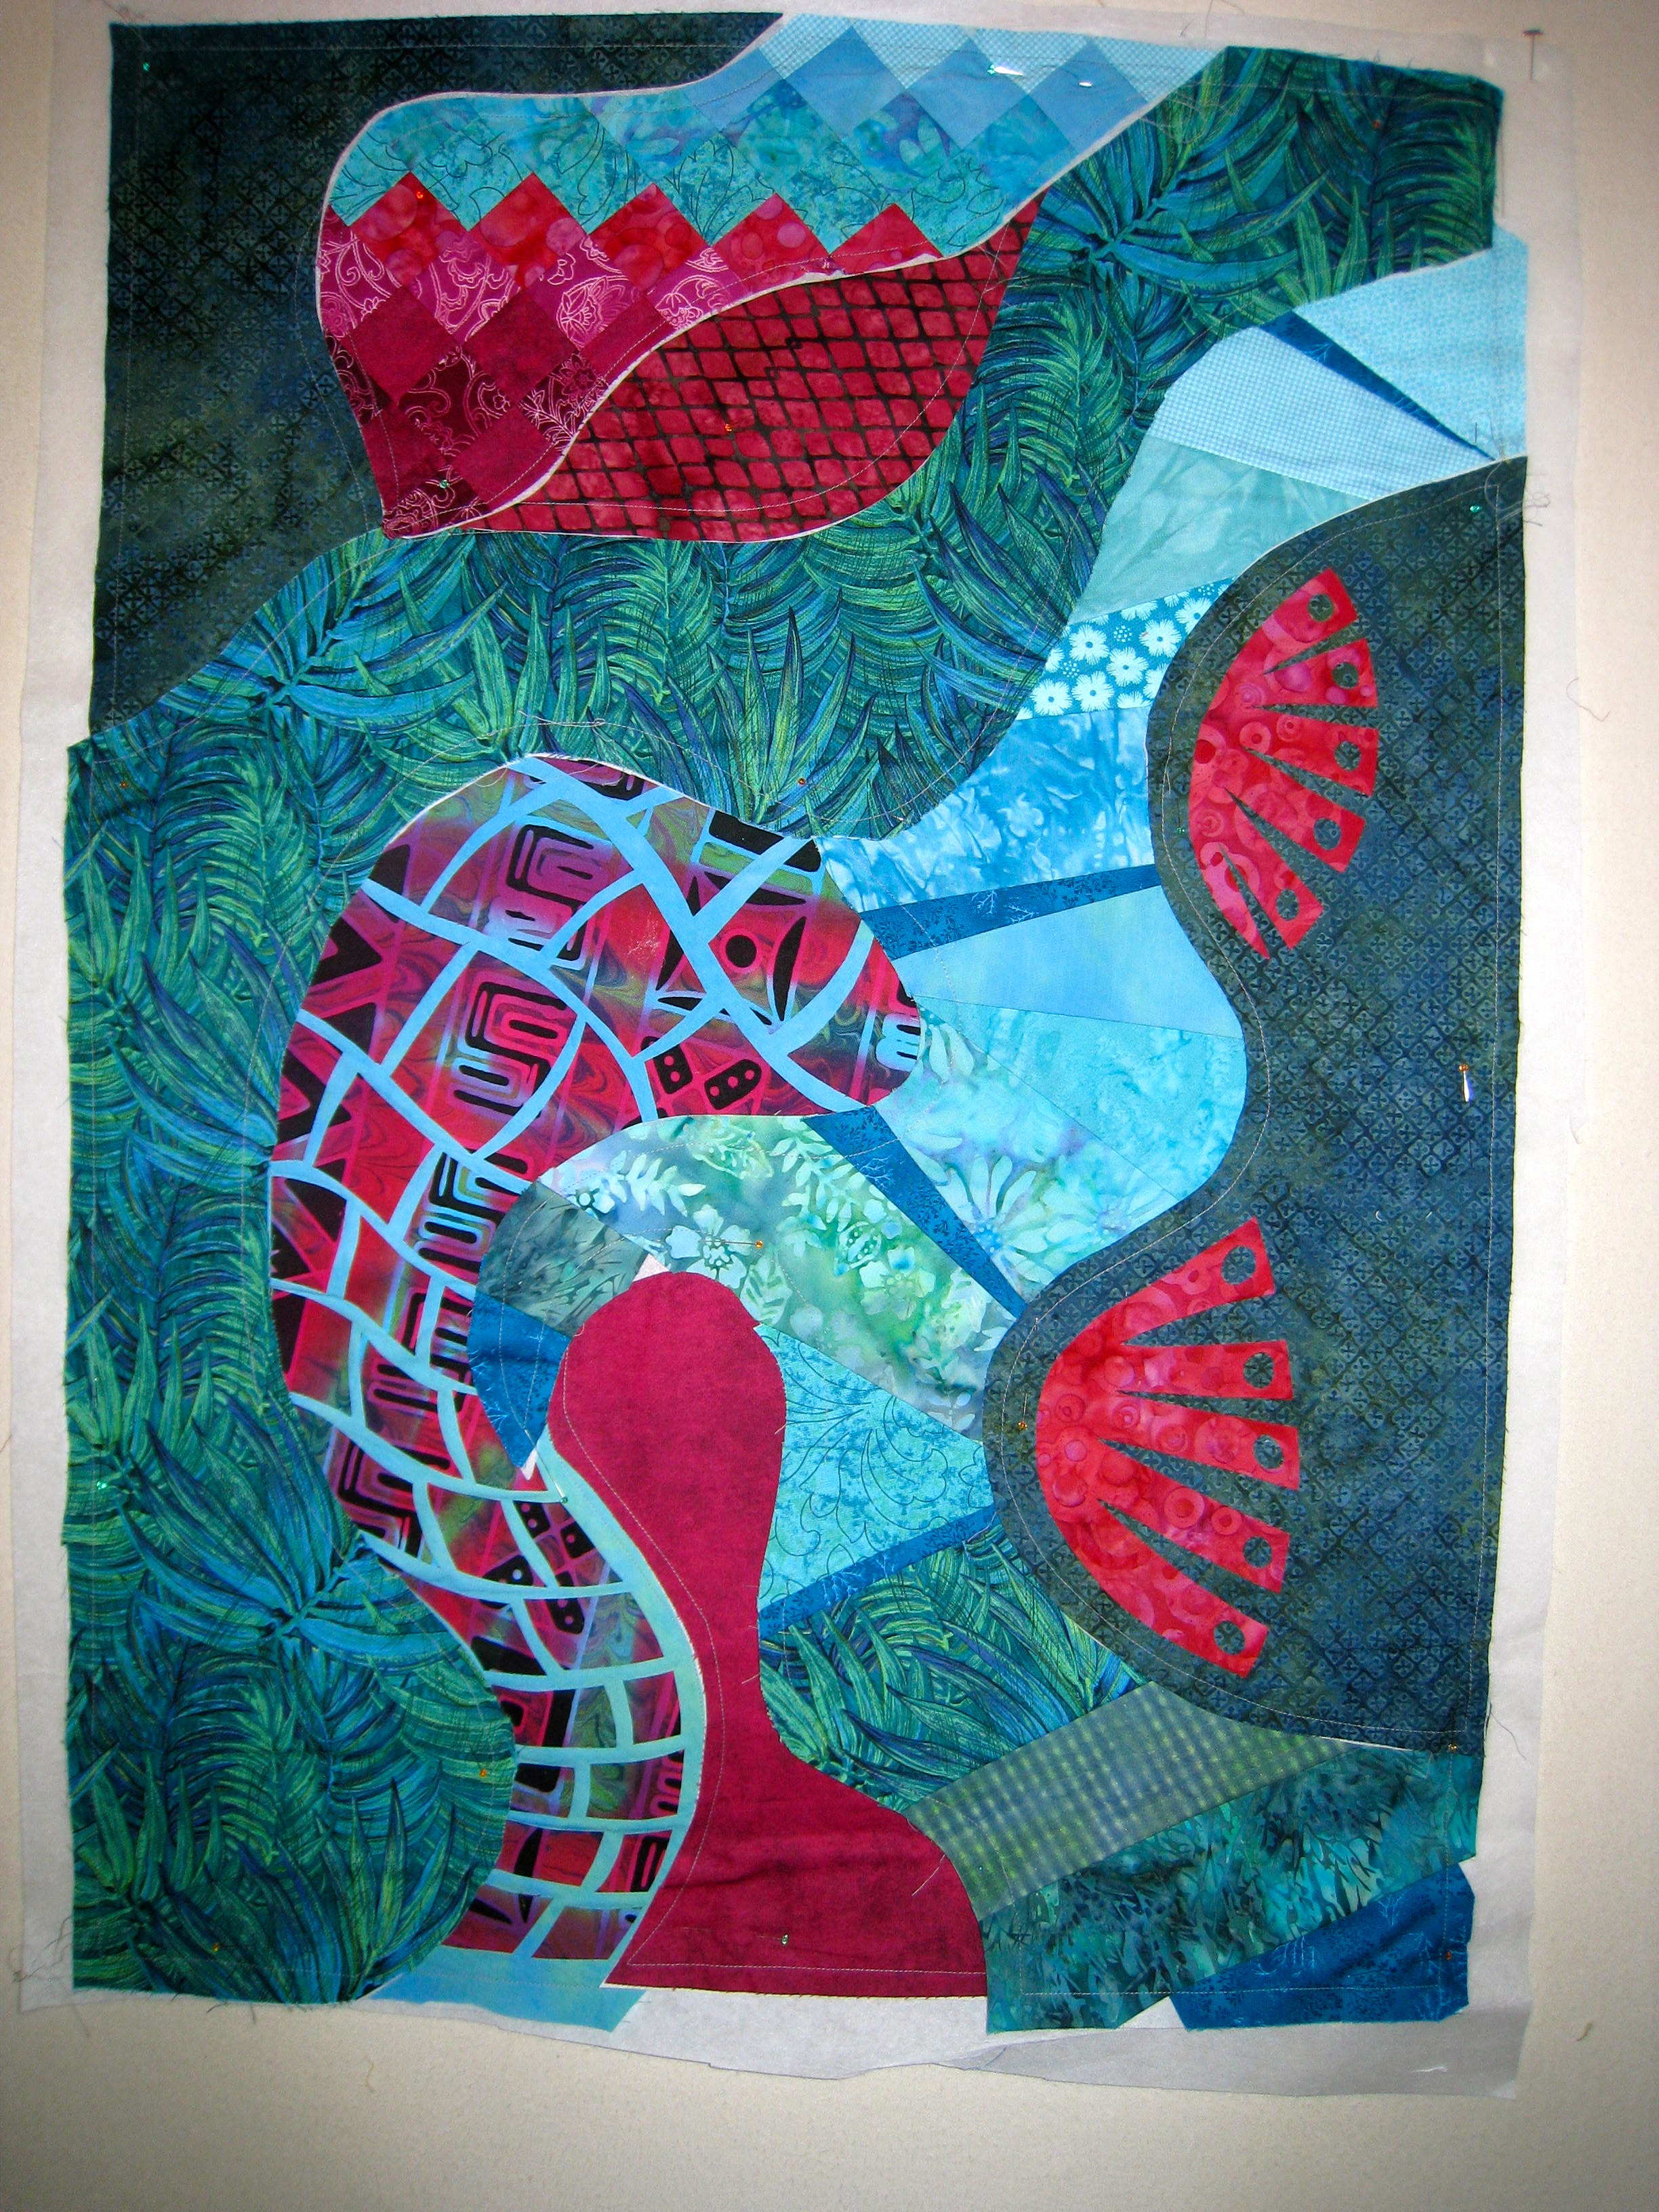
The sections all pinned to the stabilizer ready for transport home
Once again the piece took a back seat to other things that I was doing and it was never completed.
Now three years later it was unwrapped from the pool noodle. I often wonder if the reason I do not finish a piece right away is because the time isn’t right or I have no idea what to do next or other things just take over and it gets pushed to the back of the drawer. I am quite glad I didn’t finish this quilt as I have a feeling it would have been finished a lot differently and not with as much quilting detail.
After all that time rolled up the sections were finally joined and more applique was added.
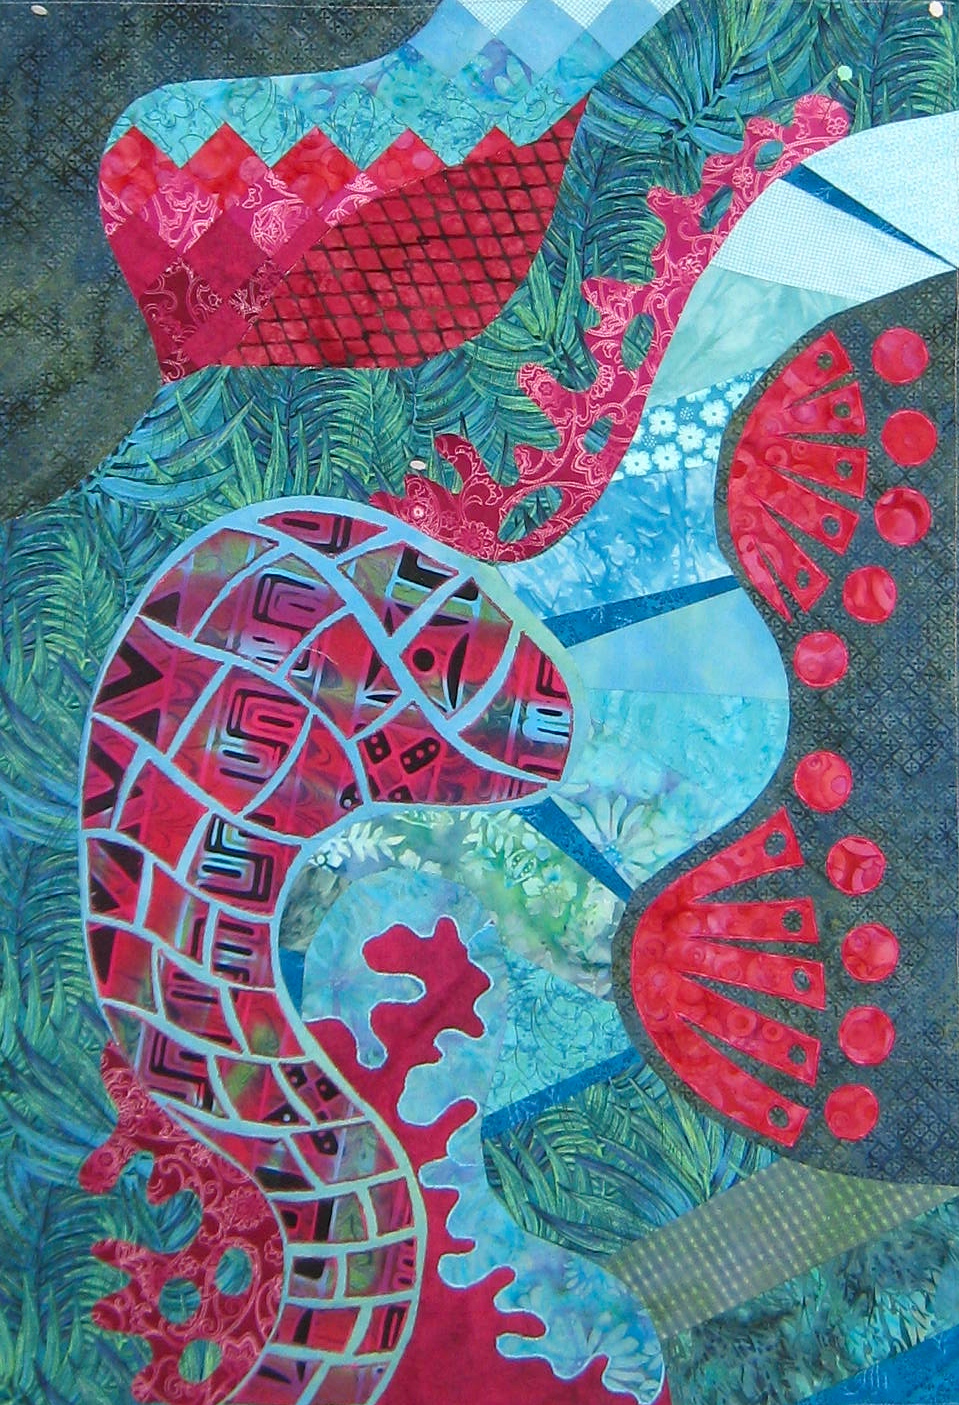
More applique added.
All the surface embellishing was done and I was ready to sandwich it for quilting when I realised that the metal hanging rod we had made would be too long. I said to Michael could he cut the rod and his reply was that he would rather not. I took this to mean that it would be a bit of an ordeal to cut the rod and said okay I can add a border or two or four(!) as it turns out.
Well, by the time I was around to putting the last border on and at least 2 ½ hours after the conversation he informed me it would have been a 5 minute job to cut the rod with the hack saw – oh boy, I was not a happy camper to hear this. So it was either reverse sew and take off all of the borders or continue forward with the borders. I chose to move forward with the borders.
[Editor’s Note: I didn’t want to cut the bars because I had just painted them and they were wet. How was I supposed to know it would take all day to put a border on? Turns out when Jen said border she meant border x4! And yes, I grovelled for the next day and a half.]
Selecting the 3rd & 4th borders
Needless to say Michael was employed to help remove the tear away stabilizer and sandwich the quilt. I gave him the most tedious piece to remove the stabilizer on.
The main body of the quilt was quilted heavily with different quilting motifs in most of the sections. All the quilting is free motion. A variety of threads were used to quilt with – King Tut by Superior, Sulky Blendables, Valdani and Wonderfil. All were 100% cotton in differing weights.
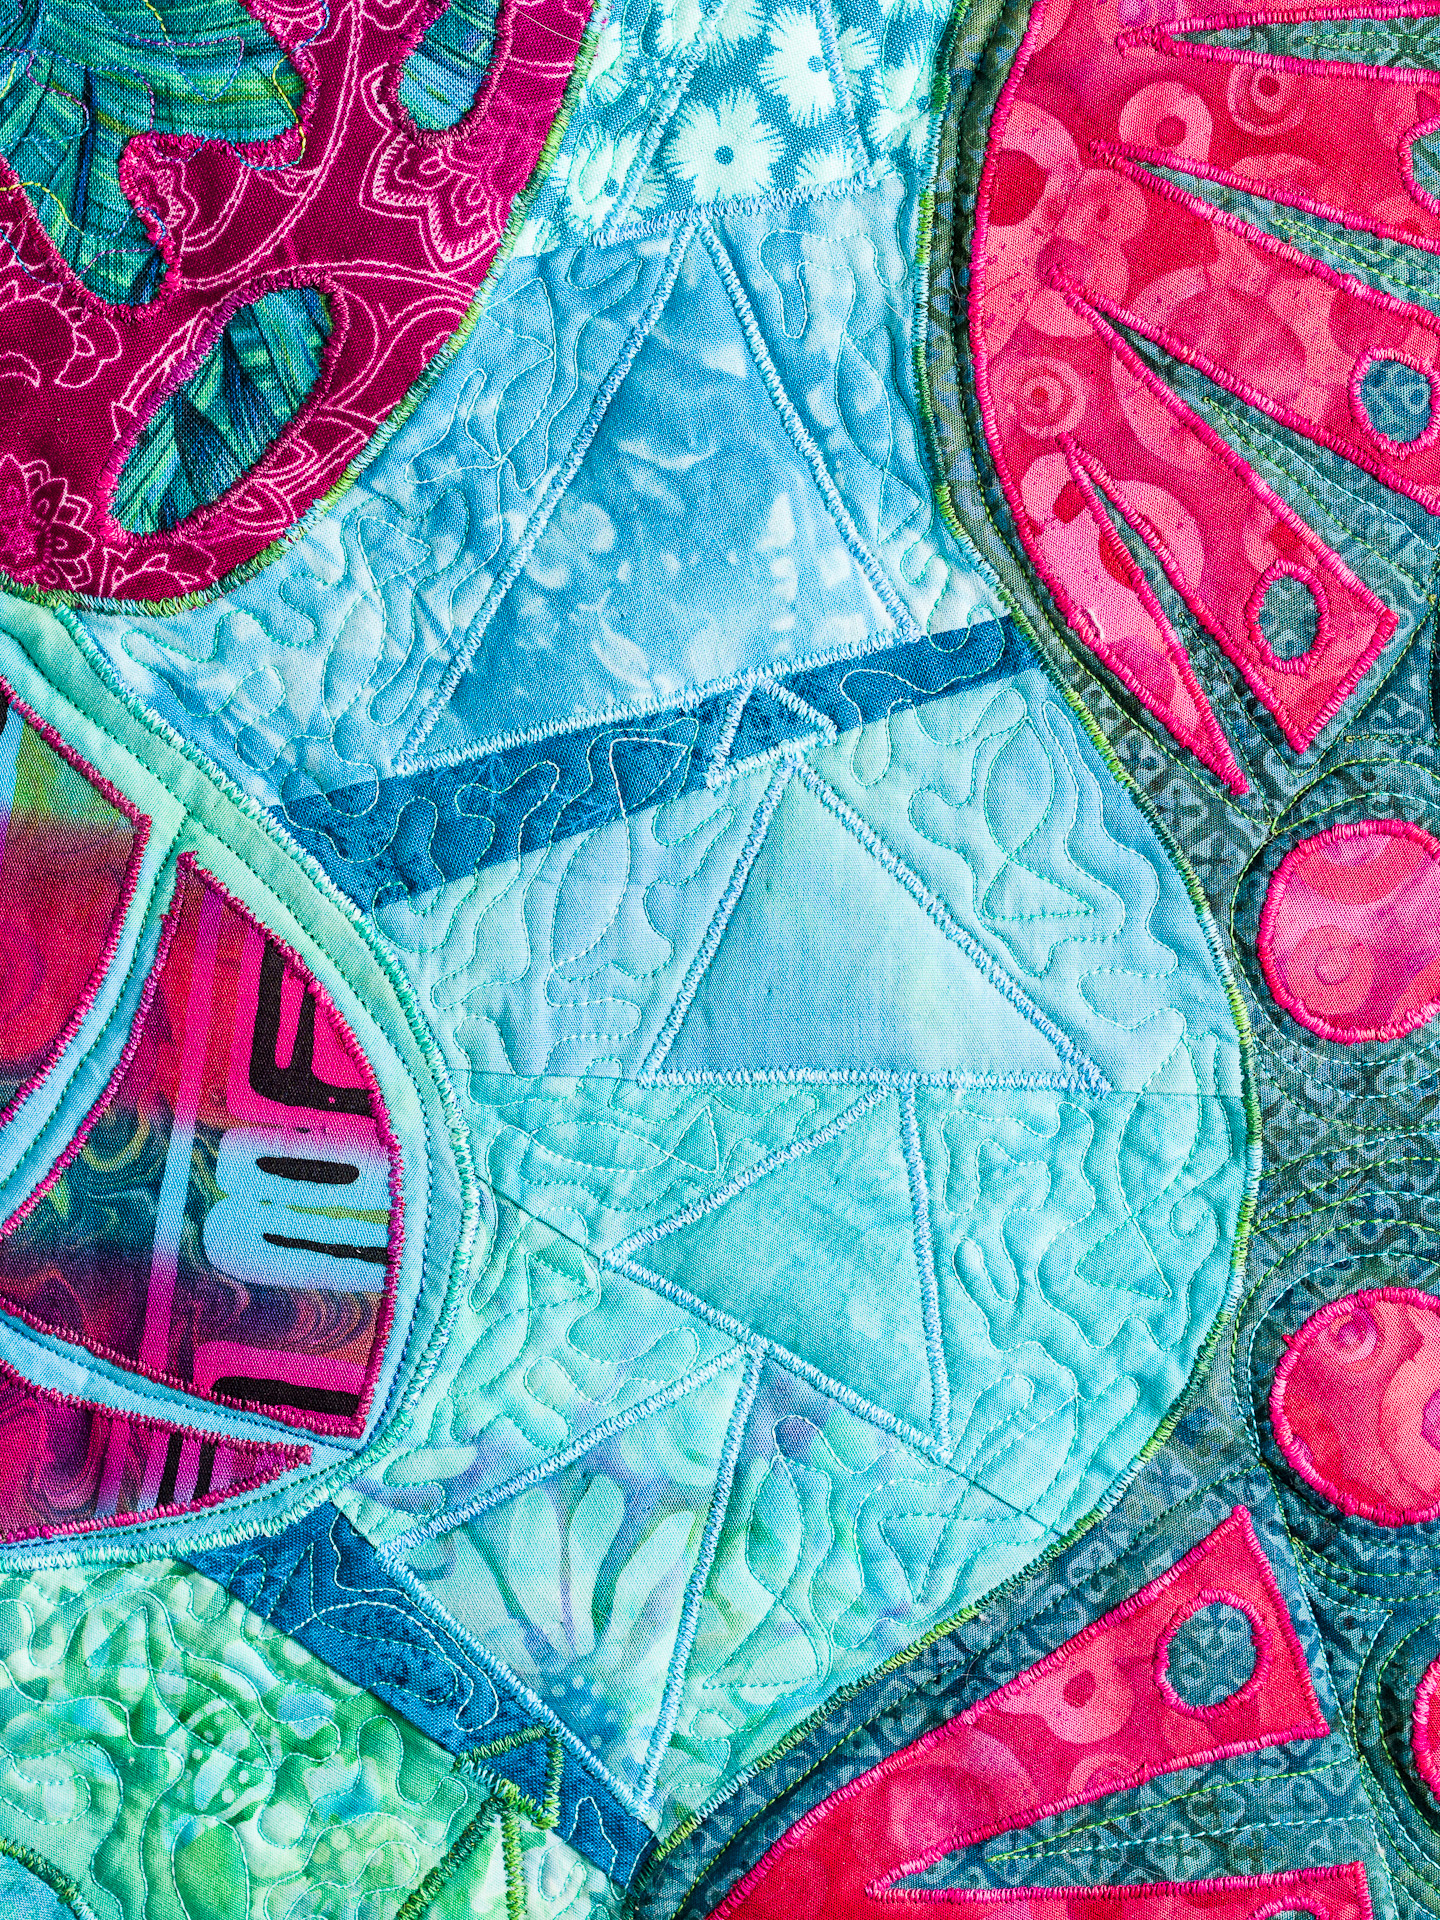
Look closely to see the little fish
When I was almost finished quilting the middle, I decided that the plain border just wasn’t doing it for me and so I added 44 appliqué pieces – yep, 44 of those little triangles to stitch around – what was I thinking! I do like the effect they have though and the extra work was worth it. And once those border triangles were finished I decided that the rest of the border needed faux appliqué triangles added.
[Editor’s note: by the time Jen finished all this embellishing, I no longer felt quite so guilty about the whole border snafu!]
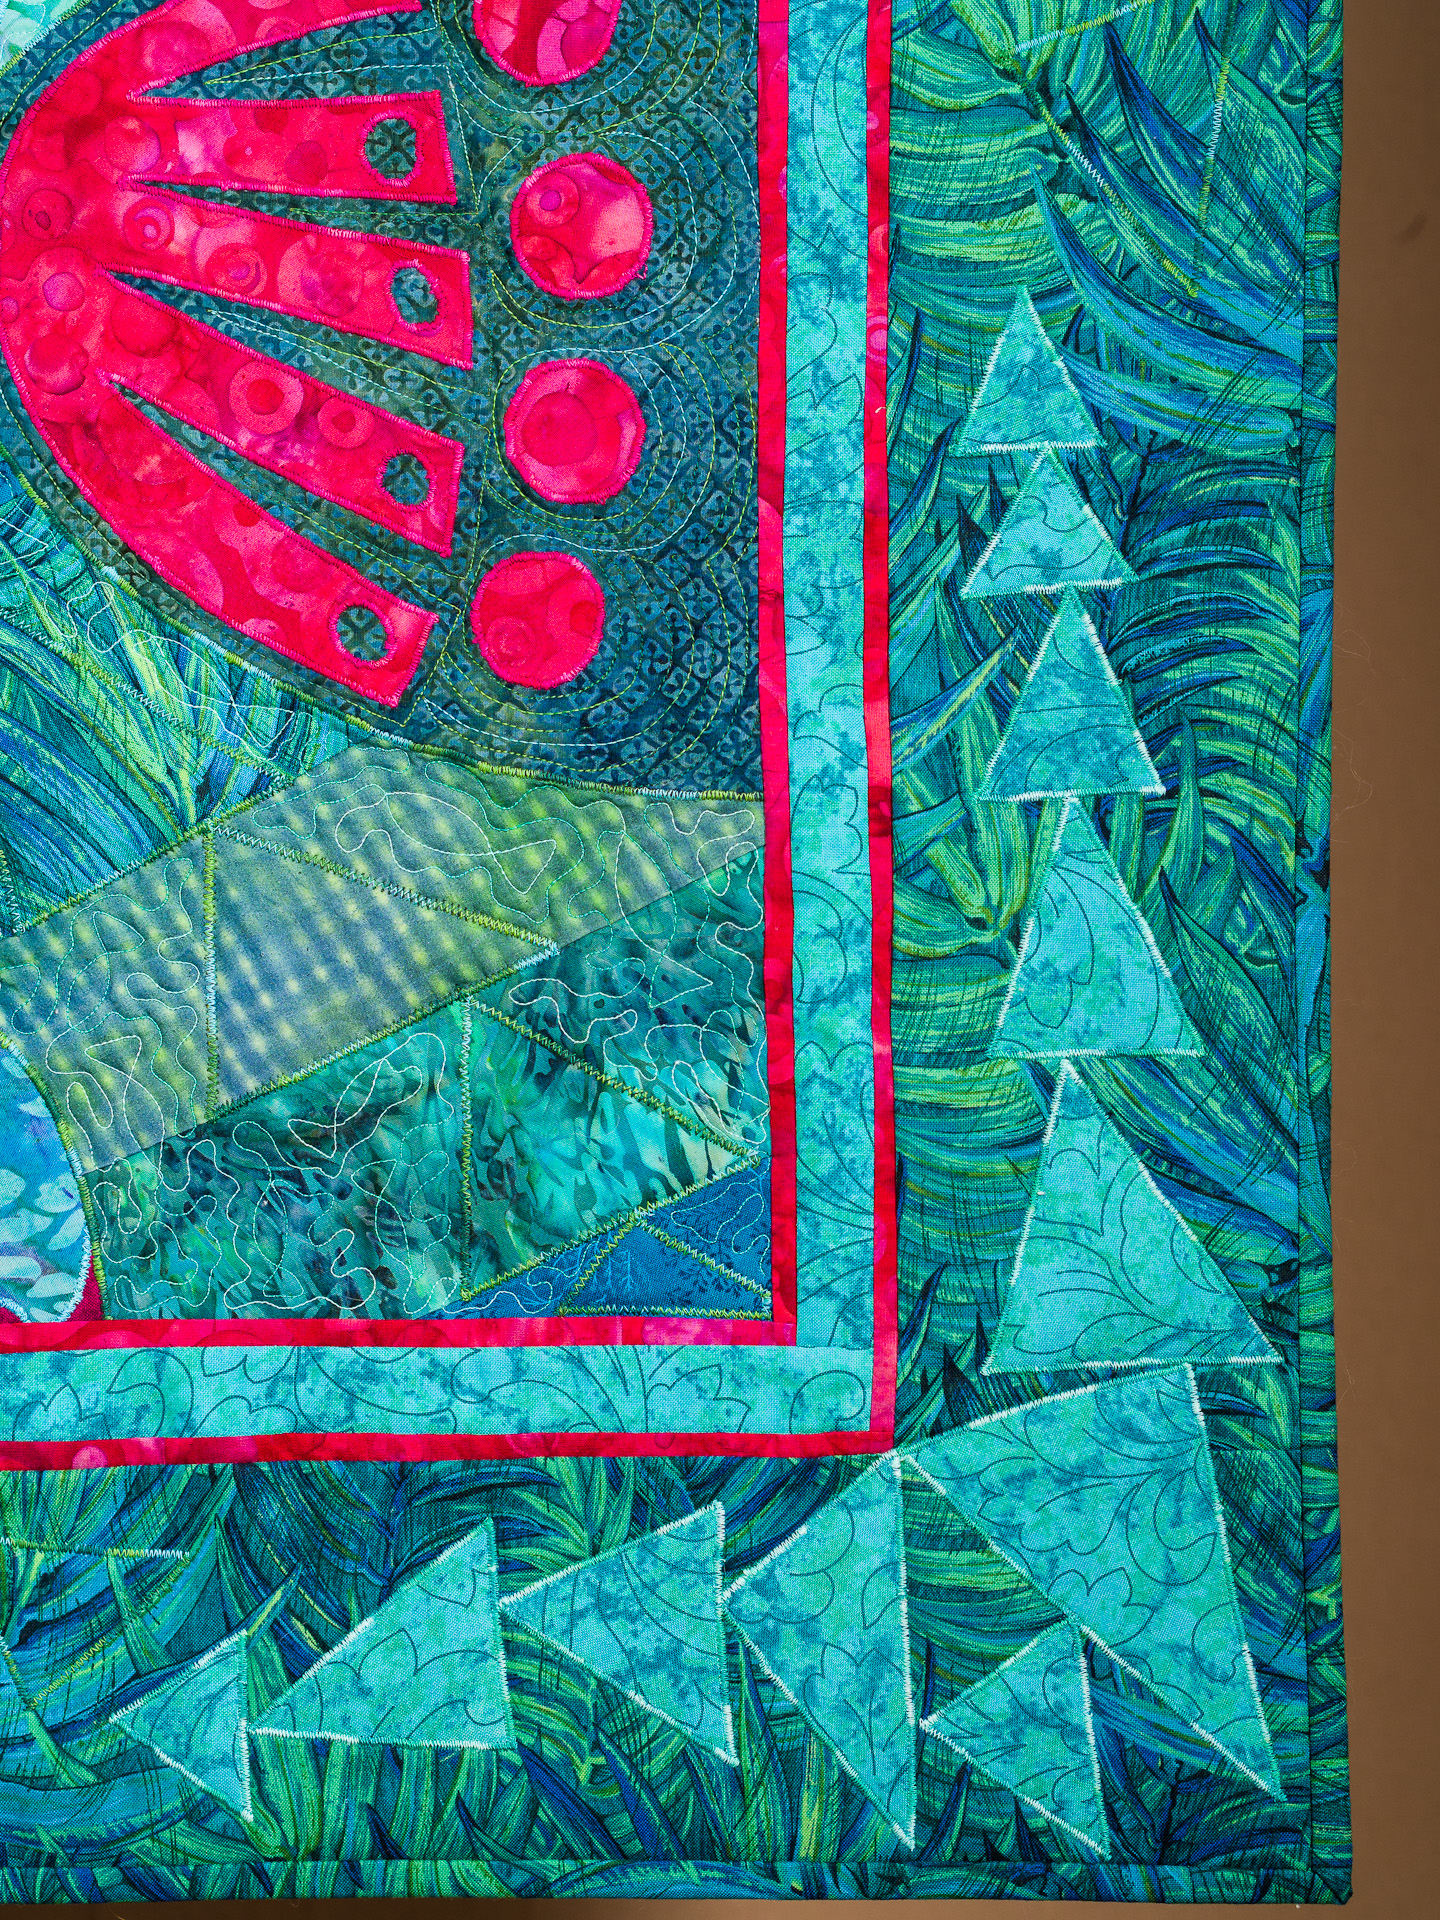
Eleven triangles added to each corner
Finally the binding, hanging sleeves and label were added and I crawled into bed at O-dark thirty.
[Editor’s Note: (yeah, I know, lots of notes today – I got in trouble one more time.) When I went to bed the plan was for Jen to work until the binding was attached and then she would get up at 0530 and finish it so I could photograph it. At 0650 I woke up and realised Jen was still asleep. Nudge, nudge. Nothing. NUDGE, NUDGE. “WAHHH!!” “Babe! It’s almost seven. You have to put the binding on.” “ROAR!!!!!!! I went to bed at 0330!” “oh crap” and I slunk out of the room and fed the furry ones.]
Another UFO completed and I am very proud to have it hanging at my show opening this Friday April 5 at the Ridge West Gallery here in Oro-Medonte, Ontario. Feel free to join me at the opening from 6 – 9 pm.
Happy Quilting!

I also shared this finished quilt on Richard and Tanya Quilts’ Finish Friday blog party. Stop in there to see some other wonderful finishes.


“border or two or four(!) as it turns out” !! I THINK that was perfect addition! It really makes it look complete, alive, and really sets off the inner contrasts! I love it! !!! Beautiful!
Thanks Lisa, yes the borders definitely made a big addition and they bring the whole piece together.
Fabulous
Thanks, Mary Ann
A lovely piece (and I might play with the approach to design). I just have to say that the border makes it a much better quilt. I love the added triangles. Accidental improvements are one of my favorite design tactics. 🙂
Thank you Claire. Yes the border was definitely a happy accident and the design elements of the triangles has really brought the piece together.
How pretty – I really like this – fun colors, intriguing design, and quilting that looks like a party. 🙂
Thanks Lynette. Quilting that looks like a party – I’ve never thought about quilting like that. What a great way to describe it!