


Hey Everyone, welcome back to Stash Blasting Wednesday.
I was checking out a bin in the back room that was full of kits I bought years and years ago. Of course none of them opened or anything out of the package. I guess in a way long forgotten as I moved beyond the kit phase of my quilting life.
I pulled 4 kits out of the bin. The first three I opened up and went oh my those fabrics are hideous. Whatever possessed me to purchase them is beyond me but we all have impulse buys and I am sure these were impulse buys. The fabrics all went into the scrap bin.
The fourth kit intrigued me since it was a pre cut kit – I know I’m not terribly fond of pre cuts but this one the pieces are curved and they are all Bali Batiks from Bentarex called the Wheel of Mystery Quilt. No pieces to cut since it was already done for me – just sew them up and create something spectacular.
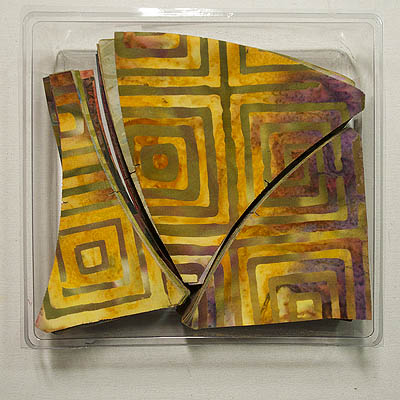
Pieces all cut and stacked in a tray
I figure I need another project on the go like I need a hole in the head but I opened up the package anyway and looked at all the pretty batiks and thought why not – it might be kind of fun and a little bit different from what I have been doing.
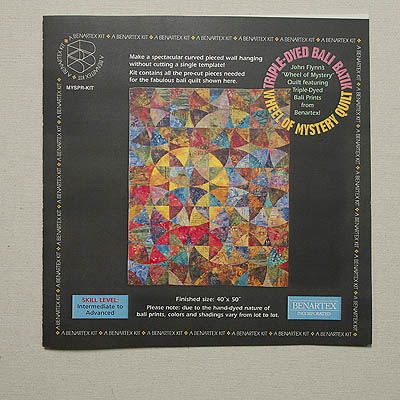
Picture of the design
Besides the kit was talking to me and saying I don’t want to go back in that bin, it’s dark and scary in there plus the other kits don’t play very nice.
Putting the Pieces Together
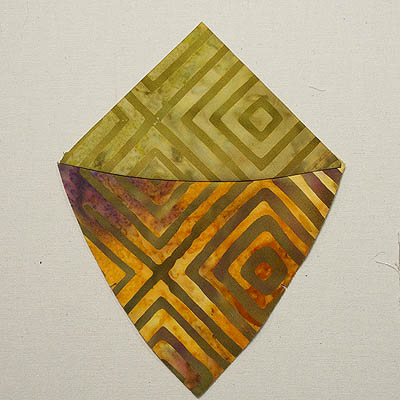
There are three pieces to each section and 4 sections to each block. I chose to just pick pieces from the stacks of pre-cuts to sew together rather than trying to match anything up.
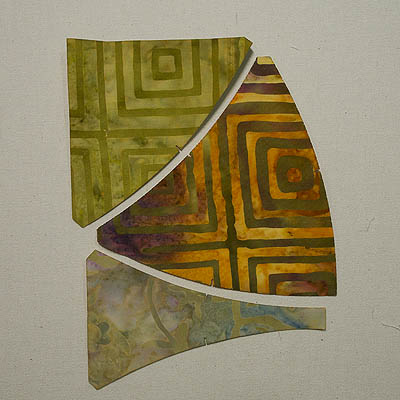
Three pieces make a section
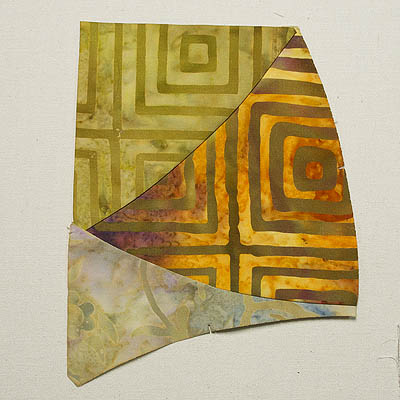
To begin each piece has cut in notched registration markers. These notches get lined up when sewing the pieces together. No pinning is required and in fact it would be a hindrance.
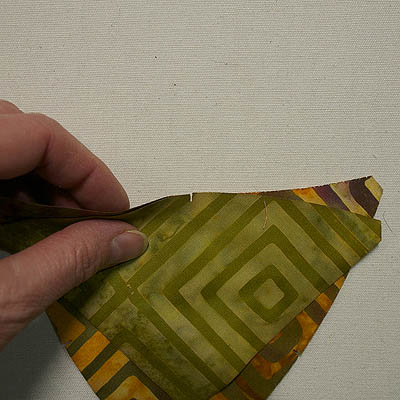
Notches in each piece
Instructions do come with the kit and so I followed them.
Sew piece A & B together with B on top. Sew slowly to ensure a ¼″ seam and proper alignment. The notches met up perfectly as I sewed the pieces together.

Notches line up perfectly
Piece A & B sewn together.

Pieces A & B sewn together
Press the seam towards piece B. It pressed very flat.
Seam presses flat
Piece C is sewn on top of piece A starting at the skinny end.
Section complete
The seam is pressed in two directions.
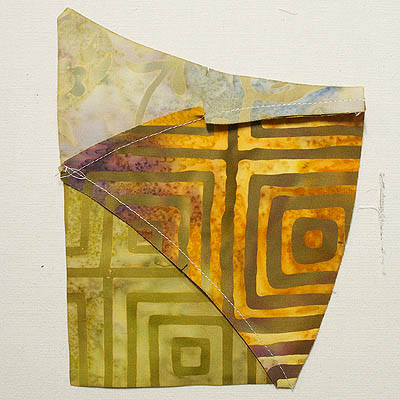
Press seam in two directions
The Block
I have 4 sections sewn together and here they are in a four patch with space between them.
4 sections completed
When sewn together they will look something like this. I didn’t measure but they look to be about a 9 inch square.
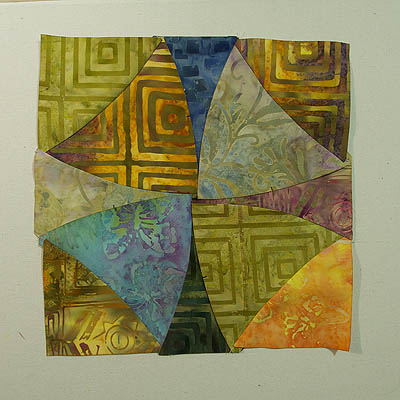
Sections made into a block
I am pretty sure I am not going to make the design on the package which is why I originally bought the kit but rather use the sections and blocks to create something else. I suspect I will be adding in some more curved piecing to the creation. I’m really liking the spacing between the blocks – now to find the perfect fabric to fill in that space.
Well, that was fun – something different and I actually enjoyed these pre cuts since I do enjoy curved piecing. Only a few more to go. I’ll keep the package by my machine and when I have a minute or two I can sew a few together.
Happy Quilting!


Jen, I’m sure you will end up with some intetesting different pattern like last time. I’m wondering how I could make up some similar pattern. Do you have in mind any name of block to use it. one of my guild we exchanged some batic fabrics and have to be done by June. Something like that would be nice to do. Didn’t have any idea yet. Thank you for your inspiration.
Bea, I’m looking forward to seeing what I can do with these blocks/sections. It will be lots of fun I am sure designing with these wonderful batiks. Someone on another forum told me it was called the winding path block. I’ll keep posting my progress.
That looks like it has possibilities. I have never bought quilt kits, but using one to make something else would be more appealing. Good luck!
Lori – Yes, I think repurposing this kit will be lots of fun with designing and creating something different. Something Artsy. I’ll keep you posted on the progress.