
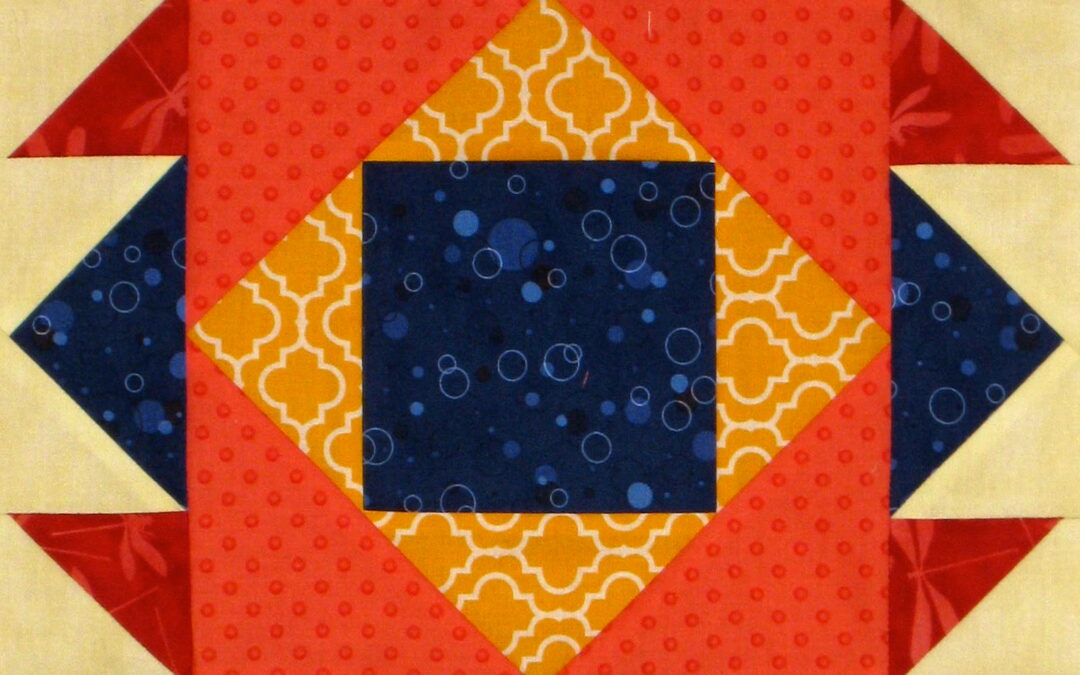

Completed Aztec Jewel quilt block
Hey Everyone, welcome back to Stash Blasting Wednesday.
I am a bit delayed getting this post out today – I was out teaching today and then, of course, I had to pick a rather involved block. There is a good reason as to why I picked this block, though so tune into Colourful Friday this week to find out why.
The block I have picked is called Aztec Jewel and I have to say I have never made this block before. I have only made one block this seeing how I am on a bit of a time crunch. This is a 12 inch block and uses 5 different fabrics.
[Editor’s Note: I tried to get Jen to make 4 blocks like she usually does, but nothing doing today, sorry.]
Fabrics and Cutting for Aztec Jewel Block
Of the 5 fabrics one is of light value, 3 are medium value and one is a dark value. It is this mix of values that gives the block contrast and allows us to see the square in square design in the block. For a little tutorial on value and contrast check out my previous 2 Colourful Friday posts.
Here are my fabrics:

The fabrics I chose to use for this block
Cutting Instructions
All measurements include a ¼″ seam allowance.
Blue
- Cut 1 – 5 ¼″ square
- Cut 1 – 4 ½″ square
Yellow-Orange
- Cut 1 – 5 ¼″ square; then cut on the diagonal twice (Not sure what this means? Check out my post from last week about cutting once or twice on the diagonal)
Red-Orange
- Cut 2 – 4 ⅞″ squares; then cut each on the diagonal once
Red
- Cut 4 – 3 ¼″ squares
Yellow
- Cut 4 – 3 ¼″ squares
- Cut 4 – 2 ⅞″ squares
- Cut 4 – 2 ½″ squares

Pieces all cut – there are a few this time
Building the Block
All seams are a ¼″ unless stated otherwise. All pieces are sewn with right sides together.
HSTs
Make 8 half square triangles using the red and yellow 3 ¼″ squares. Square off to 2 ½″. Here are directions on how to make half square triangles. If you decide to make several of these Aztec Jewel blocks then I suggest making the half square triangles with the grid method.

Make 8 half square triangles
Flying Geese
Make four flying geese units with the blue 5 ¼″ square and the 4 – 2 ⅞″ yellow squares. Here are the directions on how to make flying geese with a no waste method. Be sure to trim off the dog ears.
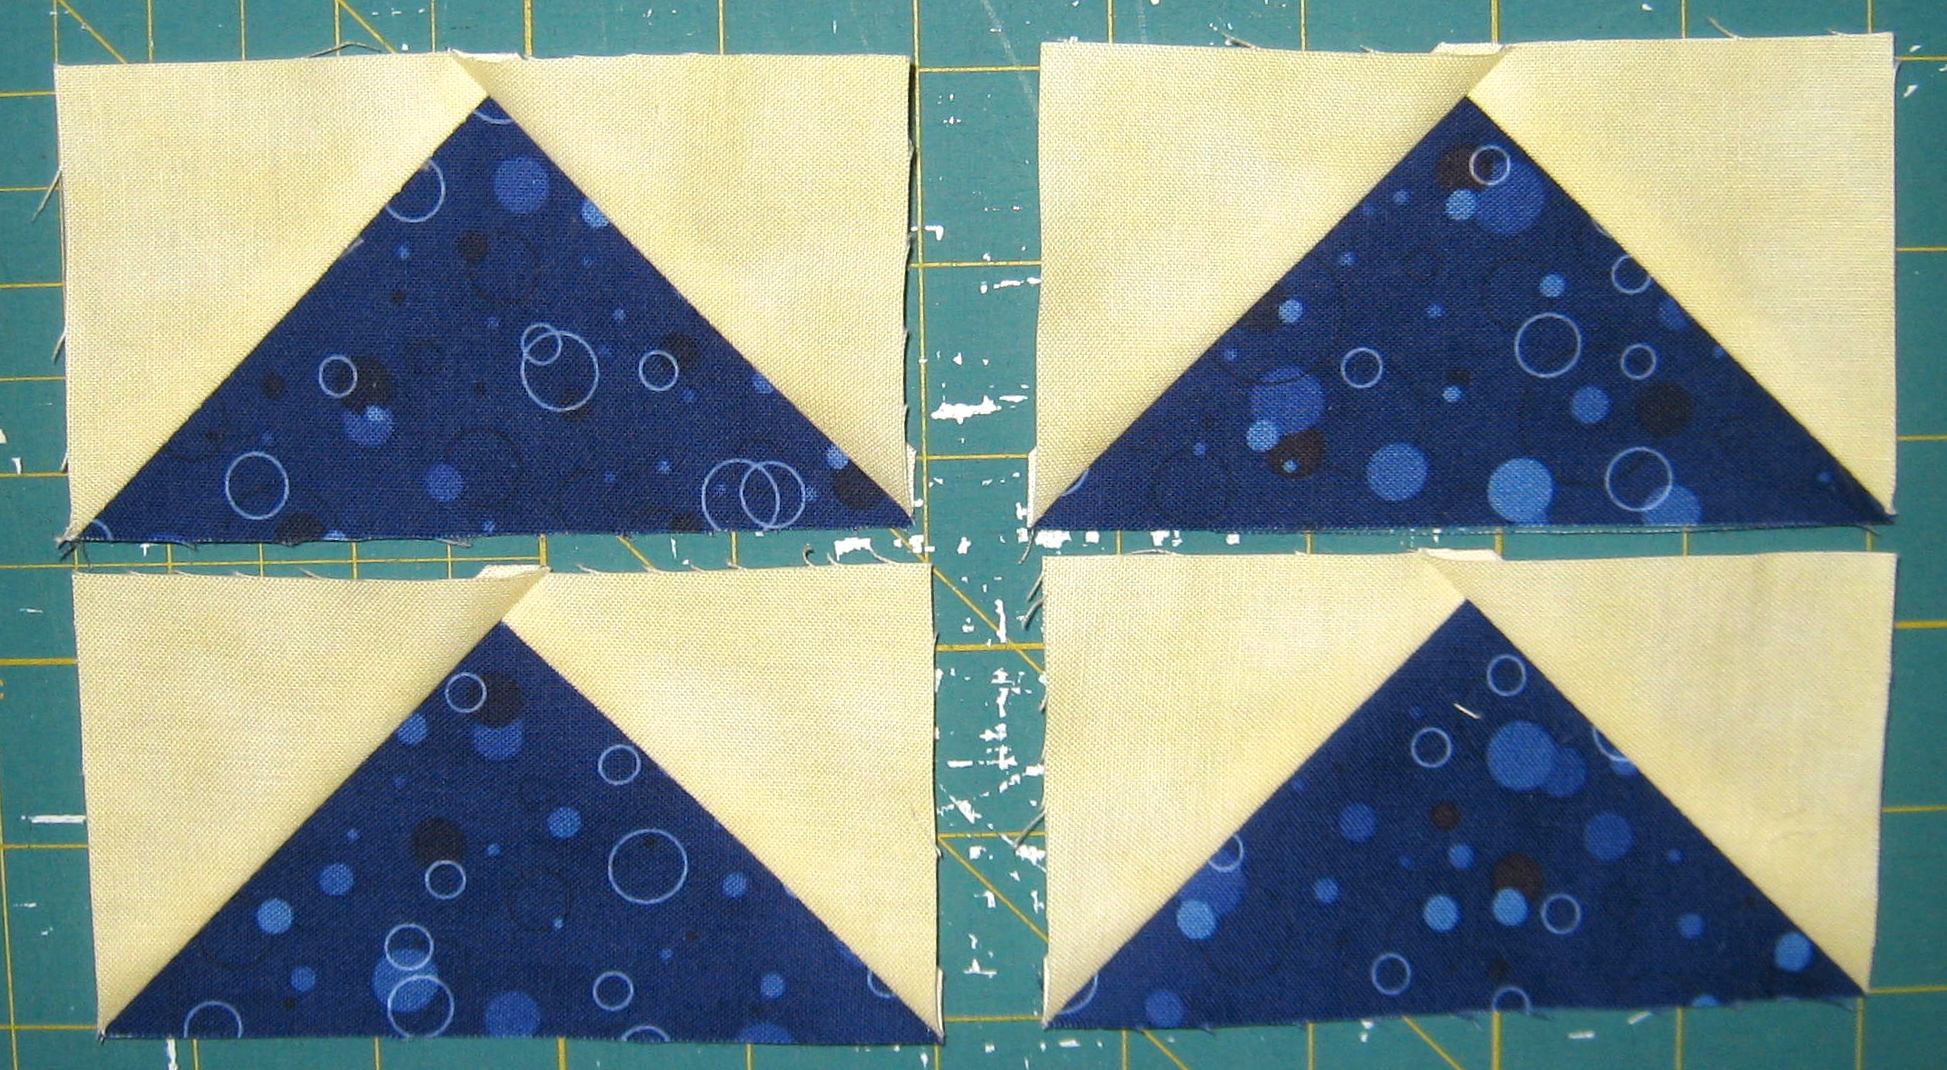
Make 4 flying geese
Square in a Square
Note: You will be sewing on the bias as all the triangles have a bias edge. This bias edge is very stretchy so try not to handle too much or pull at it while sewing. Pinning will help to keep the pieces in place.
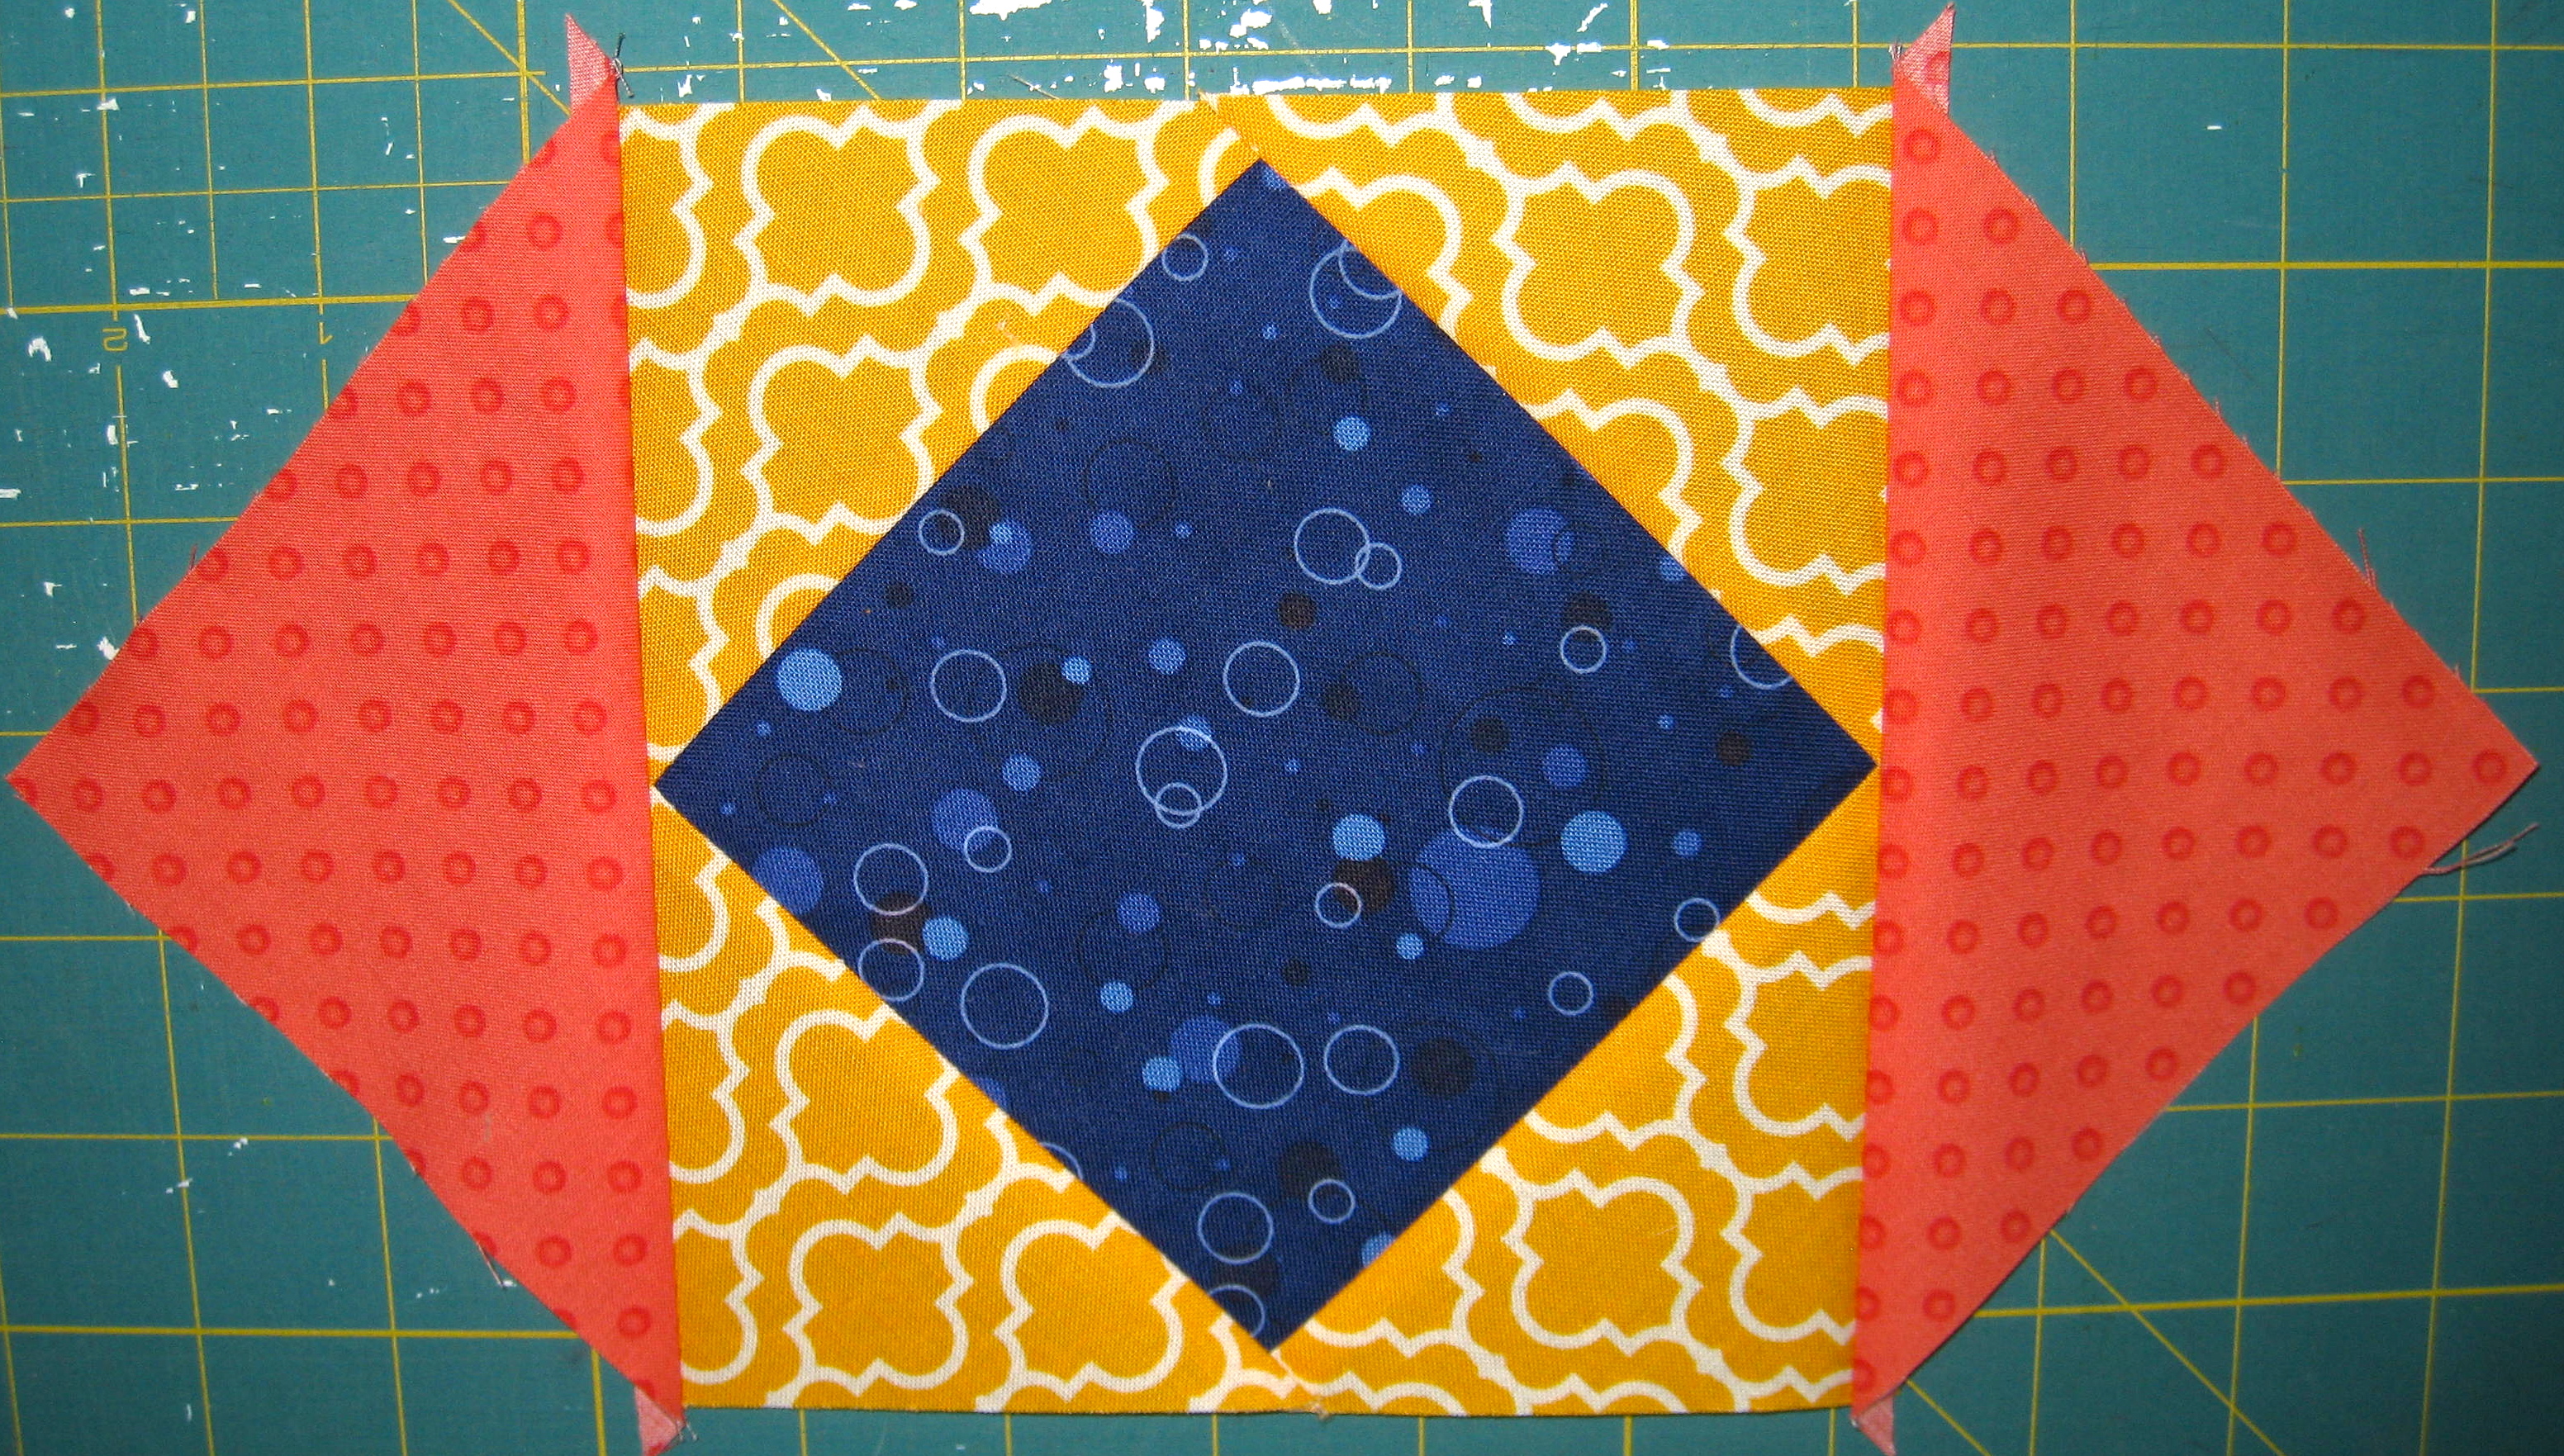
1. Sew a yellow-orange triangle to one side of the blue 4 ½″ square. To make sure the triangle is centred on the square fold the triangle in half with right sides of fabric together and finger press a small cease. Fold the blue square with wrong sides together and finger press a small crease. Line up these creases on the two pieces. Repeat on the opposite side of the square. Press the seams towards the triangles.
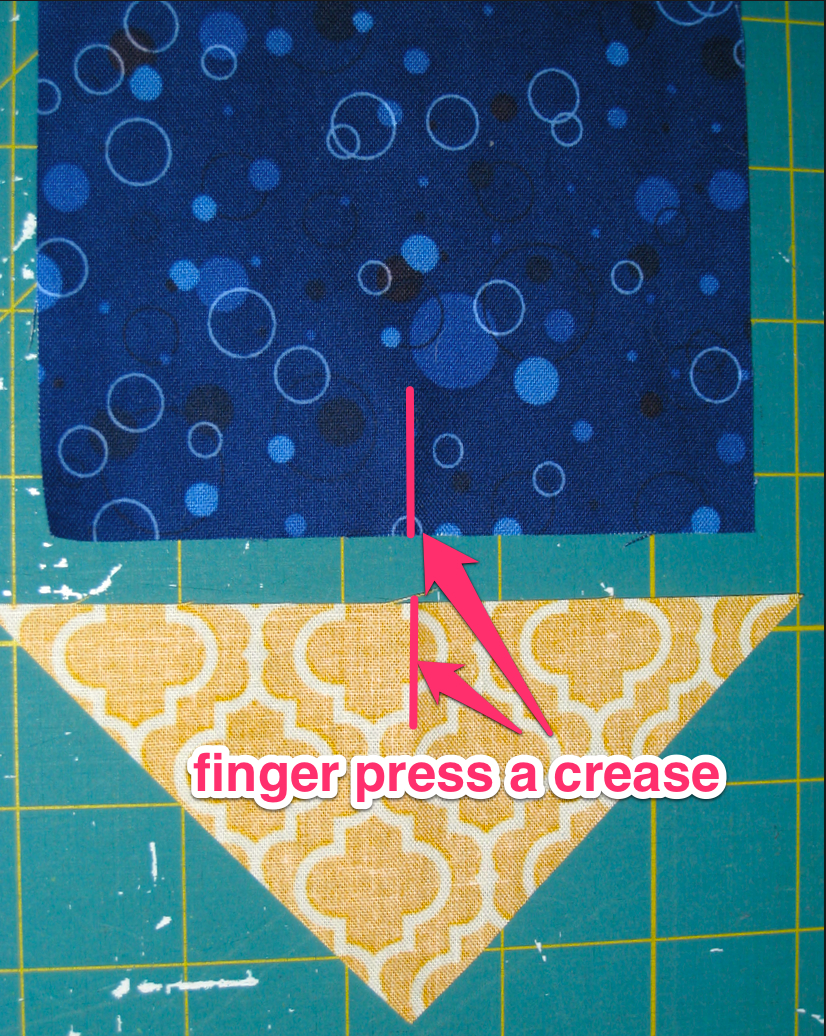
Finger press a crease in the centre of each piece
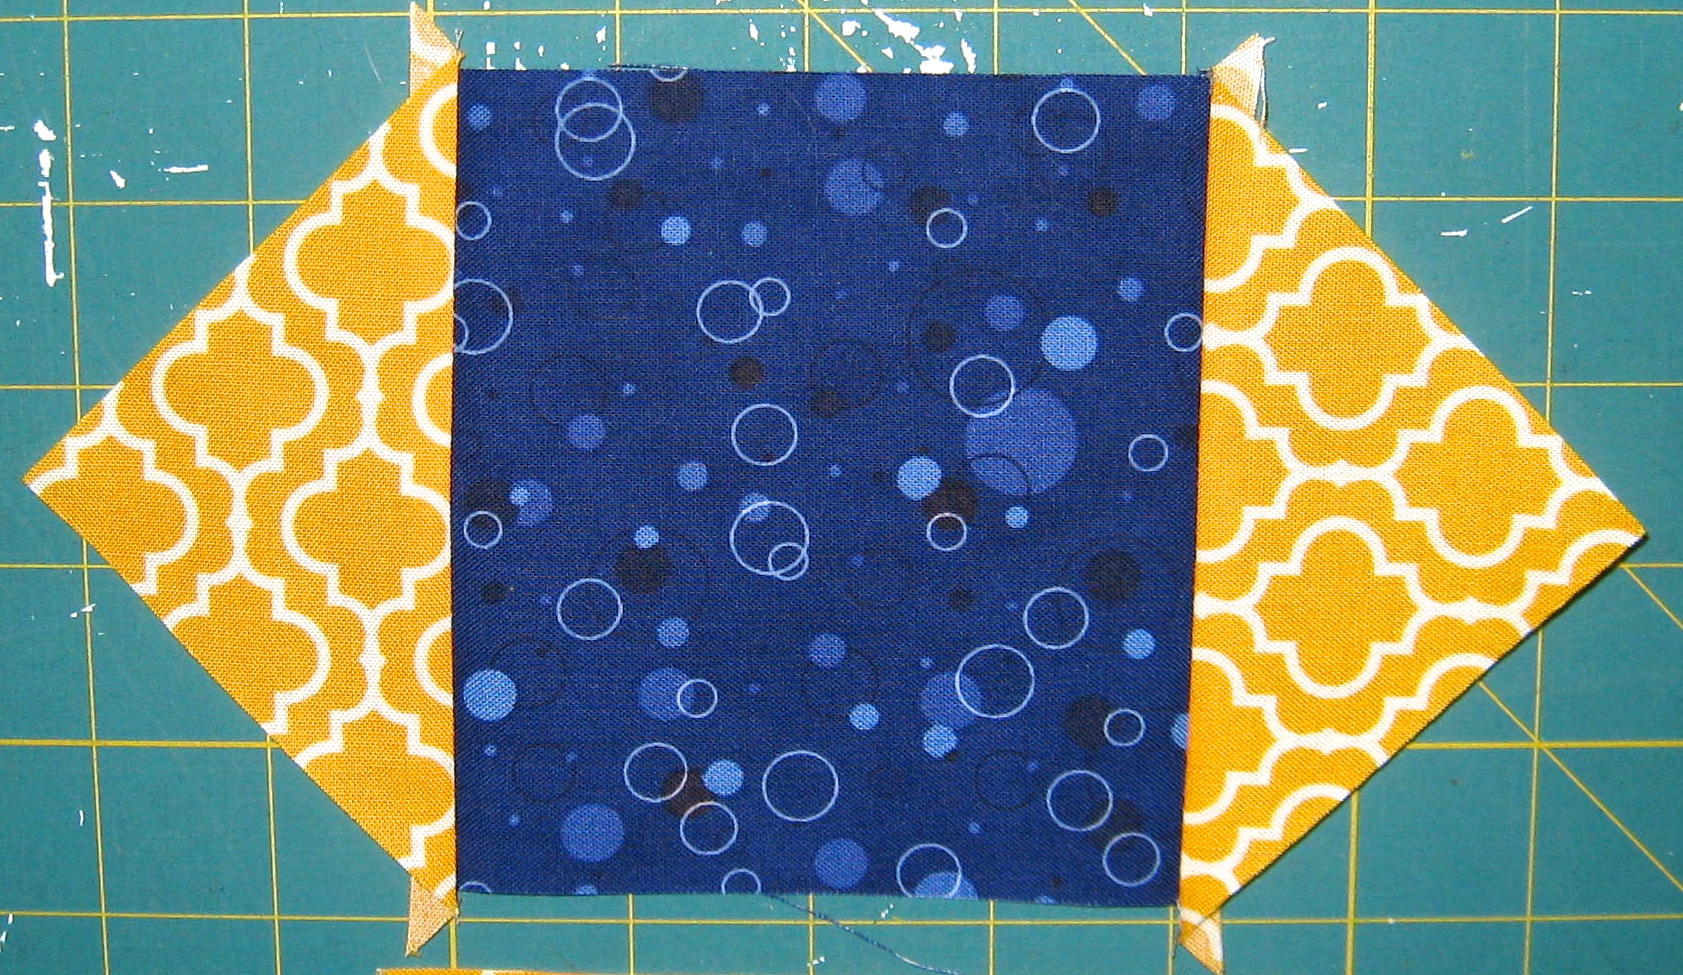
Sew 2 yellow-orange triangles to blue square
2. Sew the remaining yellow-orange triangles to the other two sides of the square as per step 1. Press the seams towards the triangles. Trim off the dog ears.

Sew remaining 2 yellow-orange triangles on to make a larger square
3. Sew a red-orange triangle to two opposite sides of the square made in step 2. Sew with the square on top this way the seam can be sewn exactly through where the other two seam cross to maintain points. Press the seams towards the triangles.
Sew 2 red-orange triangles to opposite sides
4. Sew the remaining red-orange triangles to the other two sides of the square as per step 3. Press the seams towards the triangles. Trim off the dog ears.
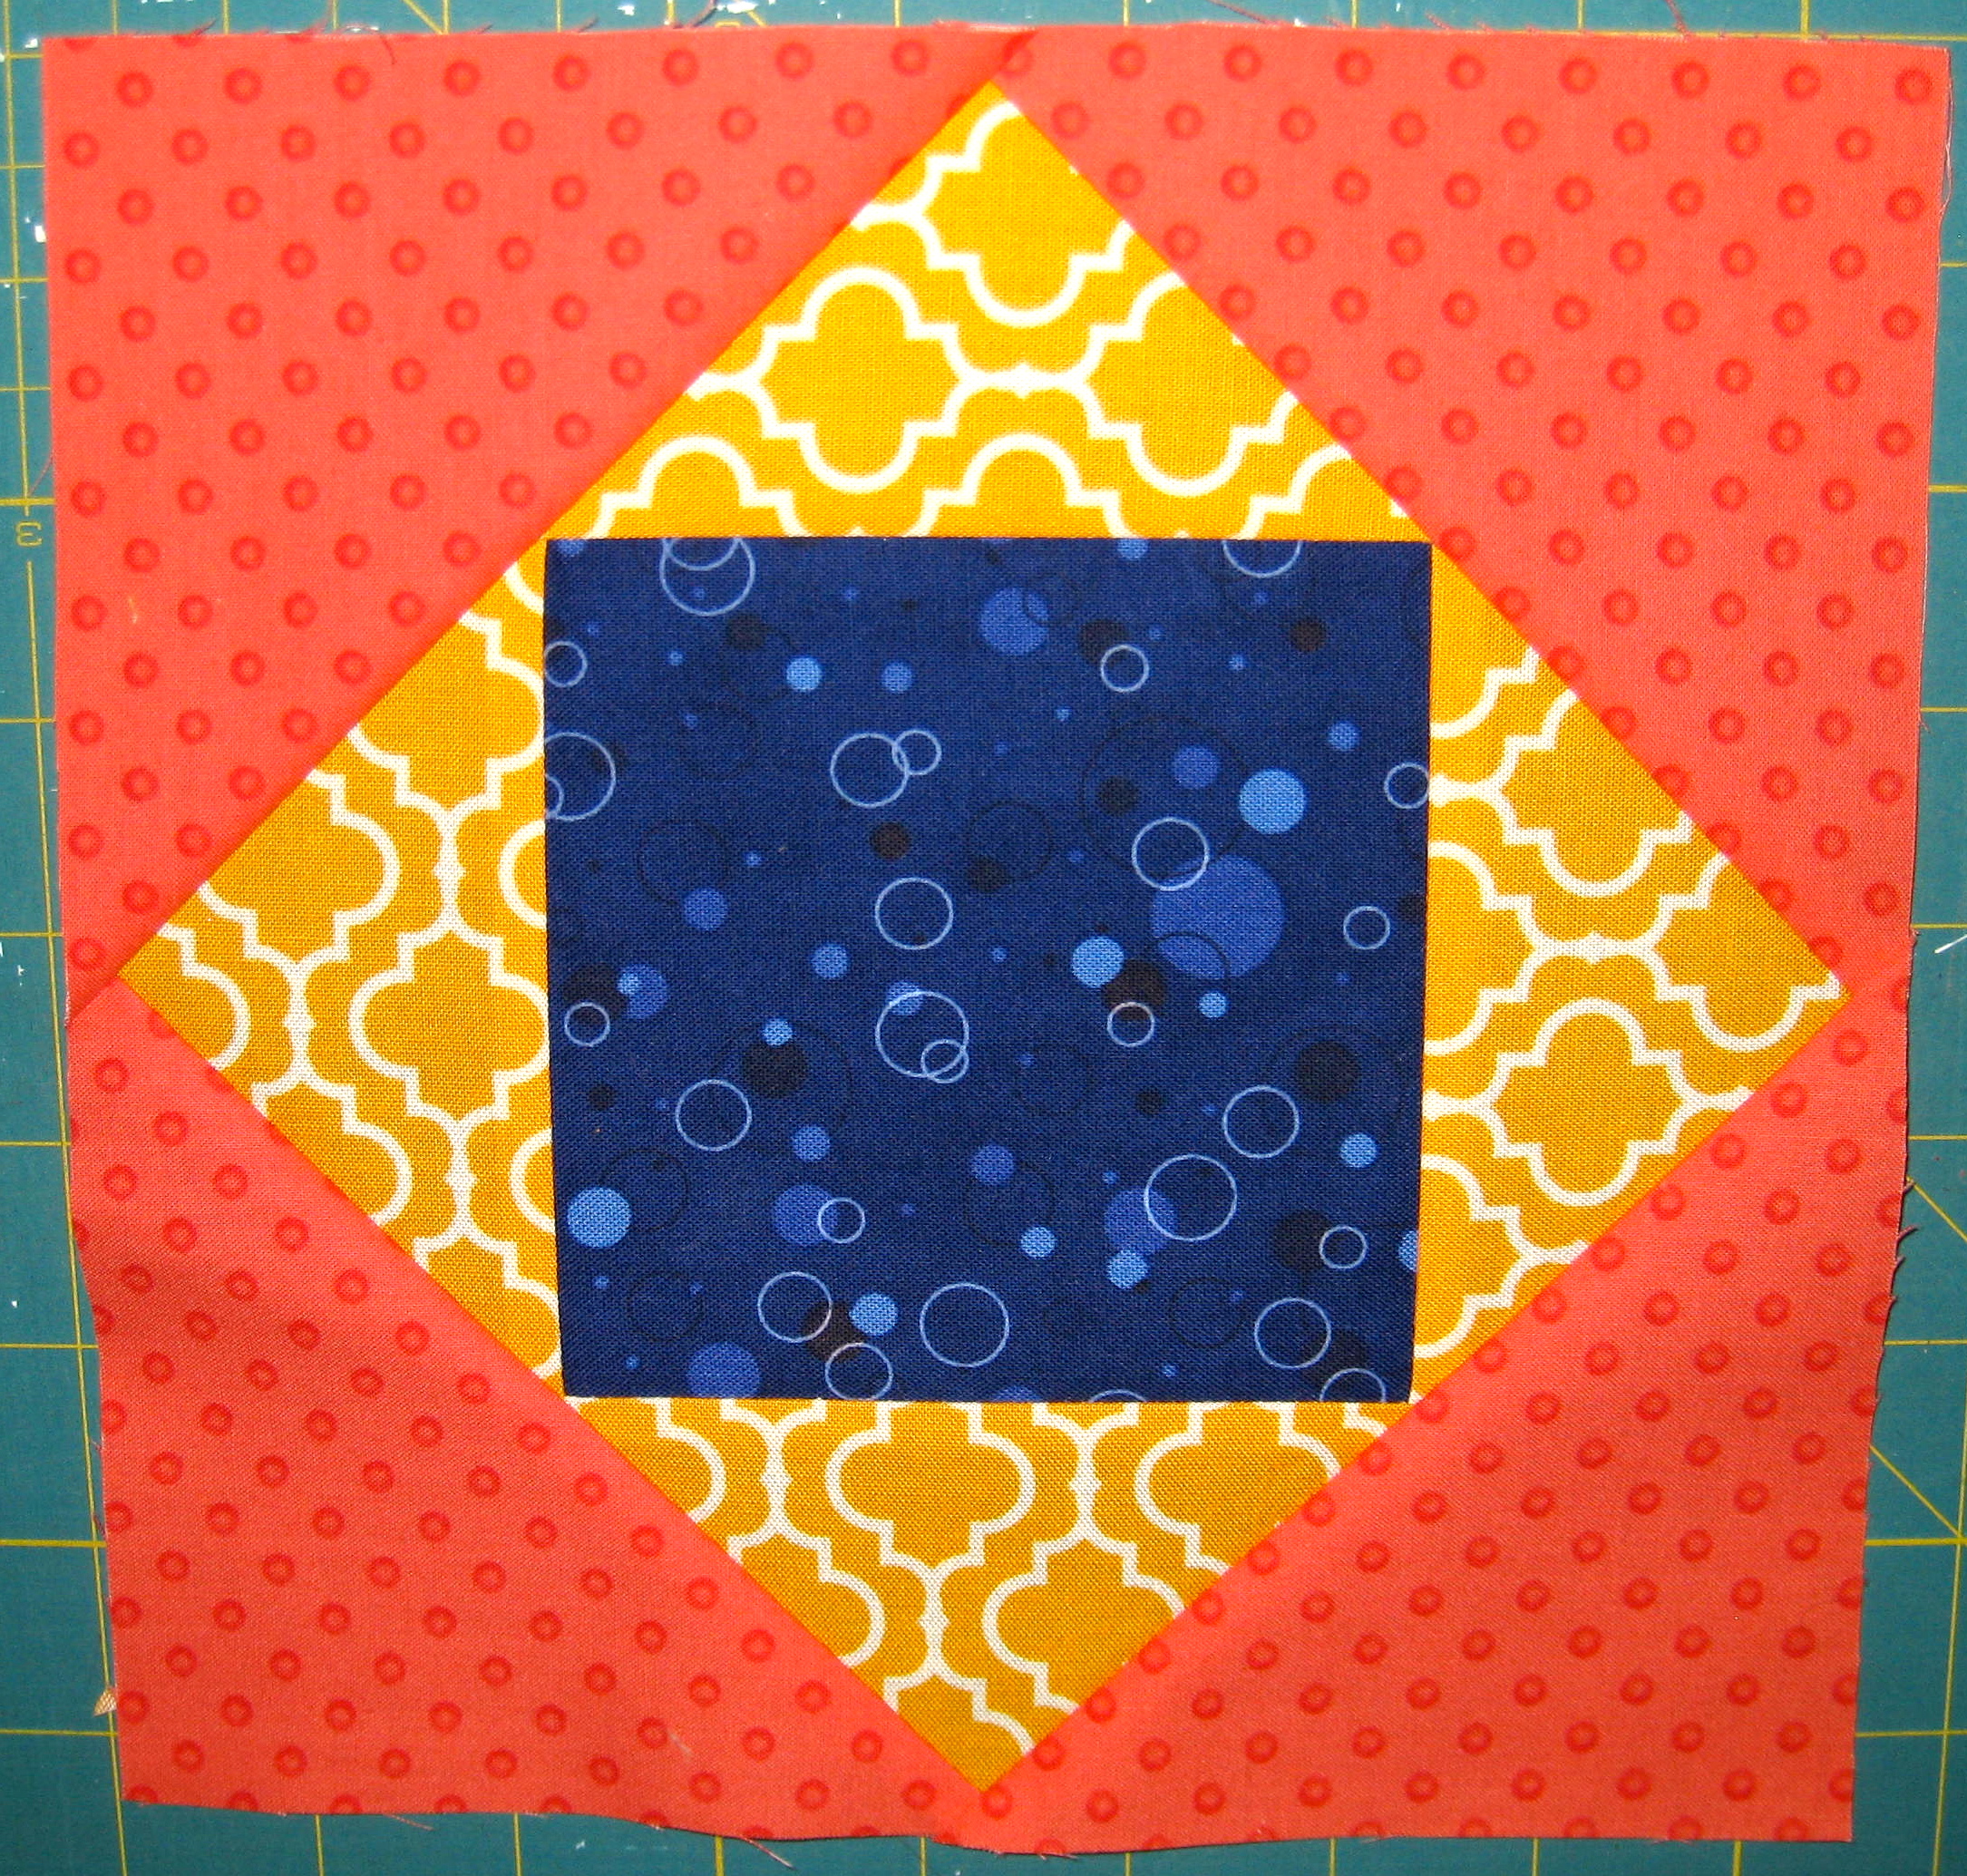
Sew remaining red-orange triangles in place
Putting the Sections Together
Layout pieces as shown in photo below.
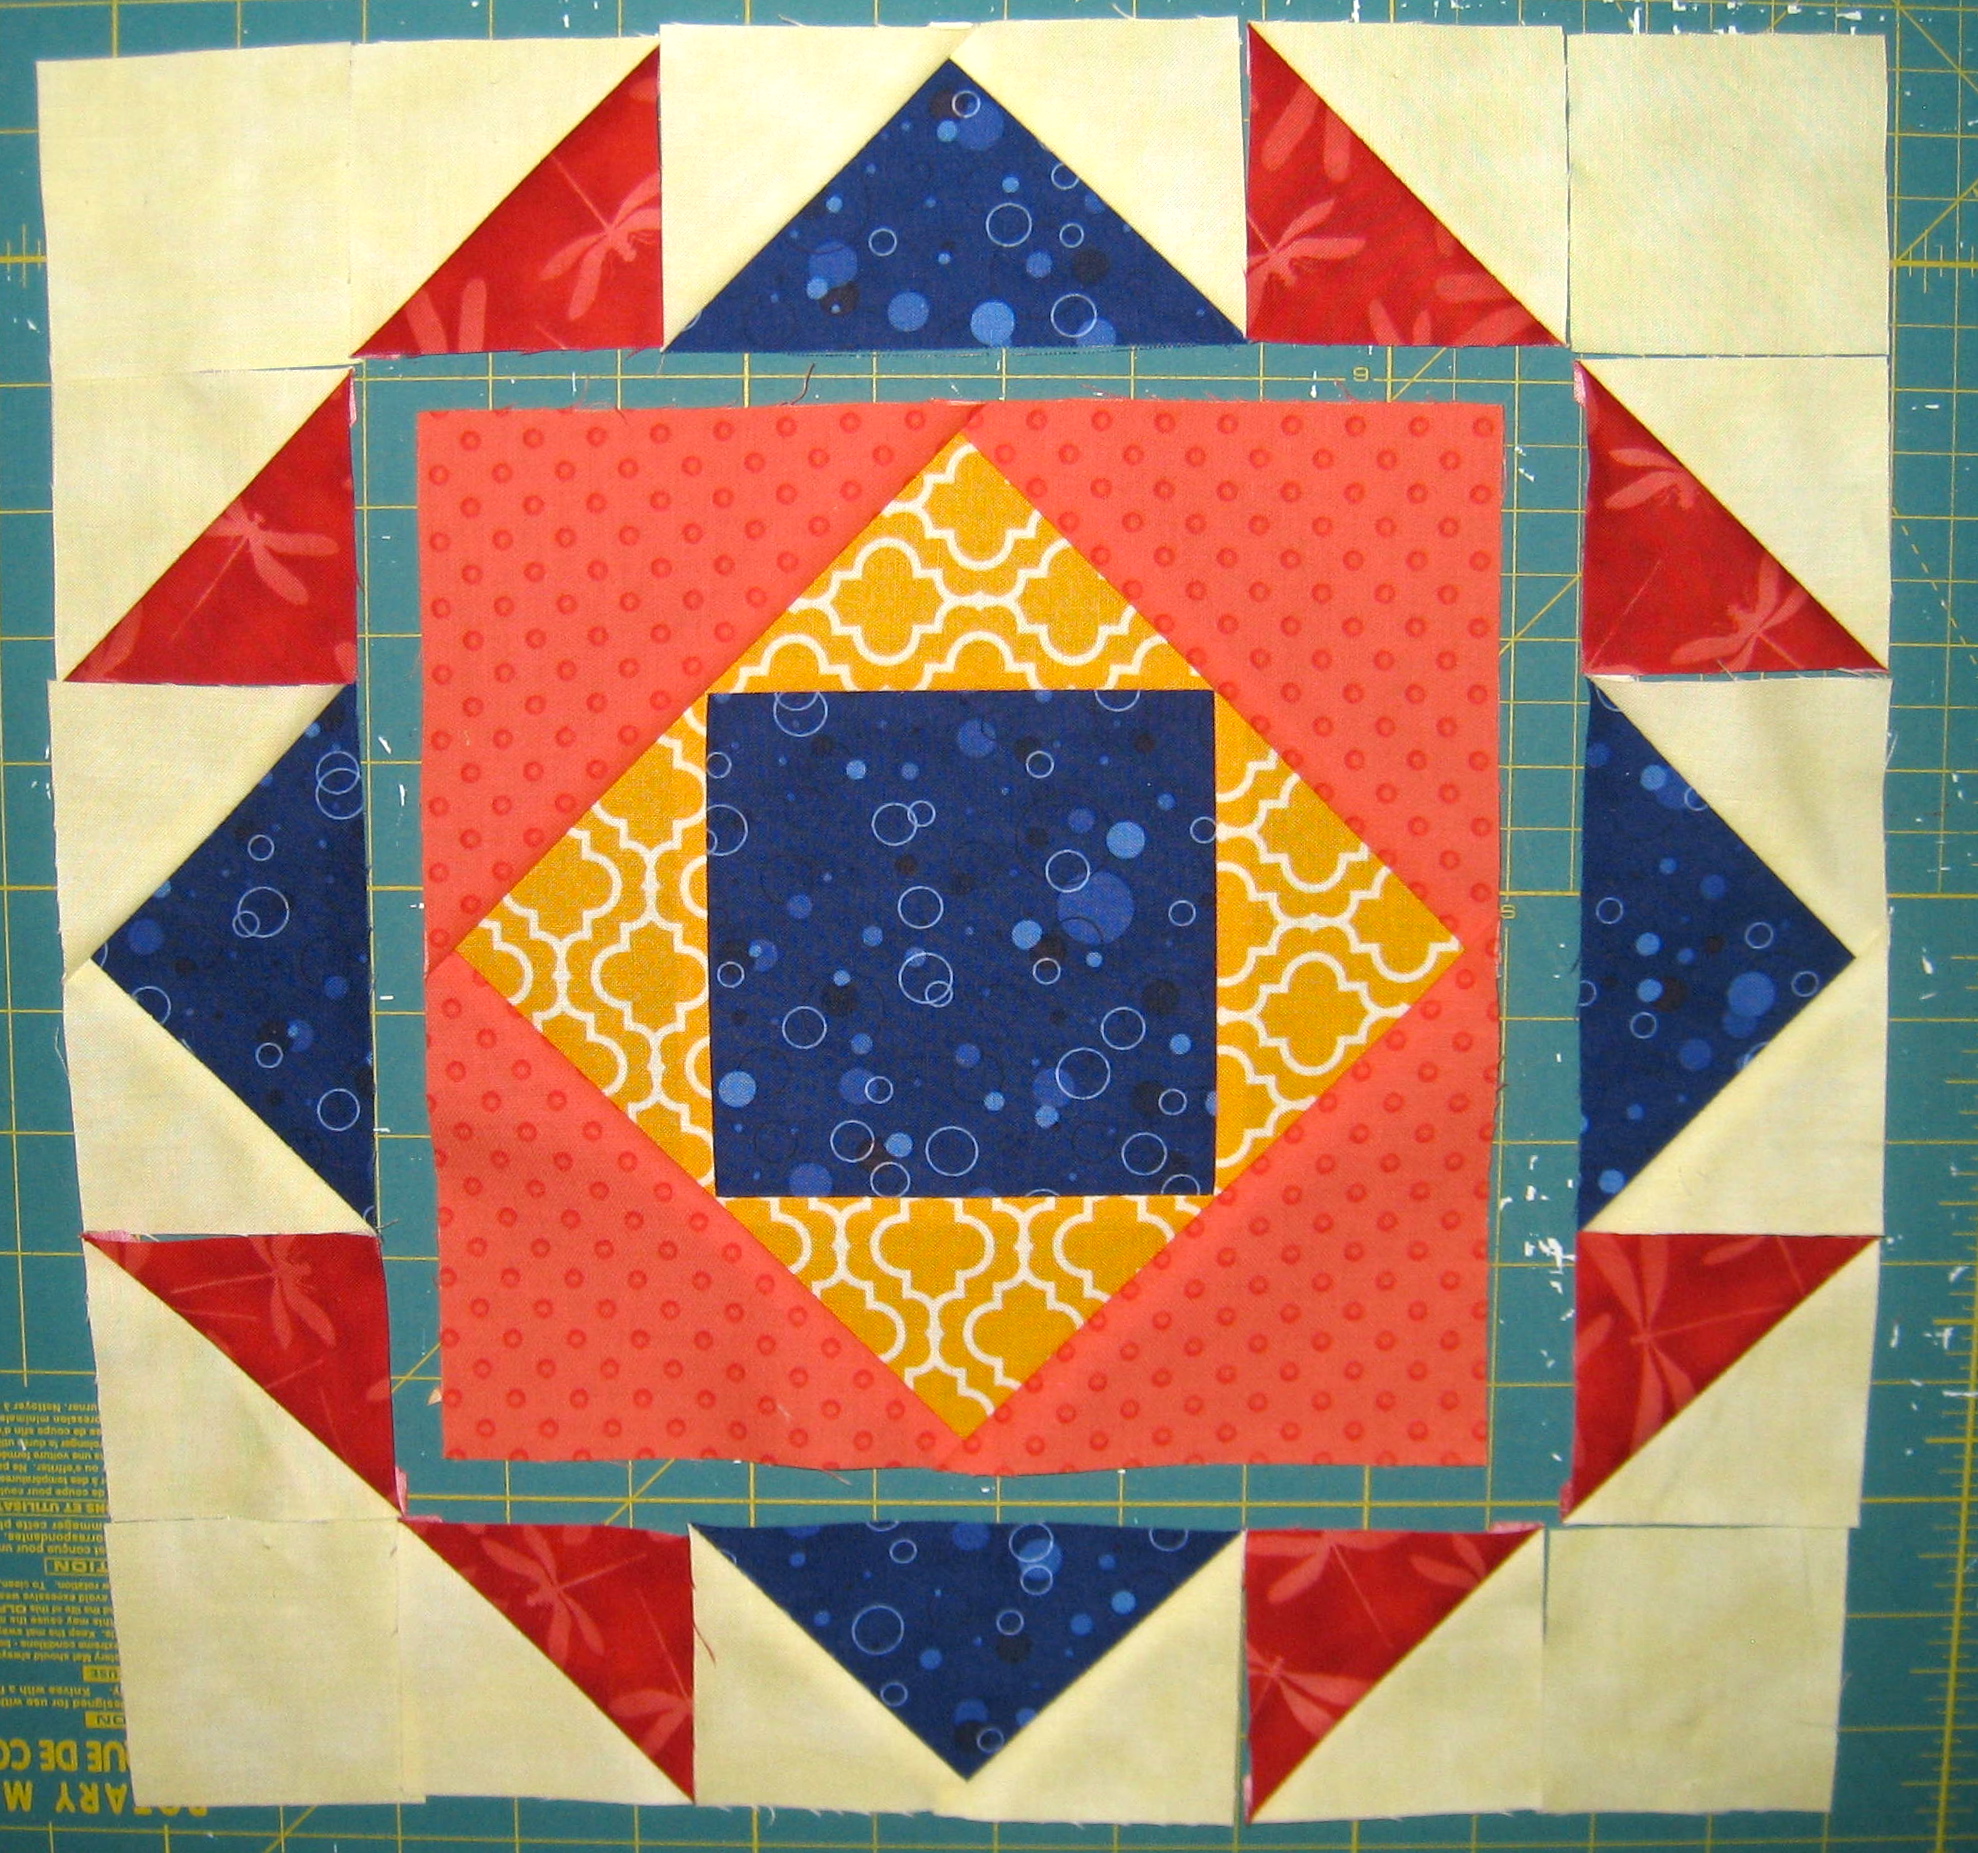
Position of pieces
1. Sew the HSTs to a plain 2 ½″ yellow square. Make sure to orient the HSTs in the proper direction. See photos. Press the seams towards the yellow square. Make four total.
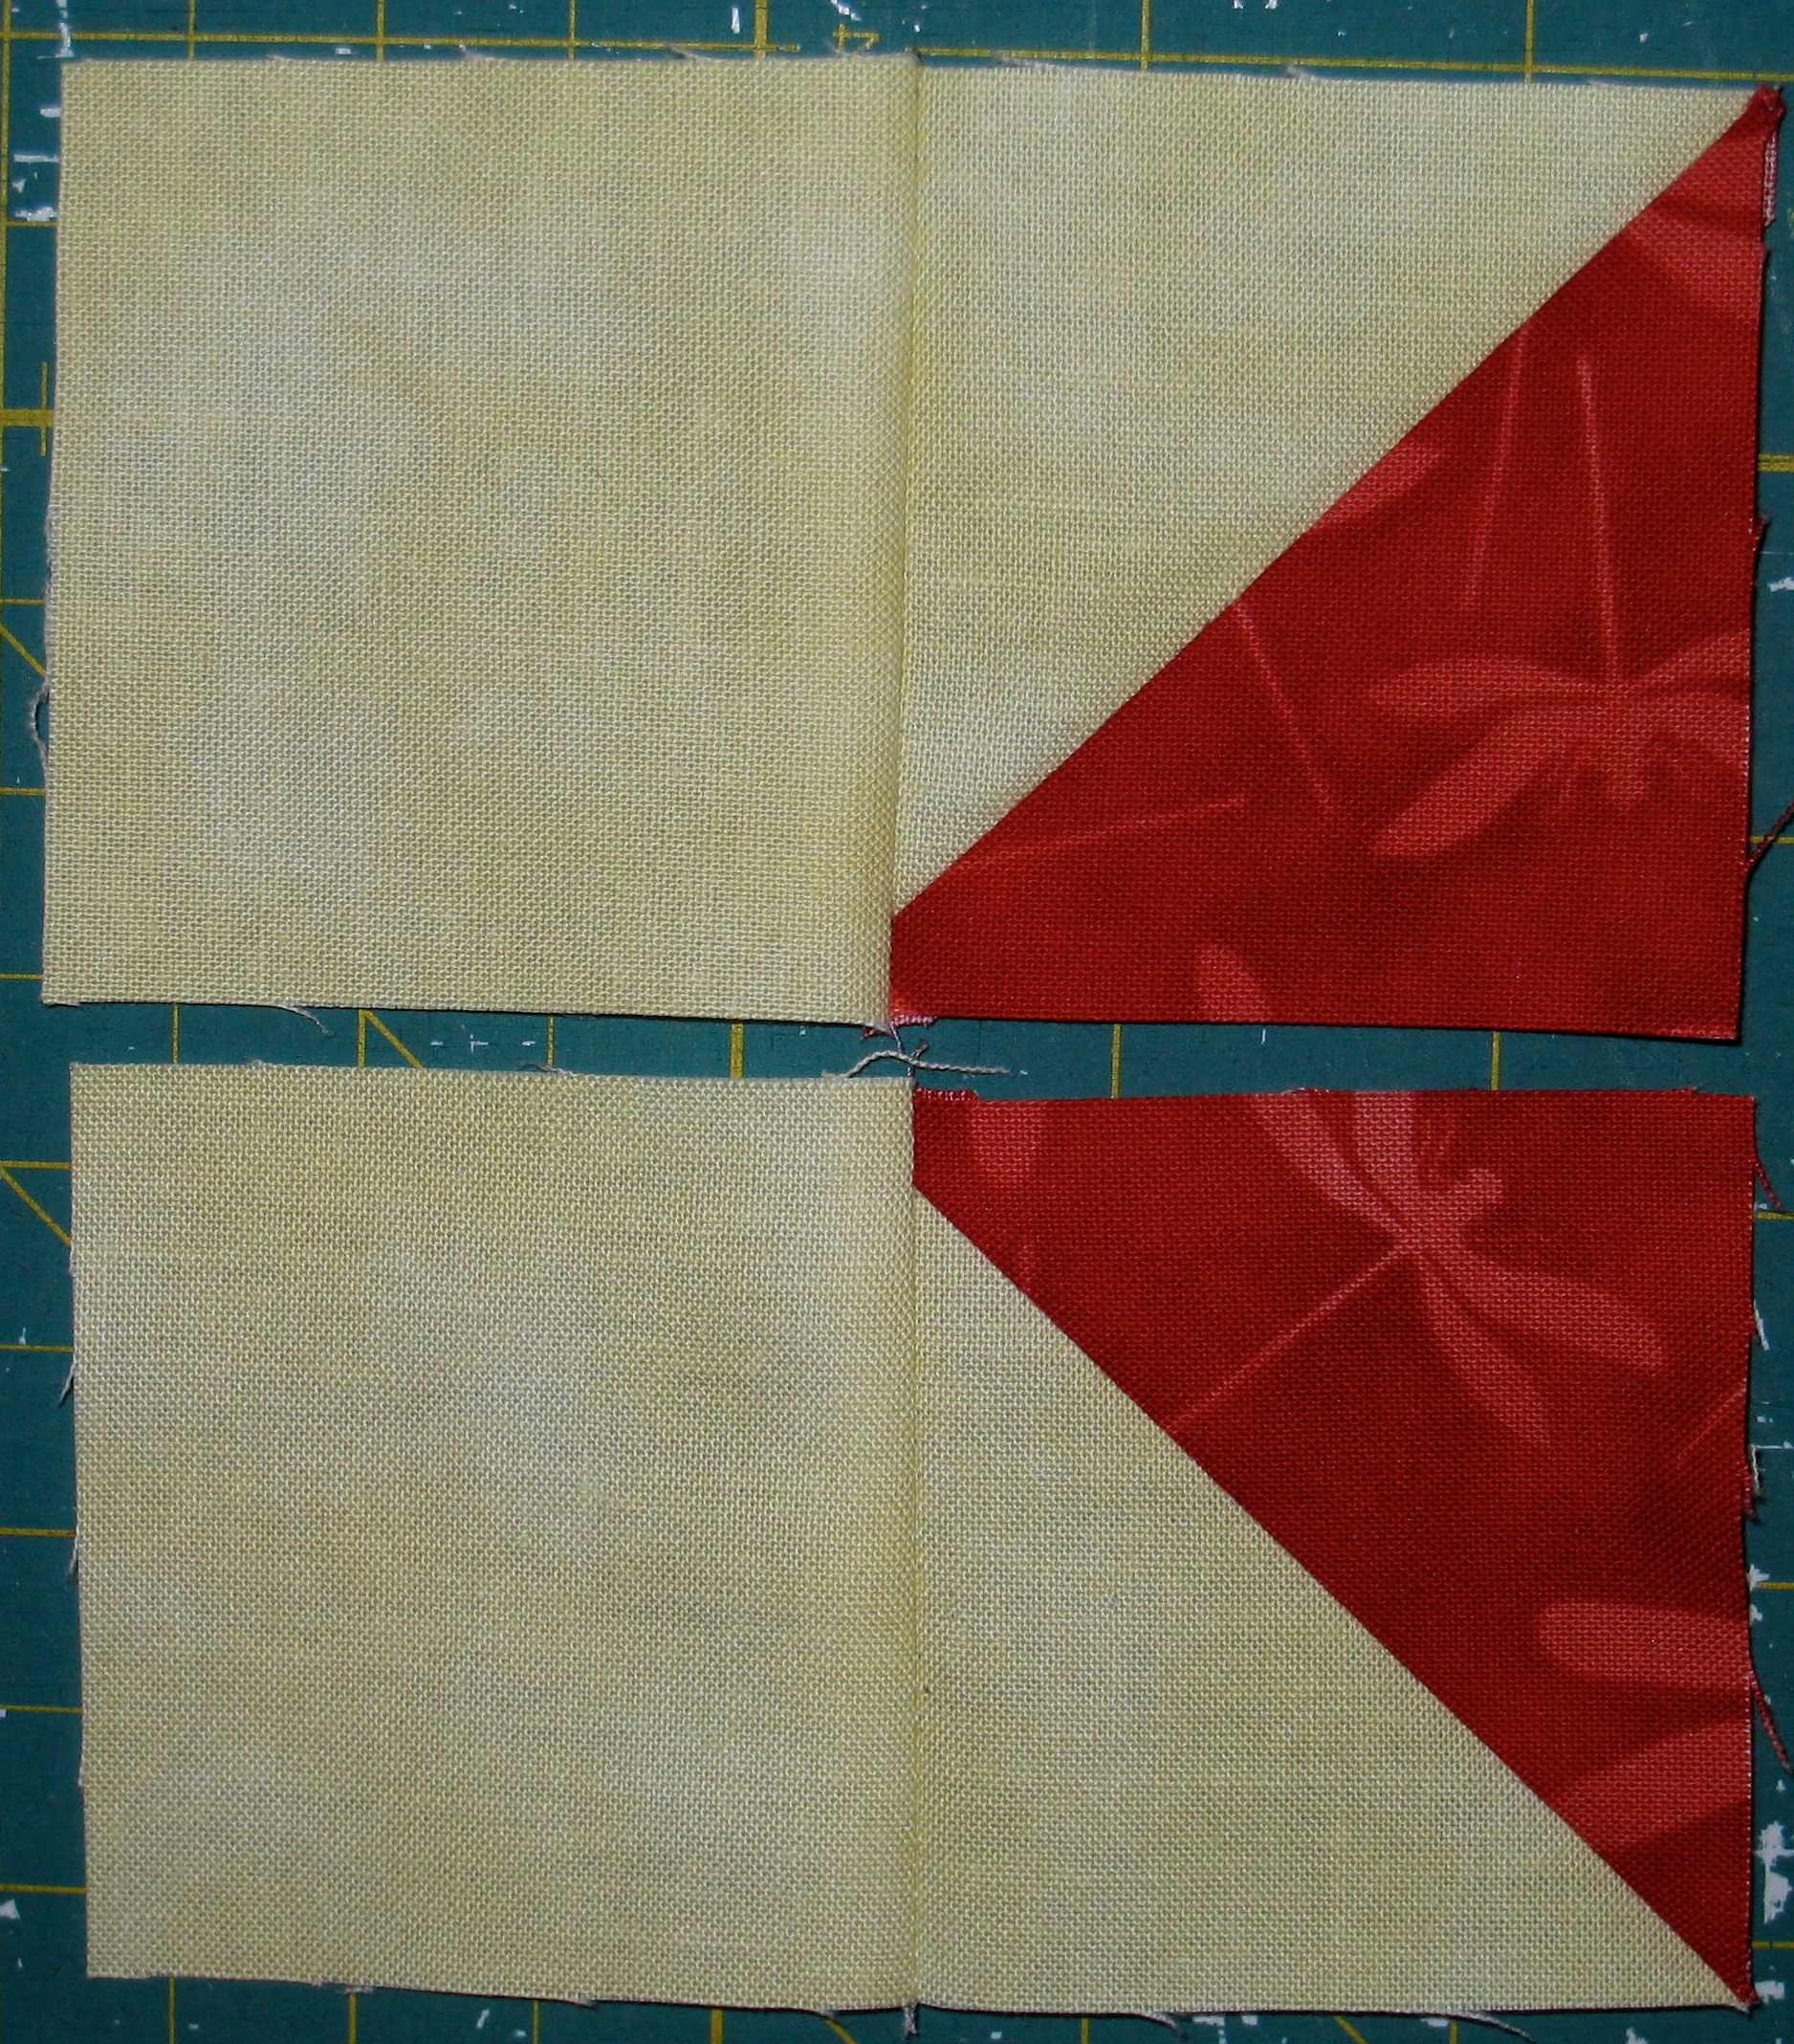
Sew HSTs to the yellow squares
2. Sew a unit from step 1 to each side of a flying geese unit. See photo for placement. Press the seam towards the HST. Make two.

Add Square & HST units to the flying geese
3. Sew an HST to each side of the remaing flying geese units. Make sure to orient the HST in the proper direction. Press the seams towards the HST. Make two.
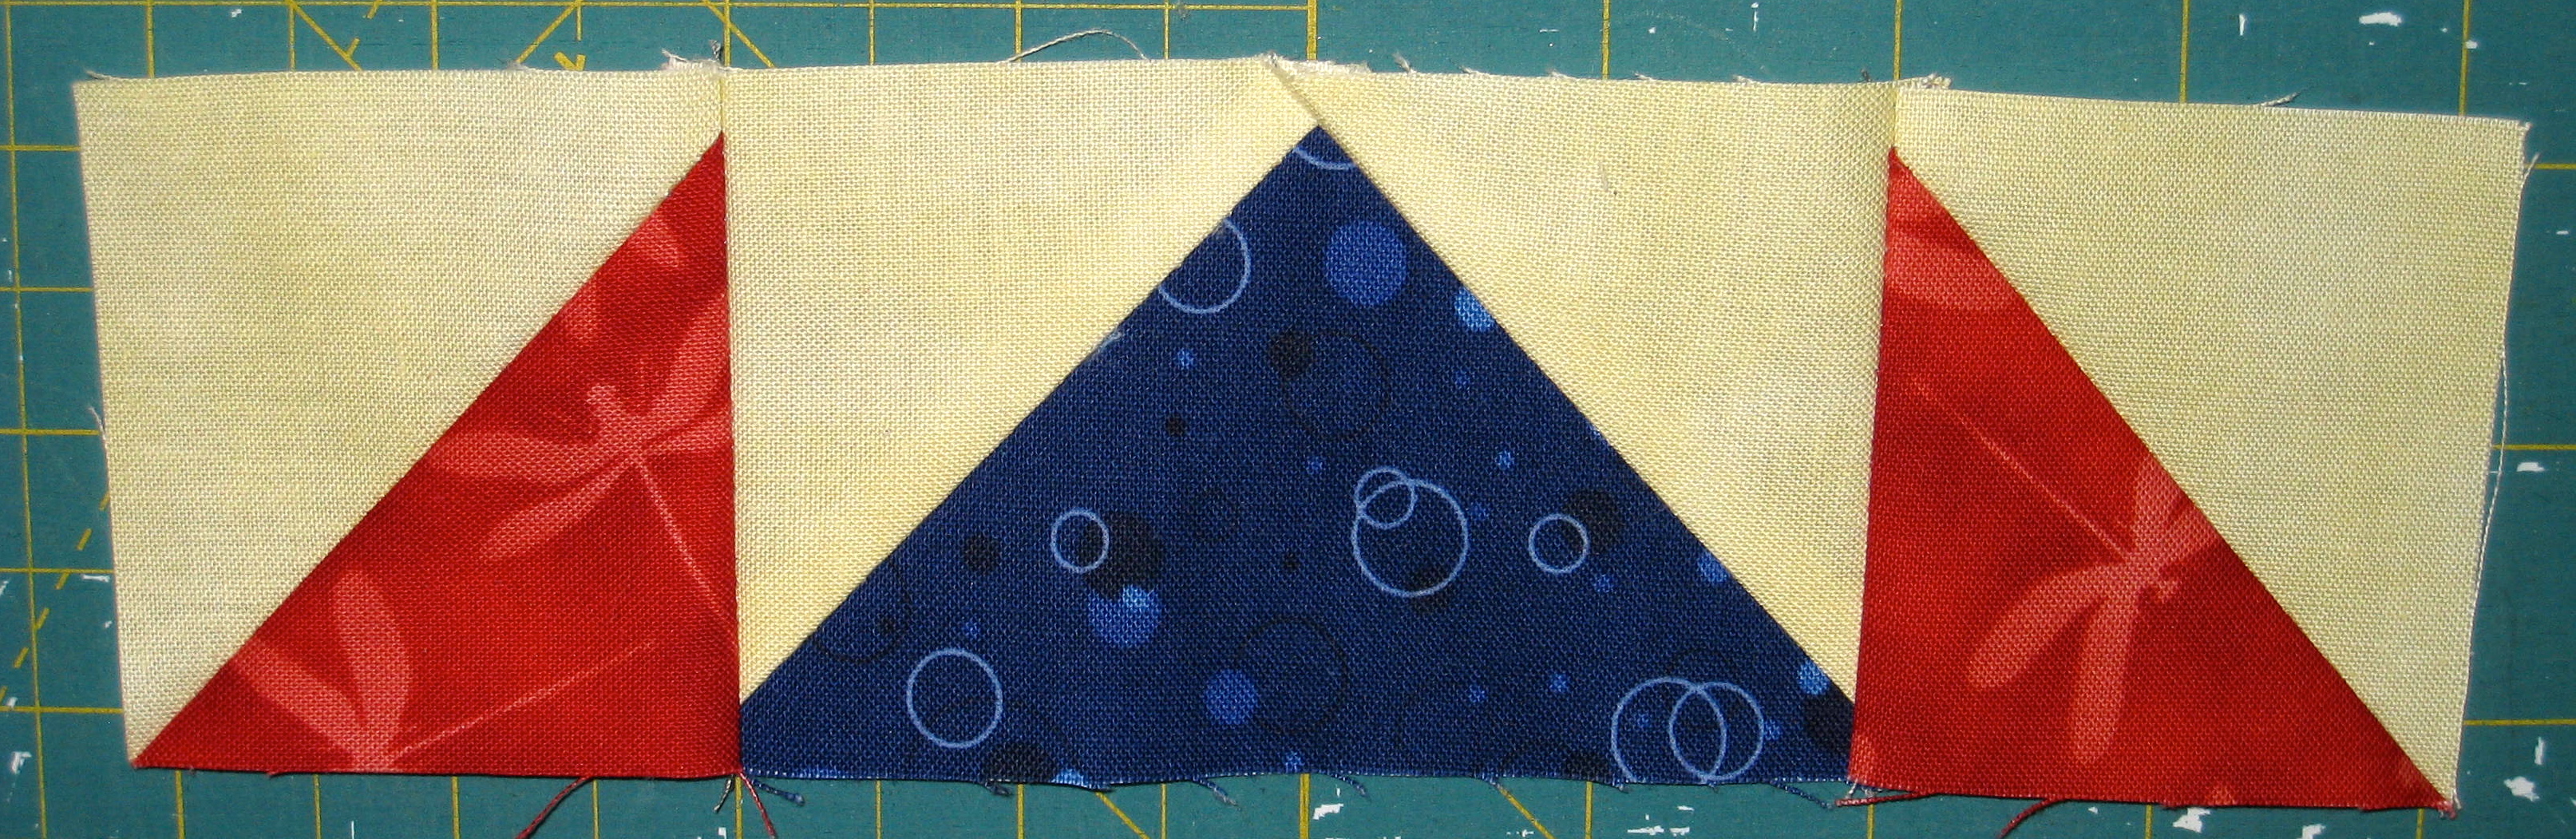
Sew an HST to the remaining flying geese units
4. Sew a unit from step 3 to one side of the square in a square unit made earlier. Once again pin together and sew with the square on top to ensure sewing through the crossed seams to make a perfect point. Press the seam towards the square. Repeat on the opposite side with the remaining unit made in step 3.
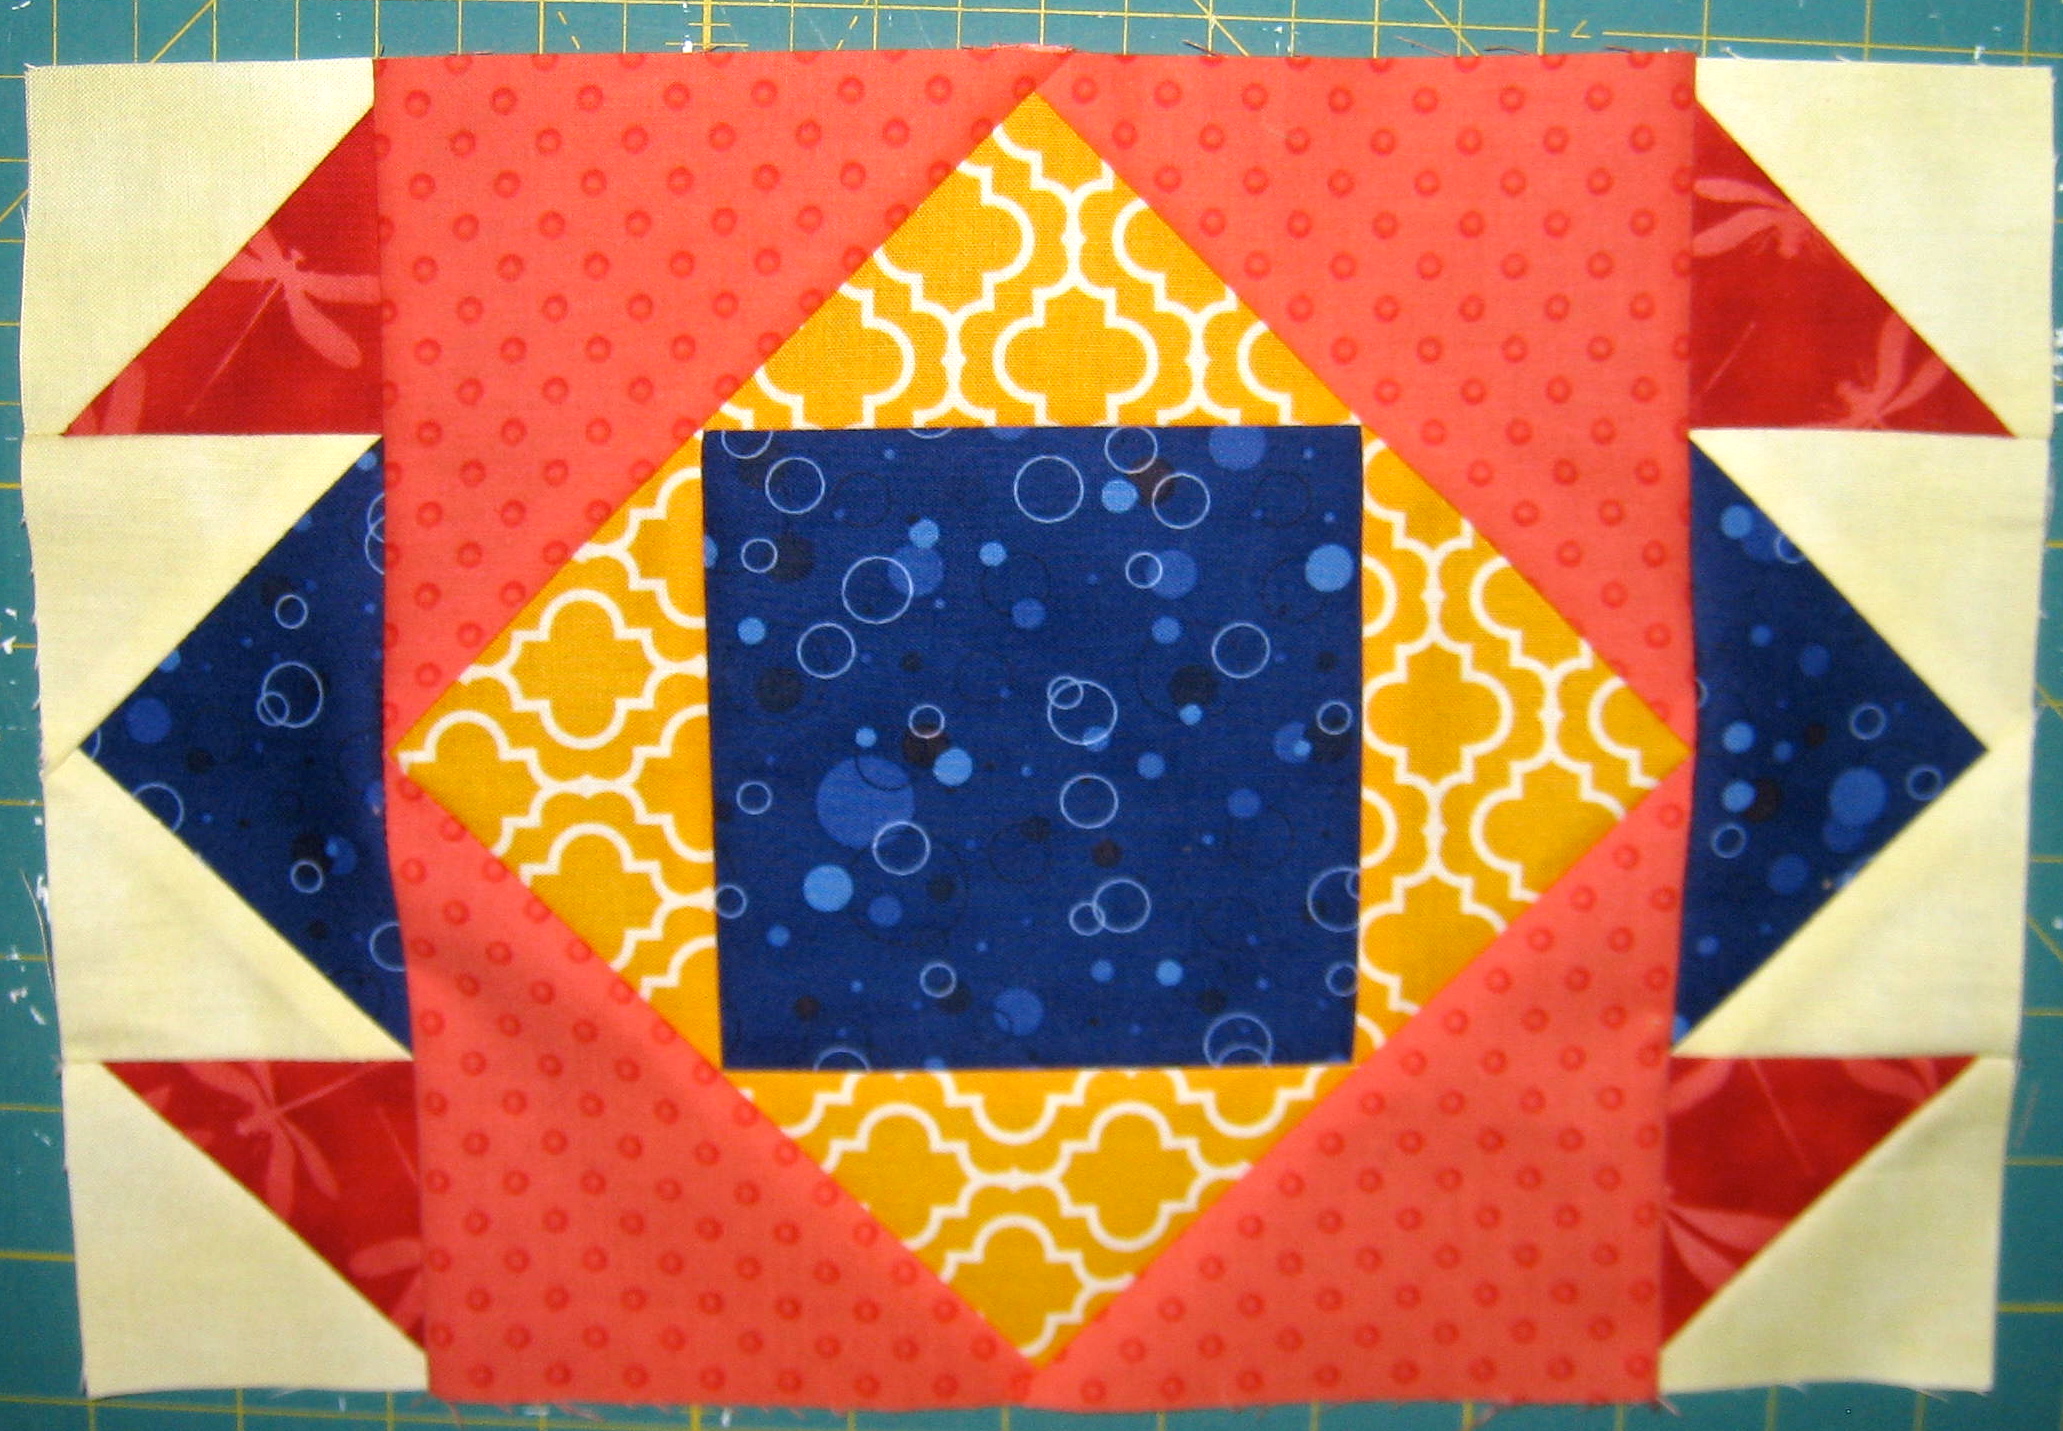
Sew units from step 3 to the sides of the square in a square unit
5. Sew a unit from step 2 to the top of the unit made in step 4 following the same steps as step 4. Take care to match seams. Press the seams away from the square. Repeat on the opposite side with the remaining unit made in step 2.
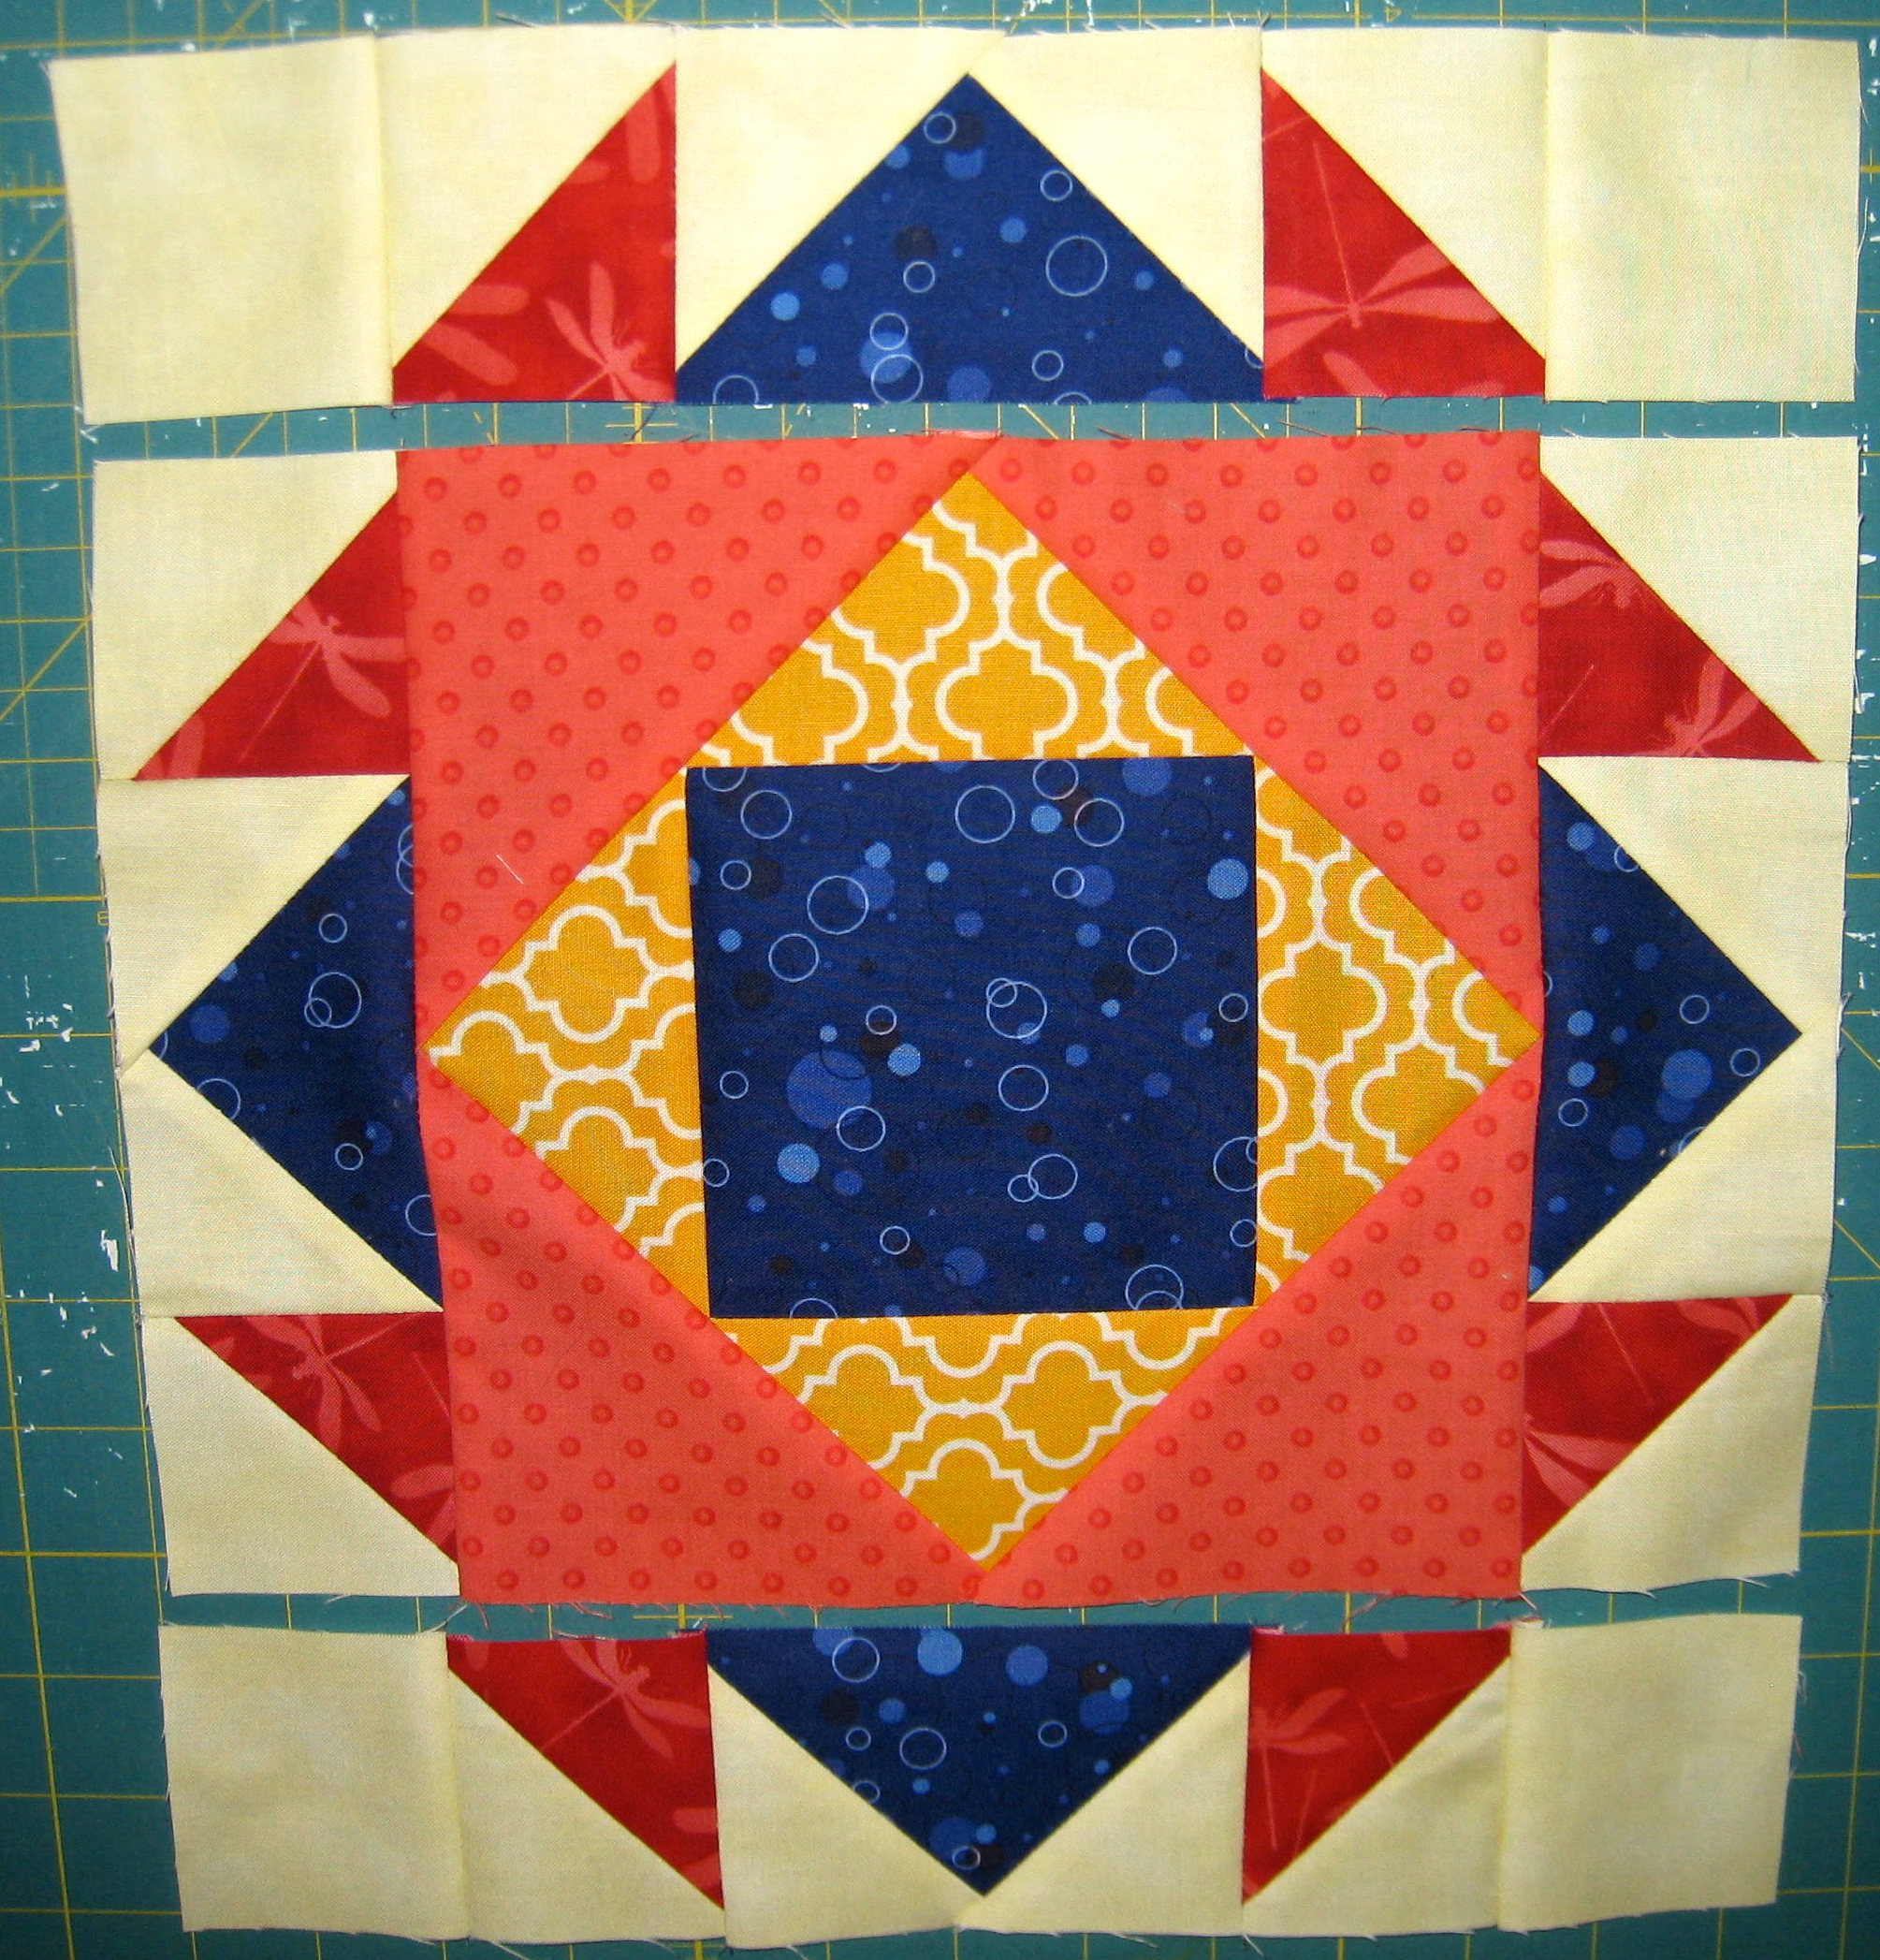
Add remaining units to the top and bottom of the unit made in step 4
Block will measure 12 ½″ unfinished at this point.
Completed Aztec Jewel quilt block
Another block to give a try – a few more pieces in this one but not really any harder than the others.
Happy Quilting!


