

Hey Everyone, welcome back to Stash Blasting Wednesday again.
I know I promised a Technique Tuesday post for today but I just really couldn’t think of anything so figured I could get away with using up some more of my stash.
I also need to get some quilts and projects done as CreativFestival is fast approaching and my time is running out to be ready with new patterns and creations for my presentations. So the next few weeks to come I will be highlighting what I will be presenting at my presentations as well as what will be in my booth.
Hopefully this will peak your curiosity and get you in the mood to join in the fun at the International Centre in Mississauga April 24 & 25th. Make sure to mark those dates on your calendar. And if you are not near the show then I hope you enjoy the show here on my blog.
Today I am going to create the border for the Granny’s Choice quilt.
Colour or No Colour
Back to the task at hand. As you know a couple of weeks ago I made another 12 blocks and posted the question should I add colour or not to this design.
There was a huge response to my question and I thank everyone who gave me input. Many suggested adding one colour as a border or binding or piping. The colours varied from yellow to red to teal and everything in-between.
I’ve decided to go with no colour added for this one. Leave it black, white and grey to get the full effect of the pinwheels in an achromatic colour scheme.
And I’ve also decided to only make it with the original 4 blocks into a table topper. I do like the design but right now I don’t need another big quilt to work on so little it is.
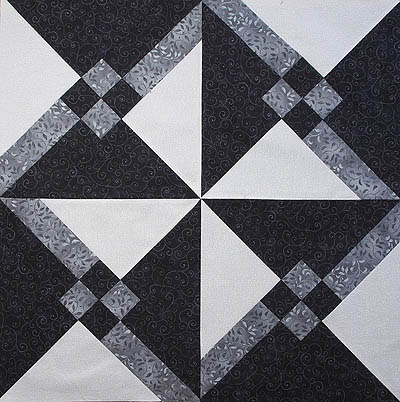
Four block pinwheel
The other 16 blocks, well I have plans, big (not necessarily big in size) and interesting plans that do involve some colour.
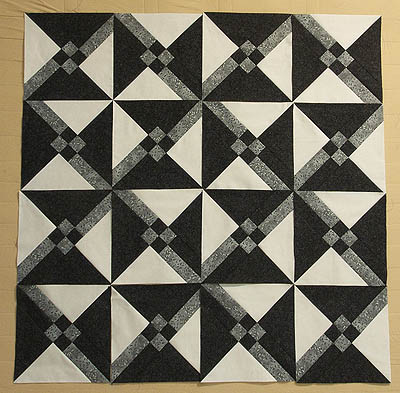
The 16 blocks
The Border
The border is going to be simple and mimic the black and grey border within the blocks – a checkerboard of sorts. I think introducing another design to the mix will take away from the simplicity and elegance of the design.
I guess I had best get cutting and sewing so I can show you how it looks by the end of this post. First though I need to do some math and figure out what size the border pieces are going to be.
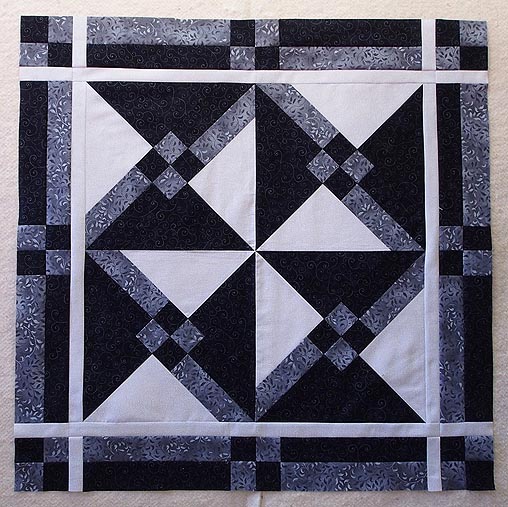
To begin I added a white border all the way around.
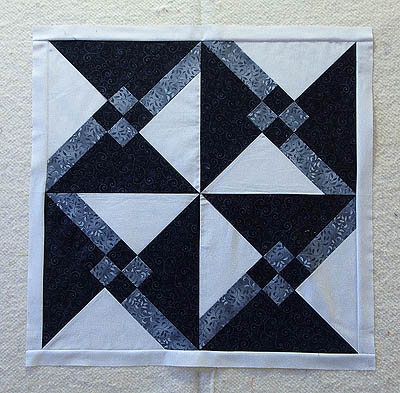
One inch white border added
Then I made the next border using the grey and black rectangles along with the grey and black squares – to mimic what is in the block.
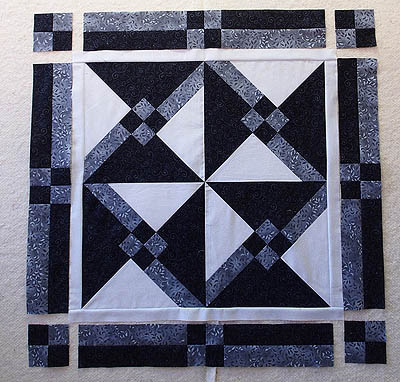
Borders are slightly too small
I based my measurements on the 12 inch block and forgot to take into account the extra inch from the inner white border. This means my borders were an inch away from each corner stone. Not good. I think I was a bit brain dead this morning.
I wasn’t ripping out and starting over because my fabric supply is getting low and when I do something with the other blocks I just may need that fabric.
I added in some sashing strips around the cornerstones. Looks okay.

Extra white sashing added to fill in the gaps
So the border is on and I’ll be using the black as the binding. In fact it is cut and ready to make just so I don’t use it up accidentally in something else – that has been known to happen.
Next step quilting, but I’ll leave that for another day as I have rambled on long enough.
Happy Quilting!


