

Hey Everyone, welcome back to Stash Blasting Wednesday.
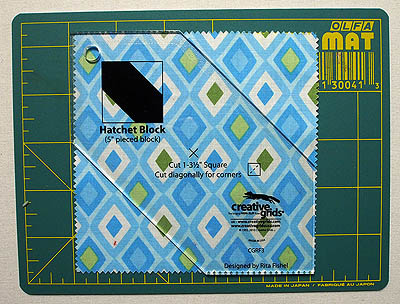
Last Thursday for Cool Tool Thursday I highlighted a template or ruler from Creative Grids called the Hatchet Template and today I am using it to create a table topper with a 5 inch charm pack and a background fabric.
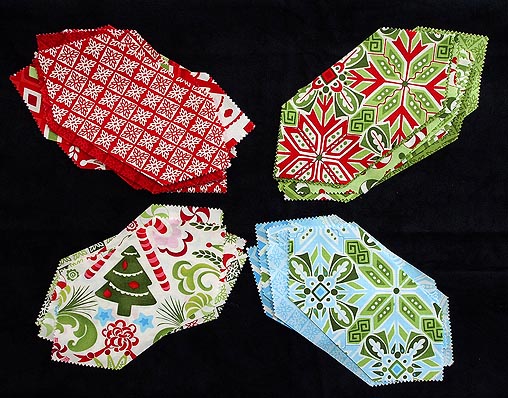
I’ve decided to use a Christmas charm pack from Moda called Flurries which has been in my drawer for a couple of winters now – definitely time to use it up – although I have two packs so am thinking I will need to make more than one project with these 80 squares.
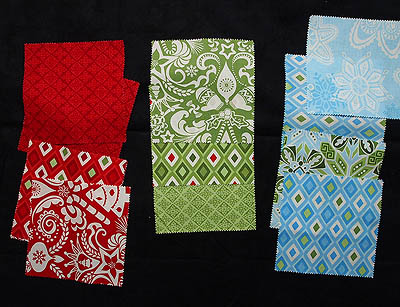
First off I need to pick a background fabric to go with the charm squares which are an assortment of colours – red, blue, green and white. My first instinct is to use white but I think I will audition some light coloured fabrics in the blue and green to see what they look like.

Squares on light backgrounds
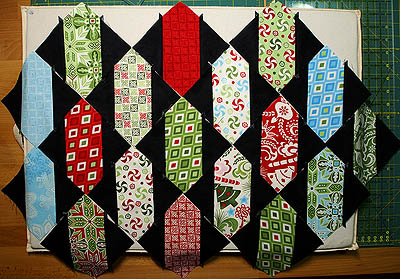
After not really being thrilled with the light coloured background I thought how about black although the blue in the bottom right corner wasn’t bad. I auditioned a couple and the really black black made the colours pop off the page – black it is.
Squares on black fabric
Cut the black into 3 ½″ strips and then sub cut into 3 ½″ squares which are then further cut on the diagonal once to yield 2 triangles per square.
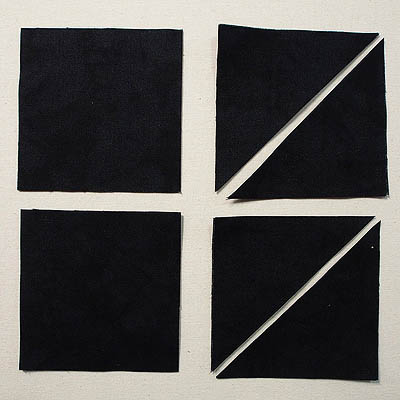
Squares turned into triangles
Making the Hatchet Block
Use a 5 inch square either cut from yardage or a pre-cut charm square. Place the template on the square. Cut off the corners of the square. Replace the corner triangles with slightly larger black triangles.
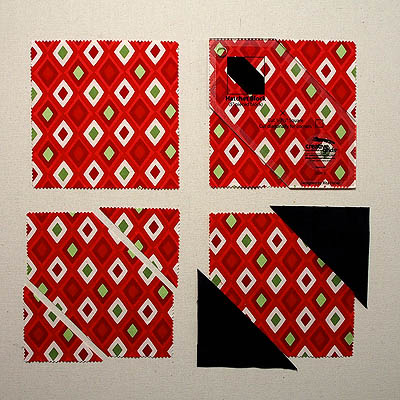
Cutting the hatchet shape
Sew the black corner triangles to the hatchet shape – they will hang over the edge of the hatchet piece. Remember you are sewing bias edges together so be careful not to stretch them out of shape. You may want to pin. Press the seam towards the darker fabric – I went towards the black. Don’t forget to trim off the dog ears for nice even edges.
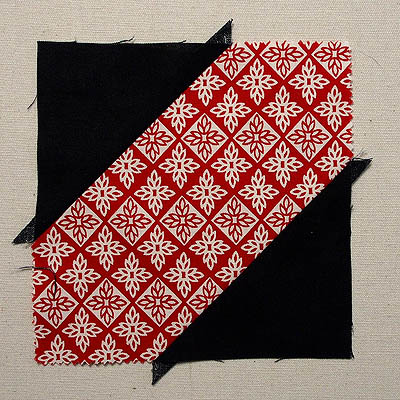
Block with triangles attached
I did find that when I was cutting the corners off the squares I needed to rotate the square around and I used my teeny tiny mat but a rotating mat would work even better. My rotating mat just doesn’t rotate very well.
Square & template on small cutting mat
Layout Options
There are few layout suggestions included with the template.
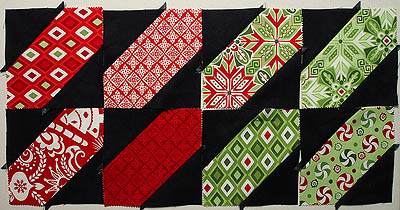
Diagonal Stripes
X’s & O’s

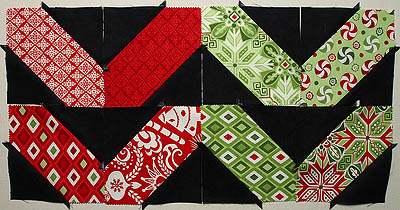
Chevron
Then I came up with a couple more and these ones are on point which means adding in setting and corner triangles.
Vertical Rows
Googly Eyes

That’s it for this week so I hope you will tune in next week when I reveal which layout option I have opted for and continue on with the little Christmas project. Depending on which option I choose I may need to make some more blocks. Probably a good thing I have two of these charm packs.
So there you go… Fun with the Hatchet Template. Please, if you enjoy these posts and find them useful, shopping with these links from Amazon goes a long to helping me keep this site active without costing you an extra penny. Thank you!
Let me know which is your favourite by leaving a comment below.
Happy Quilting!


Trackbacks/Pingbacks